15 Easy Wedding Hair Ideas for Bridesmaids with Short Hair (2026)
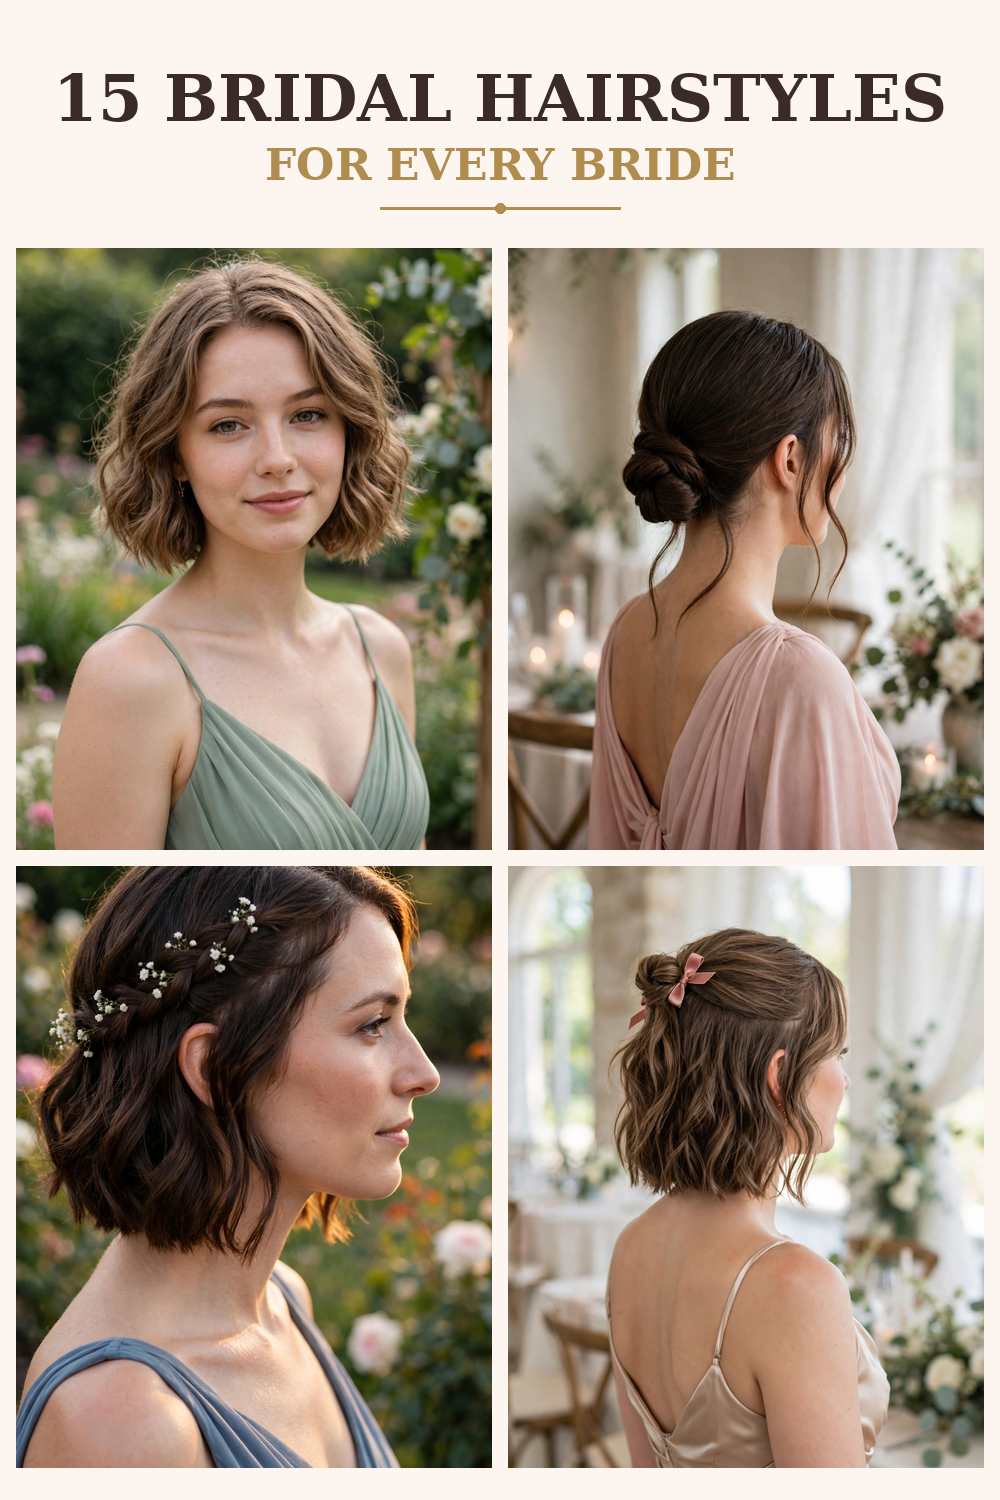
Being a bridesmaid with short hair is actually an advantage — and most wedding blogs never say that out loud. Short hair styles faster, holds a curl longer, needs fewer pins, and survives a full day of hugging, dancing, and outdoor photos with far less fuss than long hair. The only real problem is that most “bridesmaid hairstyle” guides are written for long hair, leaving short-haired bridesmaids to guess.
This guide fixes that. Below are 15 easy wedding hair ideas for bridesmaids with short hair for 2026 — every single one doable in 5 to 15 minutes, most of them DIY-friendly at home, and each one labeled with its exact time, difficulty, step-by-step how-to, and what you’ll need. No salon-only styles, no 40-minute updos, no “just add extensions” cop-outs. Whether you have a pixie, a bob, or a lob, there is a look here that will have you photo-ready before the bride finishes her makeup.
How to Use This Guide
Every style below carries two labels:
- Time: how long it takes once you’ve practiced it once (your trial run doesn’t count).
- Difficulty: Easy means anyone can do it alone with a mirror; Easy–Medium means it helps to have a friend hold a section or pin the back.
Do a trial run of your chosen style at least one week before the wedding — on hair that’s styled the same way it will be on the day (same wash timing, same products). The morning of the wedding is not the time to discover that your bun needs three extra pins.
1. Textured Bob with Soft Waves
Time: 10 minutes · Difficulty: Easy
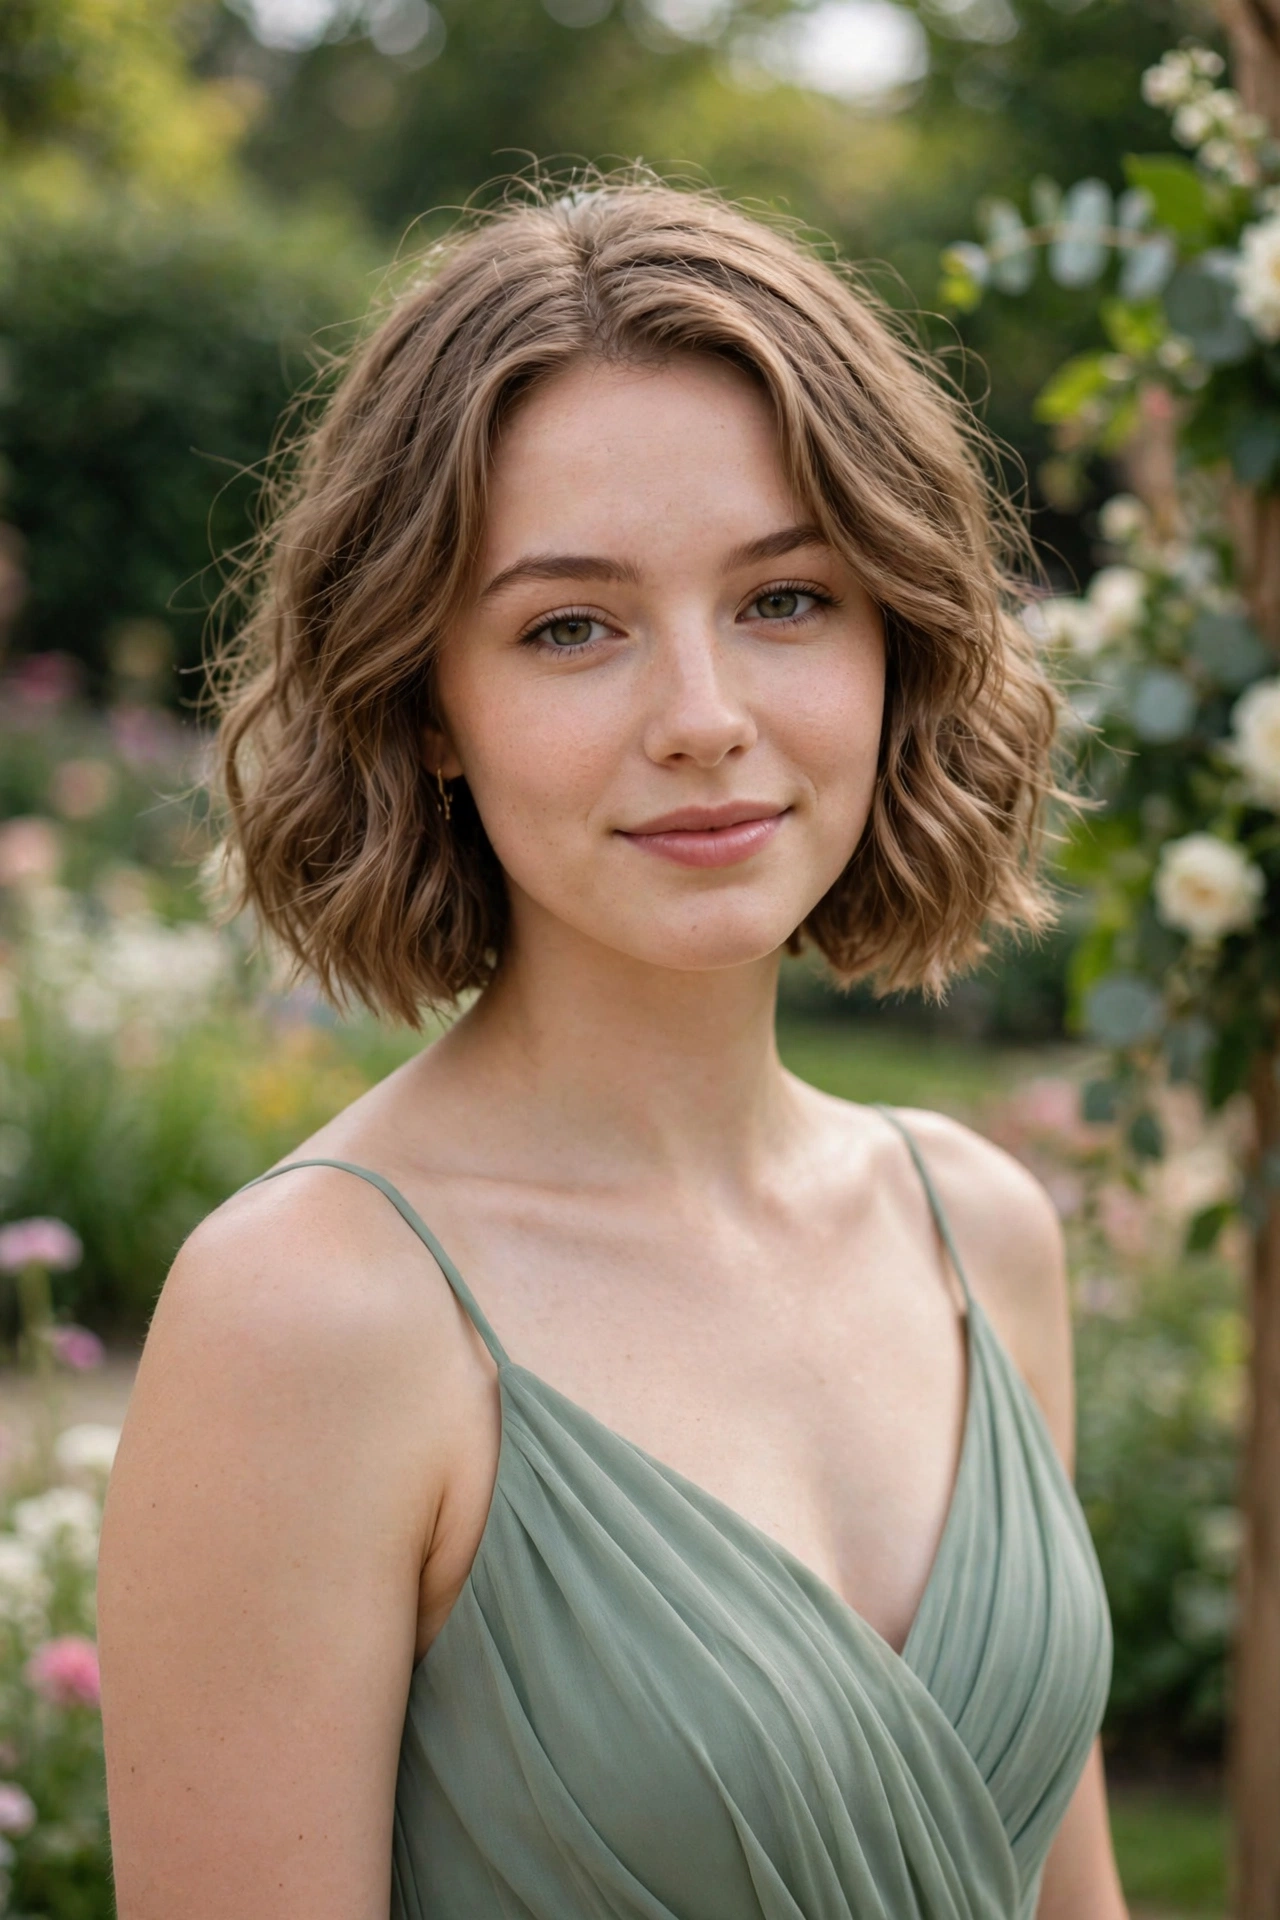
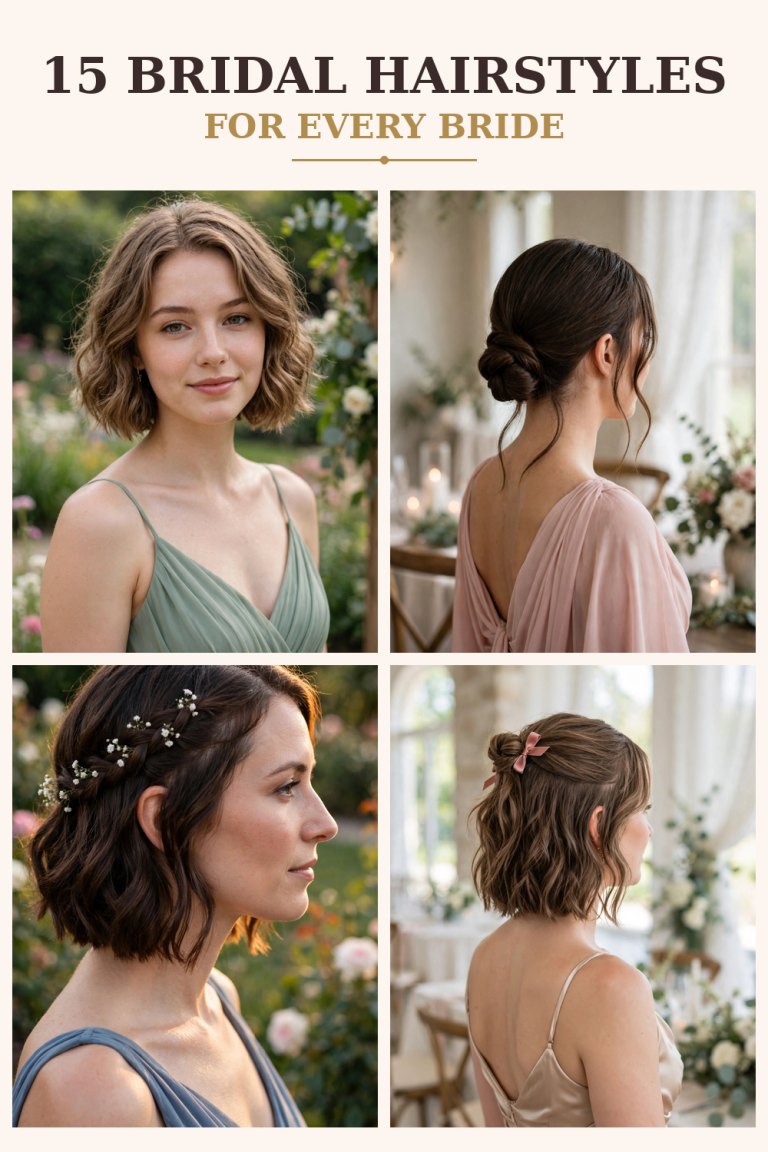
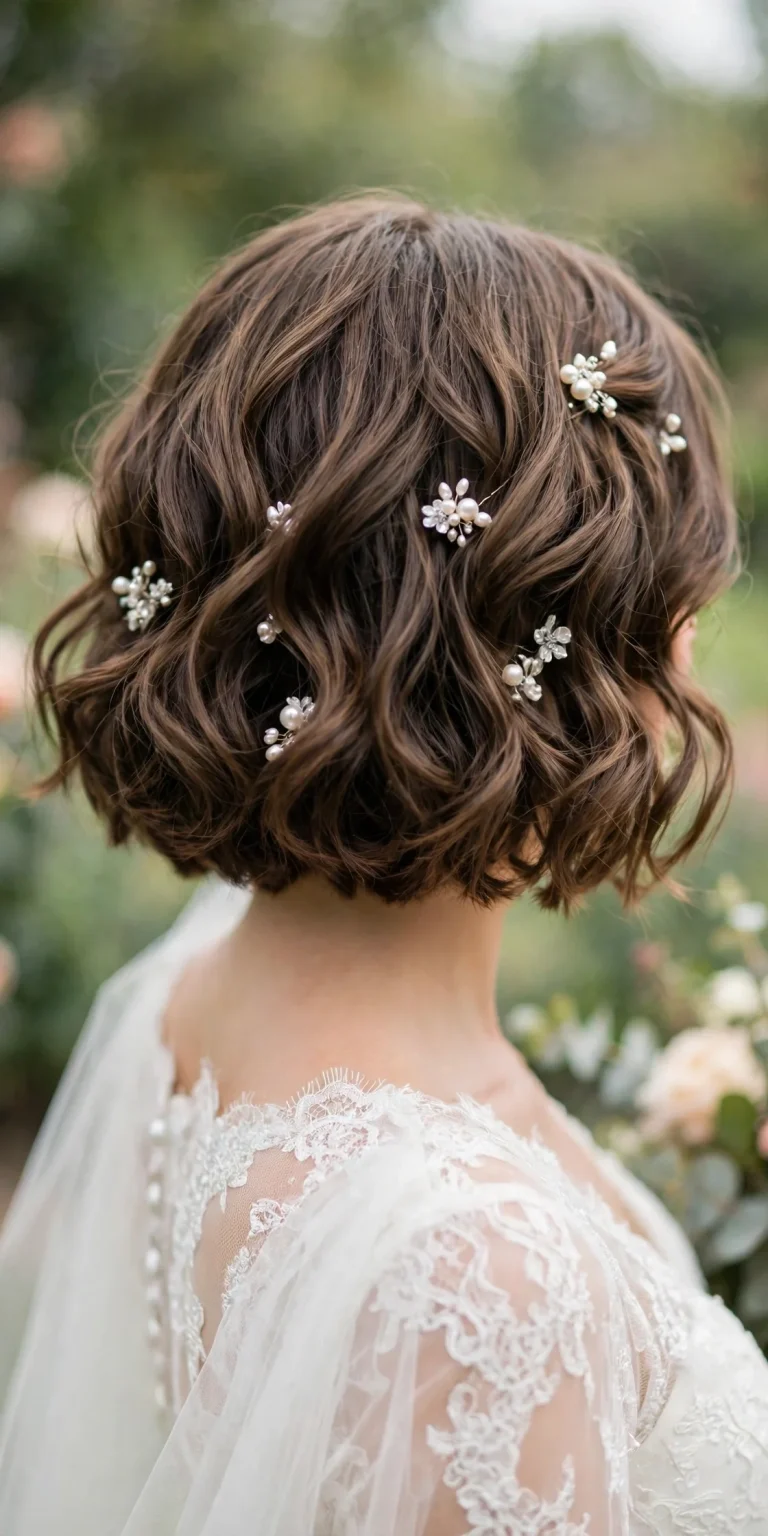
The workhorse of short bridesmaid hair: a chin-length or shoulder-grazing bob with loose, piecey waves. It looks polished in photos, survives wind and dancing, and flatters nearly every face shape and dress neckline. If your bridal party can’t agree on anything else, this is the safe style everyone can wear.
How to style it: Work a heat protectant through dry hair. Wrap 1-inch sections around a 1-inch curling iron, alternating the curl direction on each section, and leave the last inch of each end straight — that straight tip is what keeps the look modern instead of prom-y. Once cool, run your fingers through the waves to break them up (never a brush), then mist with texturizing spray and scrunch lightly.
You’ll need: Heat protectant, 1-inch curling iron, texturizing spray, flexible-hold hairspray.
Best for: Pixie-to-bob lengths won’t reach this; bob and lob lengths. Garden, beach, barn, and ballroom weddings alike; strapless, sweetheart, and V-neck dresses.
2. Low Twisted Bun
Time: 10 minutes · Difficulty: Easy
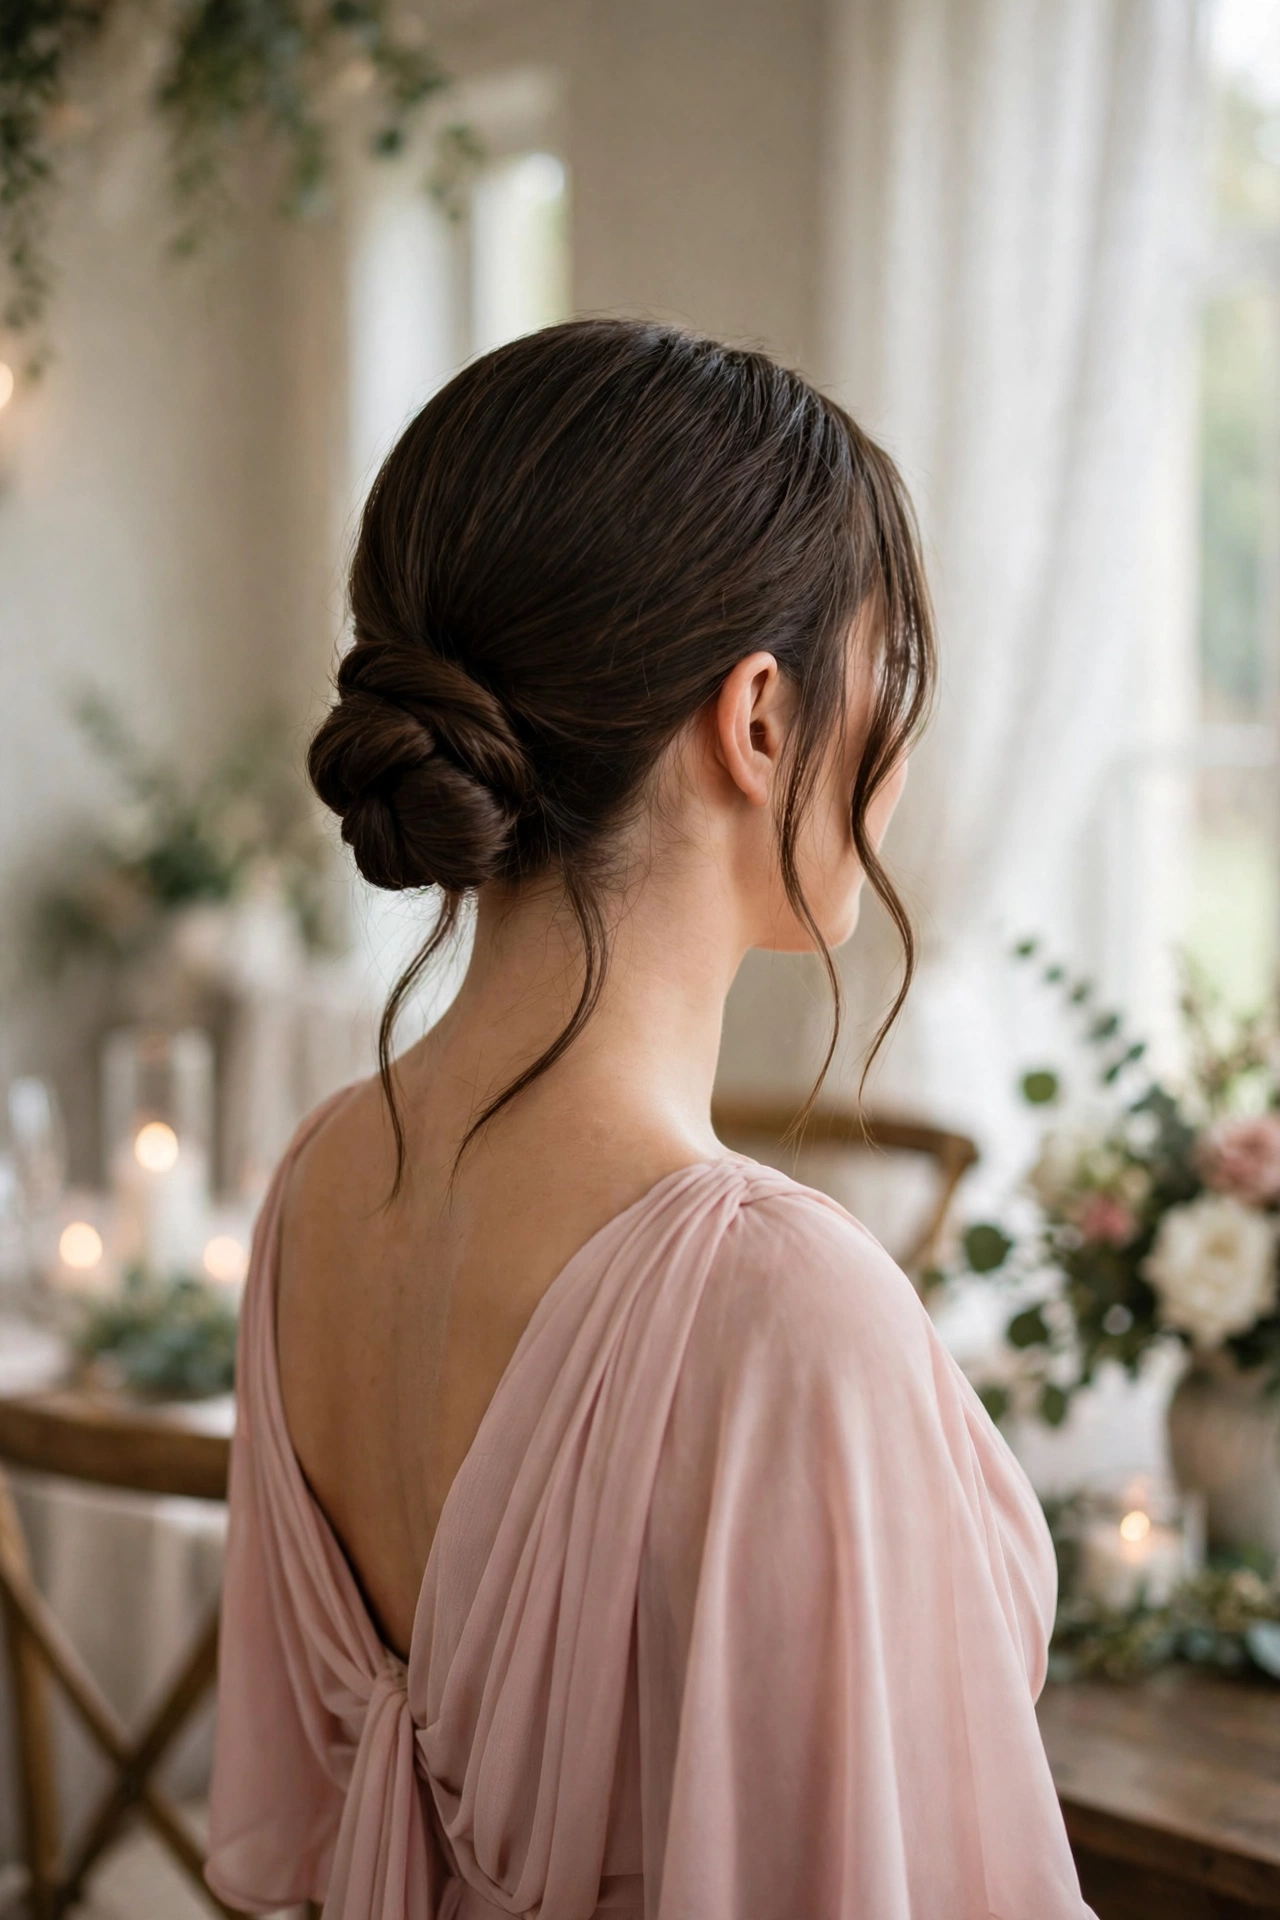
The lowest-effort updo that still reads as “updo.” A low twisted bun sits at the nape, keeps every strand off your neck on a hot day, and photographs beautifully from behind during the ceremony. It works on hair as short as a long bob and is the easiest style on this list to make look intentional rather than thrown together.
How to style it: Part the hair where you like it, then divide it into two sections at the back. Twist each section inward toward the center, cross them over each other at the nape, and coil the twisted rope into a small bun. Pin with 4–6 bobby pins, pushing each pin in the opposite direction of the twist so it locks. Pull out two thin face-framing strands and curl them lightly. Finish with medium-hold hairspray.
You’ll need: Bobby pins in your hair color, medium-hold hairspray, optional small clear elastic.
Best for: Bob and lob lengths. Formal and black-tie weddings, high-neck and halter dresses, hot-weather ceremonies.
3. Side Braid with Tiny Flowers
Time: 12 minutes · Difficulty: Easy–Medium
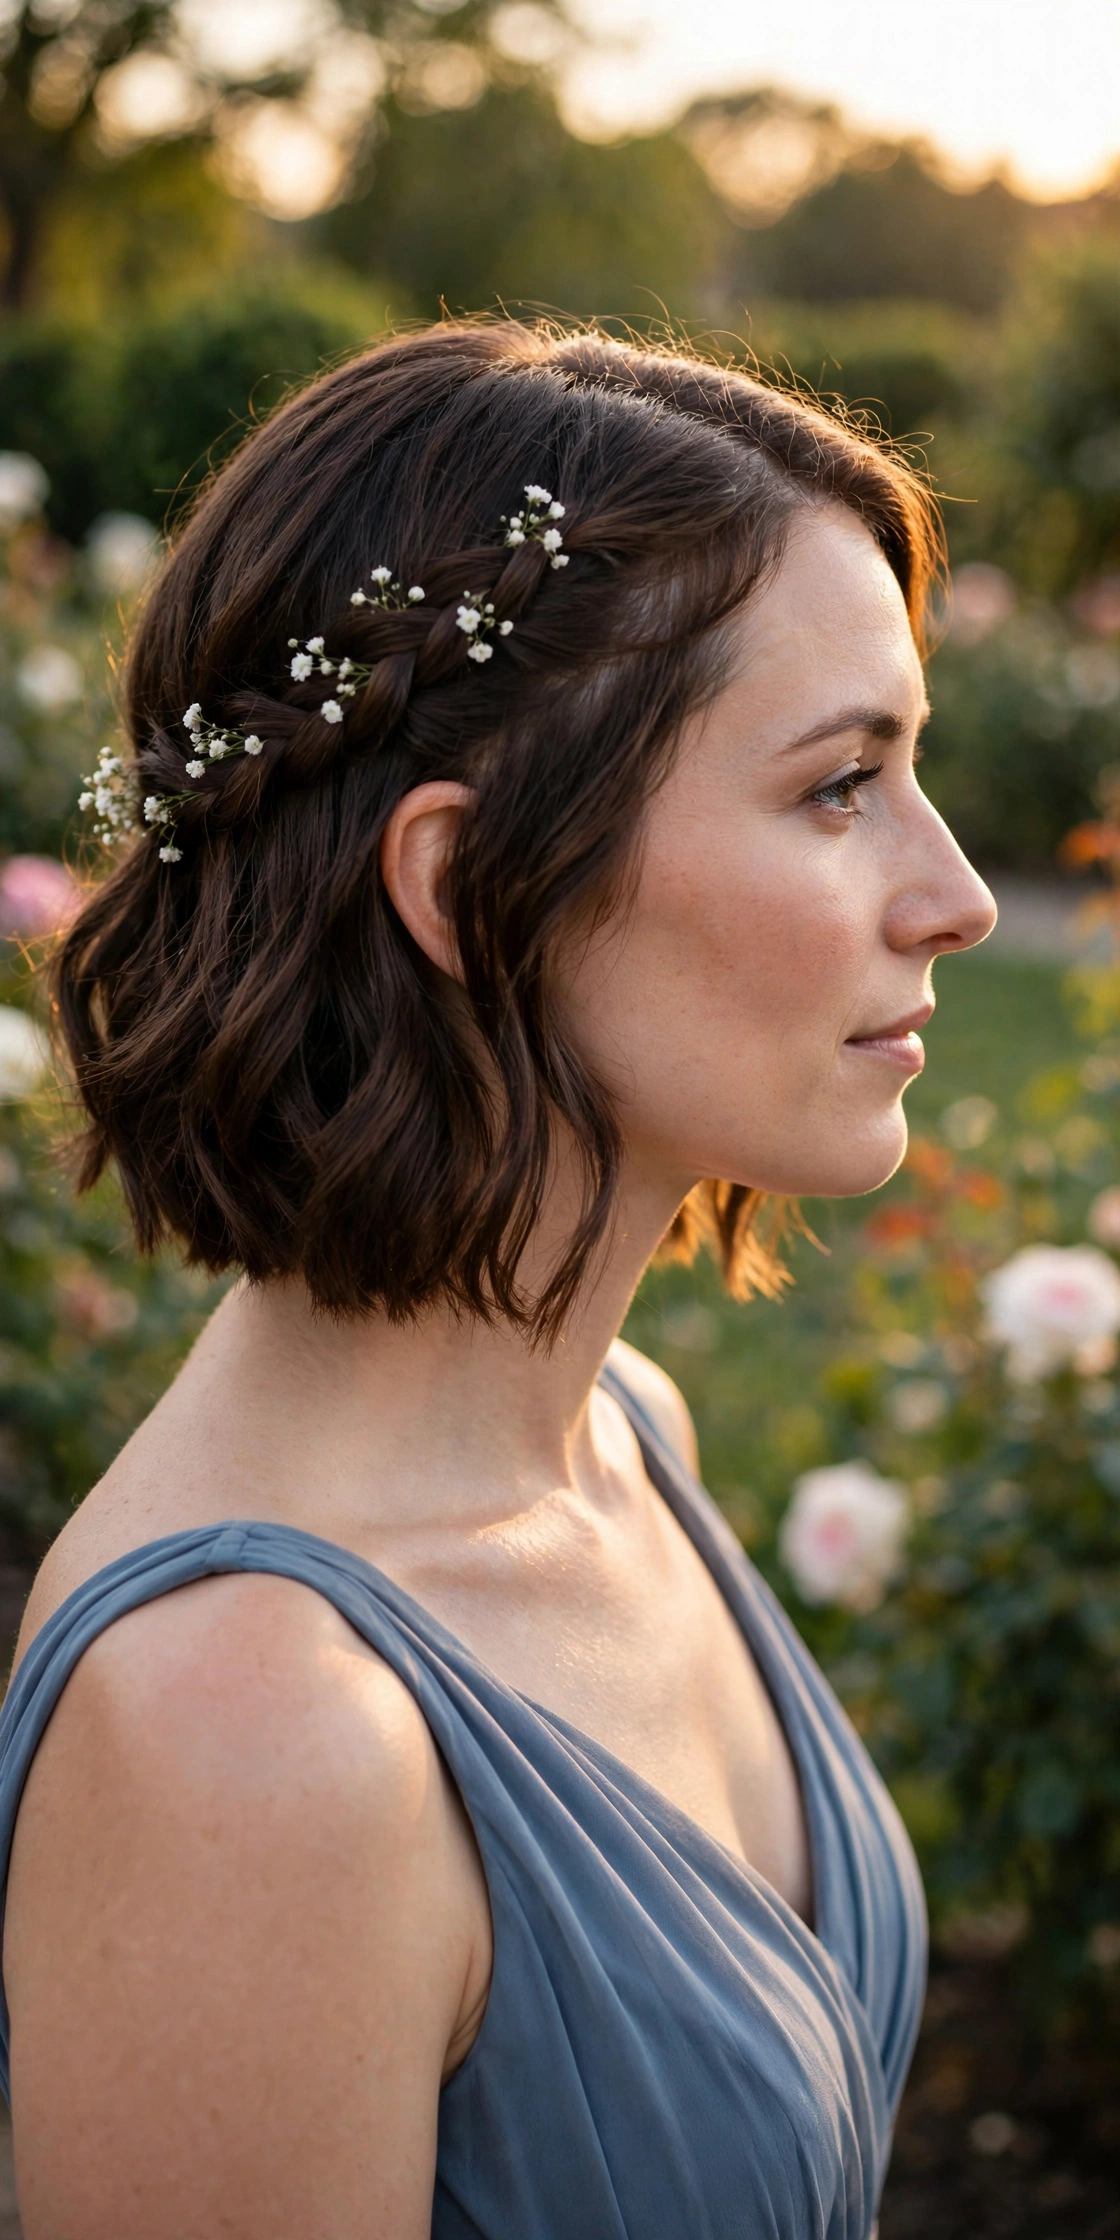
A loose side braid with a few baby’s breath or waxflower sprigs tucked in is the fastest way to look like you hired a stylist. The braid keeps the front tidy for photos, the flowers add wedding-specific charm, and the whole thing takes less time than a full makeup routine.
How to style it: Create a deep side part. Starting at the heavier side of the part, French-braid or regular-braid a 2-inch section along the hairline toward the ear, keeping the braid loose and soft — tight braids look severe on short hair. Pin the braid end behind the ear with two crossed bobby pins. Tuck 3–5 tiny flower sprigs into the braid at intervals, securing each with a pin if needed. Leave the rest of the hair down in soft waves or straight.
You’ll need: Bobby pins, baby’s breath or waxflower sprigs (fresh, dried, or silk), light-hold hairspray.
Best for: Bob and lob lengths. Boho, garden, vineyard, and outdoor weddings; flowy chiffon dresses.
4. Half-Up Twist with Ribbon
Time: 8 minutes · Difficulty: Easy
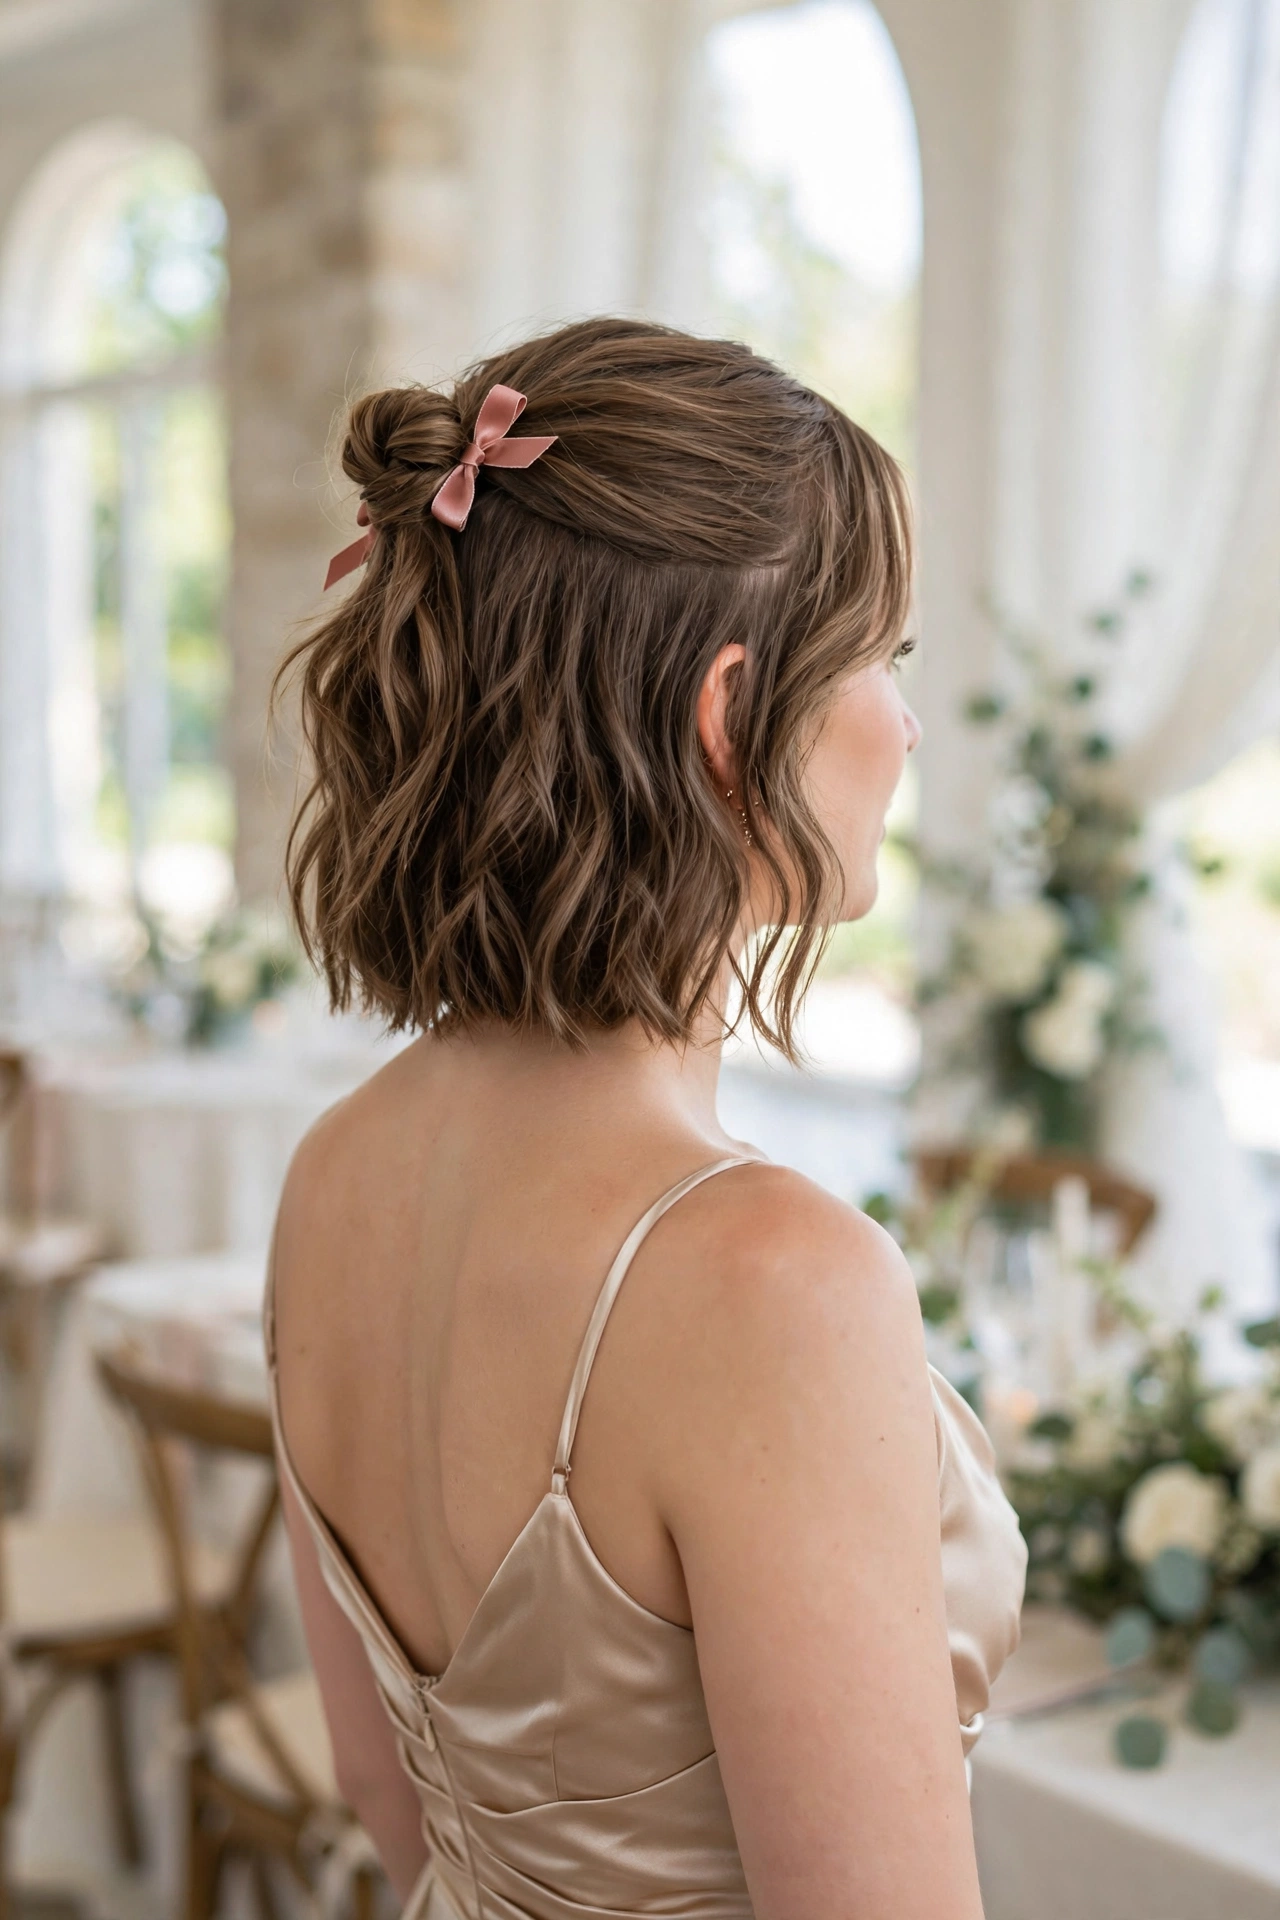
The half-up twist is the bridesmaid classic for a reason: it gets hair out of your face for the ceremony, shows off your length and texture at the back, and takes about as long as tying your shoes. A satin ribbon in the wedding color ties the whole bridal party together without anyone having to match hairstyles.
How to style it: Take a 2-inch section from each temple, twist each section back toward the crown, and meet them in the middle. Secure with one small clear elastic or two crossed bobby pins, then tie a satin ribbon over the join in a small bow or a simple knot with trailing ends. Leave the rest of the hair down — waves or straight both work. Pull the crown hair gently upward with a tail comb for a little lift before you tie.
You’ll need: Small clear elastic or bobby pins, satin ribbon in the wedding color, tail comb.
Best for: Bob and lob lengths. Any wedding theme; especially good when the bride wants coordinated-but-not-identical bridesmaid hair.
5. Sleek Side-Parted Bob
Time: 5 minutes · Difficulty: Easy
The fastest style on this list and one of the chicest. A deep side part, glass-smooth lengths, and a single statement earring will outshine fussy updos in photos. The key is shine: flat-ironed hair with a drop of serum catches light in a way curls can’t.
How to style it: Blow-dry smooth with a paddle brush, then flat-iron in thin sections. Create a deep side part with a tail comb. Smooth a pea-sized drop of shine serum through the mid-lengths and ends only — serum on the roots kills volume and makes hair look greasy by the reception. Tuck the shorter side behind the ear and pin with one decorative pin if you like.
You’ll need: Paddle brush, flat iron, shine serum, one decorative hairpin (optional).
Best for: Bob lengths. Modern, minimalist, and city weddings; satin slip dresses and structured gowns.
6. Messy Mini Updo with Loose Tendrils
Time: 12 minutes · Difficulty: Easy
The romantic option: hair loosely gathered and pinned at the back with soft pieces falling around the face. It is deliberately imperfect, which is exactly why it works — a few escaping strands look effortless, and there is no “ruined” version of this style because messiness is the point.
How to style it: Curl the hair loosely first (curls give pins something to grip). Gather the back section, twist it once, and pin it at the crown with 3–4 bobby pins in a loose knot. Pin the side sections back into the knot one at a time, leaving the front strands free. Gently tug the knot outward in a few spots to loosen it and create volume. Mist with flexible-hold spray so the tendrils move naturally instead of going stiff.
You’ll need: Curling iron, bobby pins, flexible-hold hairspray.
Best for: Bob and lob lengths. Romantic, rustic, and outdoor weddings; lace and tea-length dresses.
7. Polished Pixie with a Pearl Pin
Time: 5 minutes · Difficulty: Easy
Pixie bridesmaids, this one is for you. A pearl or crystal pin is all a pixie needs to go from everyday to wedding — the pin supplies the bridal sparkle that longer hair gets from braids and buns, and the whole style takes five minutes.
How to style it: Work a small amount of texture cream or pomade through the top of the pixie with your fingers, piece-ing out the ends for soft separation. Sweep the front slightly to one side. Place a pearl or crystal pin just above one ear, or cluster two pins at the temple. Anchor the pin with a hidden bobby pin behind it so it can’t slide on smooth, short hair.
You’ll need: Texture cream or pomade, pearl or crystal hairpin, one hidden bobby pin.
Best for: Pixie lengths. Any wedding theme; especially good with off-shoulder and high-neck dresses that show off the neckline.
8. Crown Braid (Faux) on Short Hair
Time: 15 minutes · Difficulty: Easy–Medium
A crown braid sounds impossible on short hair, but the trick is that you only braid the front hairline — the back stays down. The result reads as a crown braid in photos while taking half the time and none of the arm-aching of a full braid.
How to style it: Part the hair in the middle. Starting at one temple, Dutch-braid (underhand) a 1.5-inch section along the hairline toward the back of the head, adding small pieces as you go. Stop at the ear and pin. Repeat on the other side. Join the two braid ends at the back with crossed bobby pins and hide the join under a small flower or pin. Curl the remaining back hair loosely.
You’ll need: Bobby pins, optional small flower or decorative pin, light-hold hairspray.
Best for: Bob and lob lengths. Boho, garden, and vintage weddings; dresses with open or detailed backs.
9. Curly Bob with a Headband
Time: 8 minutes · Difficulty: Easy
If your hair is naturally curly, don’t fight it on wedding day — frame it. A thin metallic, pearl, or velvet headband on a curly bob is one of the most photogenic short bridesmaid looks there is, and it solves the “what do I do with my curls” question in one move.
How to style it: Define curls with curl cream and diffuse or air-dry. Once set, slide the headband on at the mid-head (halfway between hairline and crown) — not at the hairline, where it flattens the front curls. Anchor with one bobby pin per side, crossed in an X under the band at the temples. Fluff the curls in front of and behind the band with your fingers.
You’ll need: Curl-defining cream, headband (metallic, pearl, or velvet), 2 bobby pins.
Best for: Curly pixie, bob, and lob lengths. Any wedding theme; match the headband to the wedding colors or the bride’s accessories.
10. Low Ponytail with a Wrapped Base
Time: 7 minutes · Difficulty: Easy
A low ponytail only looks “just a ponytail” when the elastic shows. Wrap the base with a strand of your own hair and suddenly it’s a bridal style. This is the best option for bridesmaids who want their hair fully off their face and neck without any updo fuss.
How to style it: Smooth the hair back into a low ponytail at the nape and secure with a small elastic. Take a thin strand from underneath the ponytail, wrap it around the elastic 2–3 times, and pin the end underneath with a bobby pin. Curl the ponytail ends loosely for softness. Add a small ribbon or a pearl pin at the base if you want extra polish.
You’ll need: Small elastic, bobby pin, curling iron (optional), ribbon or pearl pin (optional).
Best for: Bob and lob lengths (hair must reach the nape). Hot-weather, beach, and destination weddings; backless and halter dresses.
11. Vintage Finger Waves
Time: 15 minutes · Difficulty: Easy–Medium
Old-Hollywood glamour that was literally designed for short hair. Finger waves sit close to the head, photograph like jewelry, and stay put for hours because the wave shape is molded into the hair rather than relying on pins. They take a little practice — do your trial run — but they’re worth it for a formal wedding.
How to style it: On damp hair, apply a generous amount of strong-hold gel. Using a fine-tooth comb and your fingers, sculpt S-shaped waves along one side, pressing each ridge with your finger and combing the next curve in the opposite direction. Clip each wave ridge with duck-bill clips while it sets. Let it air-dry or diffuse on low, then remove the clips and mist with strong-hold hairspray.
You’ll need: Strong-hold gel, fine-tooth comb, duck-bill clips, strong-hold hairspray.
Best for: Bob lengths. Vintage, Gatsby, black-tie, and ballroom weddings; satin and beaded gowns.
12. Twisted Side Sweep
Time: 8 minutes · Difficulty: Easy
One of the best styles for bridesmaids whose hair is between a pixie and a bob — too short for a bun, too long to leave alone. The twist pulls one side back and leaves the rest down, giving an asymmetrical, styled look with two twists and three pins.
How to style it: Create a deep side part. On the heavier side, take a 2-inch section at the front, twist it back away from your face, and pin it behind the ear with two crossed bobby pins. Repeat with a second, smaller section just behind the first for a layered twist effect. Leave the rest of the hair down, and curl the ends loosely if your hair is straight.
You’ll need: 3–4 bobby pins, curling iron (optional), light-hold hairspray.
Best for: Pixie-to-bob transition lengths and bobs. Casual, garden, and courthouse weddings; any dress neckline.
13. Braided Headband (Hair-as-Headband)
Time: 12 minutes · Difficulty: Easy–Medium
Instead of wearing a headband, braid one out of your own hair. A thin braid swept across the front like a headband keeps the hairline neat, adds texture, and needs no accessories at all — perfect for bridesmaids who lose hairpins within the hour.
How to style it: Take a 1-inch section from behind one ear and braid it into a thin three-strand braid. Sweep it across the front, just behind the hairline, to the other ear, and pin it behind that ear with two crossed bobby pins. Let the rest of the hair fall naturally, or curl it softly. Gently pull the braid’s edges outward to make it look fuller.
You’ll need: 2–3 bobby pins, light-hold hairspray.
Best for: Bob and lob lengths. Boho, rustic, and outdoor weddings; flower-girl-adjacent sweetness for younger bridesmaids.
14. Sleek Low Chignon (Faux, with a Bun Form)
Time: 12 minutes · Difficulty: Easy
Short hair can’t make a big chignon on its own — but a small padded bun form (donut) can. The donut gives short hair the volume and shape of a chignon, and nobody will know it’s there because your own hair covers it completely.
How to style it: Gather the hair into a low ponytail at the nape. Slide a small donut form over the ponytail to the base. Spread your hair evenly over the donut, tucking the ends underneath, and pin all around with bobby pins pushed into the donut. Smooth the top with a brush and mist with medium-hold hairspray. Add a pearl vine or a few pins around the chignon for bridal detail.
You’ll need: Small donut bun form (match your hair color), small elastic, 6–8 bobby pins, medium-hold hairspray, optional pearl vine.
Best for: Bob and lob lengths. Formal, church, and classic weddings; high-neck and long-sleeve dresses.
15. Accessorized Straight Bob (Clips, Combs, or a Birdcage Veil)
Time: 5 minutes · Difficulty: Easy
The ultimate low-effort bridal look: wear your bob straight and let one statement accessory do all the work. A crystal comb, a pair of pearl clips, or a mini birdcage veil turns a plain bob into a wedding hairstyle in under five minutes — no heat, no pins, no stress.
How to style it: Blow-dry or flat-iron the bob smooth. Choose ONE statement accessory — a crystal comb above one ear, two pearl clips clustered at the temple, or a small birdcage veil pinned at the crown. Place it, anchor it with one hidden bobby pin if needed, and finish with shine spray. One accessory is the rule: two statement pieces fight each other in photos.
You’ll need: Flat iron or blow-dryer, ONE statement accessory, one hidden bobby pin, shine spray.
Best for: All short lengths, including pixies. Modern, courthouse, and elopement weddings; minimalist dresses where the hair accessory is the jewelry.
How to Choose: A Quick Guide by Hair Length
Pixie (2–4 inches): Styles 7, 9, 12, and 15 are your best bets. Your advantage is speed — every pixie style here takes under 10 minutes. Lean on accessories (pins, headbands, clips) for bridal polish, since there isn’t enough length for braids or buns.
Bob (chin to shoulder): Almost everything on this list works. If your bob barely reaches the nape, skip the low bun and chignon and favor styles 1, 3, 4, 8, and 13. If it reaches the shoulders, the full menu is open.
Lob (shoulder to collarbone): All 15 styles work. The lob is the most versatile short length — you can do real updos (styles 2, 6, 14) and still wear it down beautifully (styles 1, 5, 9).
By face shape: Round faces look best with crown volume and side parts (styles 1, 4, 8) — avoid center parts and flat, ear-hugging styles. Oval faces can wear anything. Square faces soften with waves and face-framing tendrils (styles 1, 6). Heart-shaped faces balance with volume at the jaw, like a curled bob or a low bun with loose strands.
By venue and season: Outdoor summer weddings favor hair-up styles (2, 6, 10, 14) that survive heat and wind. Winter and formal weddings favor polished styles (5, 11, 14). Beach weddings favor braids and twists (3, 8, 13) that hold through breeze and humidity.
Should All Bridesmaids Have the Same Hairstyle?
Short answer: no — and most brides don’t want that. Matching hairstyles only work when every bridesmaid has similar hair length and texture, which almost never happens. What actually looks cohesive in photos is a shared element, not an identical style. Pick one of these:
- Same accessory: every bridesmaid wears the same pearl pin, ribbon color, or flower type.
- Same finish: everyone wears their hair up, or everyone wears it down with waves.
- Same part: everyone parts on the same side.
Let each bridesmaid choose the style from this list that suits her hair length and face shape, then tie the group together with one shared element. The result looks intentional, not uniform — and every bridesmaid actually likes her hair.
Making It Last All Day: Prep + Morning-Of Timeline
The night before: Wash and fully dry your hair. Freshly washed, squeaky-clean hair is slippery — pins slide out and curls fall flat. Day-old hair (or hair prepped with dry shampoo and texturizing spray) has the grip styles need. If you must wash the morning of, add dry shampoo at the roots and texturizing spray through the lengths before styling.
Morning-of timeline (allow 30 minutes total):
- Style your hair first, before makeup — stray hairs and hairspray land on foundation.
- Work in this order: heat styling → pinning → accessories → final hairspray.
- Do a 10-second shake test: shake your head gently. Anything that moves gets another pin.
- Pack a touch-up kit: 6 bobby pins, a mini hairspray, 2 tissues for blotting, and one spare pin or clip.
All-day hold rules: Use medium or strong-hold hairspray as the LAST step, not the first — spraying early makes hair stiff and hard to pin. In humidity, skip heavy oils and serums near the roots; they weigh hair down and loosen pins. If your style starts to slip at the reception, re-pin at the base (where the structure is), not at the loose end.
7 Mistakes to Avoid
- Skipping the trial run. Every style on this list needs one practice session. Fifteen minutes of practice saves a morning-of panic.
- Styling squeaky-clean hair. Freshly washed hair rejects pins and drops curls. Second-day hair, dry shampoo, or texturizing spray fixes this.
- Using the wrong pins. Bobby pins must match your hair color and go in wavy-side-down, crossed in an X for grip. One pin never holds anything — always use two.
- Overloading on hairspray early. Spraying before pinning makes hair stiff and slippery. Pin first, spray last.
- Choosing a style for someone else’s hair. Pick for YOUR length and texture, not for the bride’s Pinterest board. A lob style on a pixie will fail no matter how pretty the photo is.
- Forgetting the back view. Ceremony photos are shot from behind. Check the back in a second mirror or phone photo before you leave.
- Two statement accessories. One comb, one headband, or one veil — never two. Accessories compete in photos.
Budget vs. Premium Kit
| What you need | Budget pick | Premium pick |
|---|---|---|
| Curling iron | Drugstore 1-inch iron (~$20) | Ceramic 1-inch iron (~$60) |
| Hairspray | Flexible-hold drugstore spray (~$6) | Humidity-proof salon spray (~$25) |
| Bobby pins | Bulk pack, match hair color (~$3) | Grip-coated pins (~$10) |
| Headband / pins | Faux-pearl set (~$8) | Real-pearl or crystal piece (~$40+) |
| Texturizing spray | Drugstore sea-salt spray (~$7) | Salon dry-texture spray (~$28) |
| Donut bun form | Foam donut, hair-color match (~$4) | Mesh donut with pins (~$9) |
You do not need the premium column. The budget kit styles every look on this list — the premium versions are about longevity and finish, not whether the style works.
Pro Tips from Stylists
- Pin in an X, always. Two bobby pins crossed in an X hold four times better than two parallel pins.
- Pin wavy-side down. The wavy side grips hair; the flat side slides. Most people insert pins upside down.
- Curl away from the face on the front sections — it opens the face and photographs better than curls falling inward.
- Tease the crown before any half-up or updo style. Three strokes of backcombing at the crown gives short hair the lift that reads as “styled” in photos.
- Photograph your trial run. A style that looks fine in the mirror can look flat in photos. Take a phone photo from the front, side, and back before deciding.
Frequently Asked Questions
Can I do my own bridesmaid hair for a wedding?
Yes — every style on this list is designed to be DIY-friendly, and most take 5–15 minutes once you’ve practiced. Styles rated Easy are genuinely solo-doable with a mirror. For Easy–Medium styles (crown braid, finger waves), ask a fellow bridesmaid to pin the back sections while you hold the front.
How long does it take to style short hair for a wedding?
Plan 5–15 minutes per style once you’ve practiced it, plus 30 minutes total on the morning of the wedding for styling, pinning, and final hairspray. Your trial run a week before doesn’t count toward that time — it’s what makes the morning fast.
What products do I need for short bridesmaid hair?
The essentials: heat protectant, a 1-inch curling iron, bobby pins in your hair color, flexible or medium-hold hairspray, and texturizing spray or dry shampoo. Add a flat iron if you want sleek styles, curl cream if your hair is naturally curly, and one statement accessory (headband, pin, or comb) for bridal polish.
Can bridesmaids wear their hair down for a wedding?
Absolutely. Hair down is a perfectly appropriate bridesmaid choice, especially with waves (style 1), a sleek finish (style 5), or curls with a headband (style 9). The only real consideration is weather — for hot or windy outdoor weddings, a half-up or updo style holds up better through the ceremony and photos.
How do I keep short hair up all day at a wedding?
Three things: start with second-day or texturized hair (grip matters more than cleanliness), pin in crossed X pairs with the wavy side down, and finish with medium or strong-hold hairspray as the last step. Pack a touch-up kit — 6 bobby pins and a mini hairspray — and re-pin at the base of the style if anything loosens, not at the loose end.
Can bridesmaids wear a veil or headband with short hair?
Yes to both. A headband is the easiest bridal accessory for short hair — slide it to the mid-head and anchor with X-crossed pins at the temples. A veil works too: pin a birdcage or short veil at the crown over a half-up style or a low bun, and anchor it with two crossed pins into the pinned hair underneath. The veil needs pinned hair to grip, so it pairs best with styles 2, 4, 6, or 14.
Should all bridesmaids have the same hairstyle?
No. Matching hairstyles only work when everyone has similar hair length and texture. What looks cohesive in photos is one shared element — the same accessory, the same finish (all up or all down), or the same part — with each bridesmaid choosing the style that suits her own hair. Coordinate the element, not the exact style.
The Bottom Line
Short hair is not a limitation on wedding day — it’s a head start. Pick one style from this list, do a trial run a week before, prep with second-day hair and the right pins, and you’ll be photo-ready in 15 minutes or less. Coordinate one shared element with the rest of the bridal party, pack a tiny touch-up kit, and then stop worrying about your hair and enjoy the wedding.