10 Stunning Bridal Nail Designs for Short Nails (2026)
Quick Tutorial: 3 Rules in 30 Seconds
Why Short Nails Are the Chicest Bridal Choice in 2026
Let’s retire the myth that bridal nails have to be long. In 2026, some of the most photographed bridal hands on Pinterest belong to brides wearing short, perfectly shaped nails — and there’s a practical reason the trend keeps growing. Short nails survive the wedding day. They fasten buttons, pin veils, shake a hundred hands, and still look immaculate in the ring close-up. Bridal nail artists consistently say the same thing: a short nail with a perfect cuticle and a glassy finish photographs better than long nails that are fighting for attention.
Short nails also keep the focus where it belongs — on your ring. When the photographer zooms in on that new band, a sheer nude or micro French tip lets the stone do the talking. And if you’ve never worn long nails in your life, your wedding week is not the moment to start. Comfort is confidence, and confidence is what reads as “bridal” in every photo.
This guide is built specifically for short nails: every design below was chosen because it stays legible at short lengths. Some nail art needs a big canvas; none of these do. You’ll get the shape rules that make short nails look longer, ten complete designs with exact salon wording and DIY routes, a gel-versus-press-on decision table, the booking timeline, a prep protocol, and answers to the real questions brides actually ask. If you pair your manicure with a full beauty plan, our guides to simple daytime bridal makeup and bridal makeup for round faces keep the whole look cohesive.
The Short-Nail Shape Guide: Oval, Round, or Squoval?
Shape matters more than color on short nails. The wrong shape can make short nails look stubby; the right one adds the illusion of length without a single millimeter of extension.
Oval — the default recommendation. Slightly elongated with a softly rounded tip. It makes fingers look longer and suits almost every hand. On short nails, oval is the most forgiving shape in close-up photos, and it’s the shape nail artists reach for first with nervous brides.
Round — the natural look. Follows your natural nail shape, just tidier. Best for brides who want their nails to look groomed rather than “done.” Particularly good on very short or ultra-short nails where an oval would have nothing to work with. In ring photos, round reads soft and romantic.
Squoval — the practical pick. A square with gently rounded corners: structure without sharp edges. Good for wider nail beds, and the most durable of the three because the corners don’t catch on things. If you type for a living, squoval is your shape.
What to avoid on short nails. Square needs length to look architectural — on short nails it reads blunt. Almond needs medium length minimum. Stiletto and coffin are fashion shapes that fight a bridal aesthetic at short lengths. If your heart is set on almond, add a short press-on or gel extension; forcing it on a short nail plate rarely ends well.
The length rule: go one step longer than your usual, not three. Brides who never wear extensions and suddenly choose long almonds often spend the wedding day unable to fasten their dress or pin their veil. Short nails with immaculate cuticles beat long nails you keep tapping on things.
| Shape | Best for short nails? | Why |
|---|---|---|
| Oval | ✅ Yes — best overall | Elongates fingers, flatters every hand, photographs beautifully |
| Round | ✅ Yes — most natural | Follows the natural nail, ideal for ultra-short lengths |
| Squoval | ✅ Yes — most durable | Structured but soft corners, great for wide nail beds |
| Square | ⚠️ Needs length | Can look blunt and stubby on short nails |
| Almond | ⚠️ Medium length minimum | Lovely, but needs a longer nail bed or short extensions |
| Stiletto / Coffin | ❌ Skip for bridal | Fashion-forward, draws attention away from the ring |
The 10 Designs
Each design below includes who it suits best, exactly what to ask for at the salon, and a DIY route with real products and Tier-1 prices. Prices are USD.
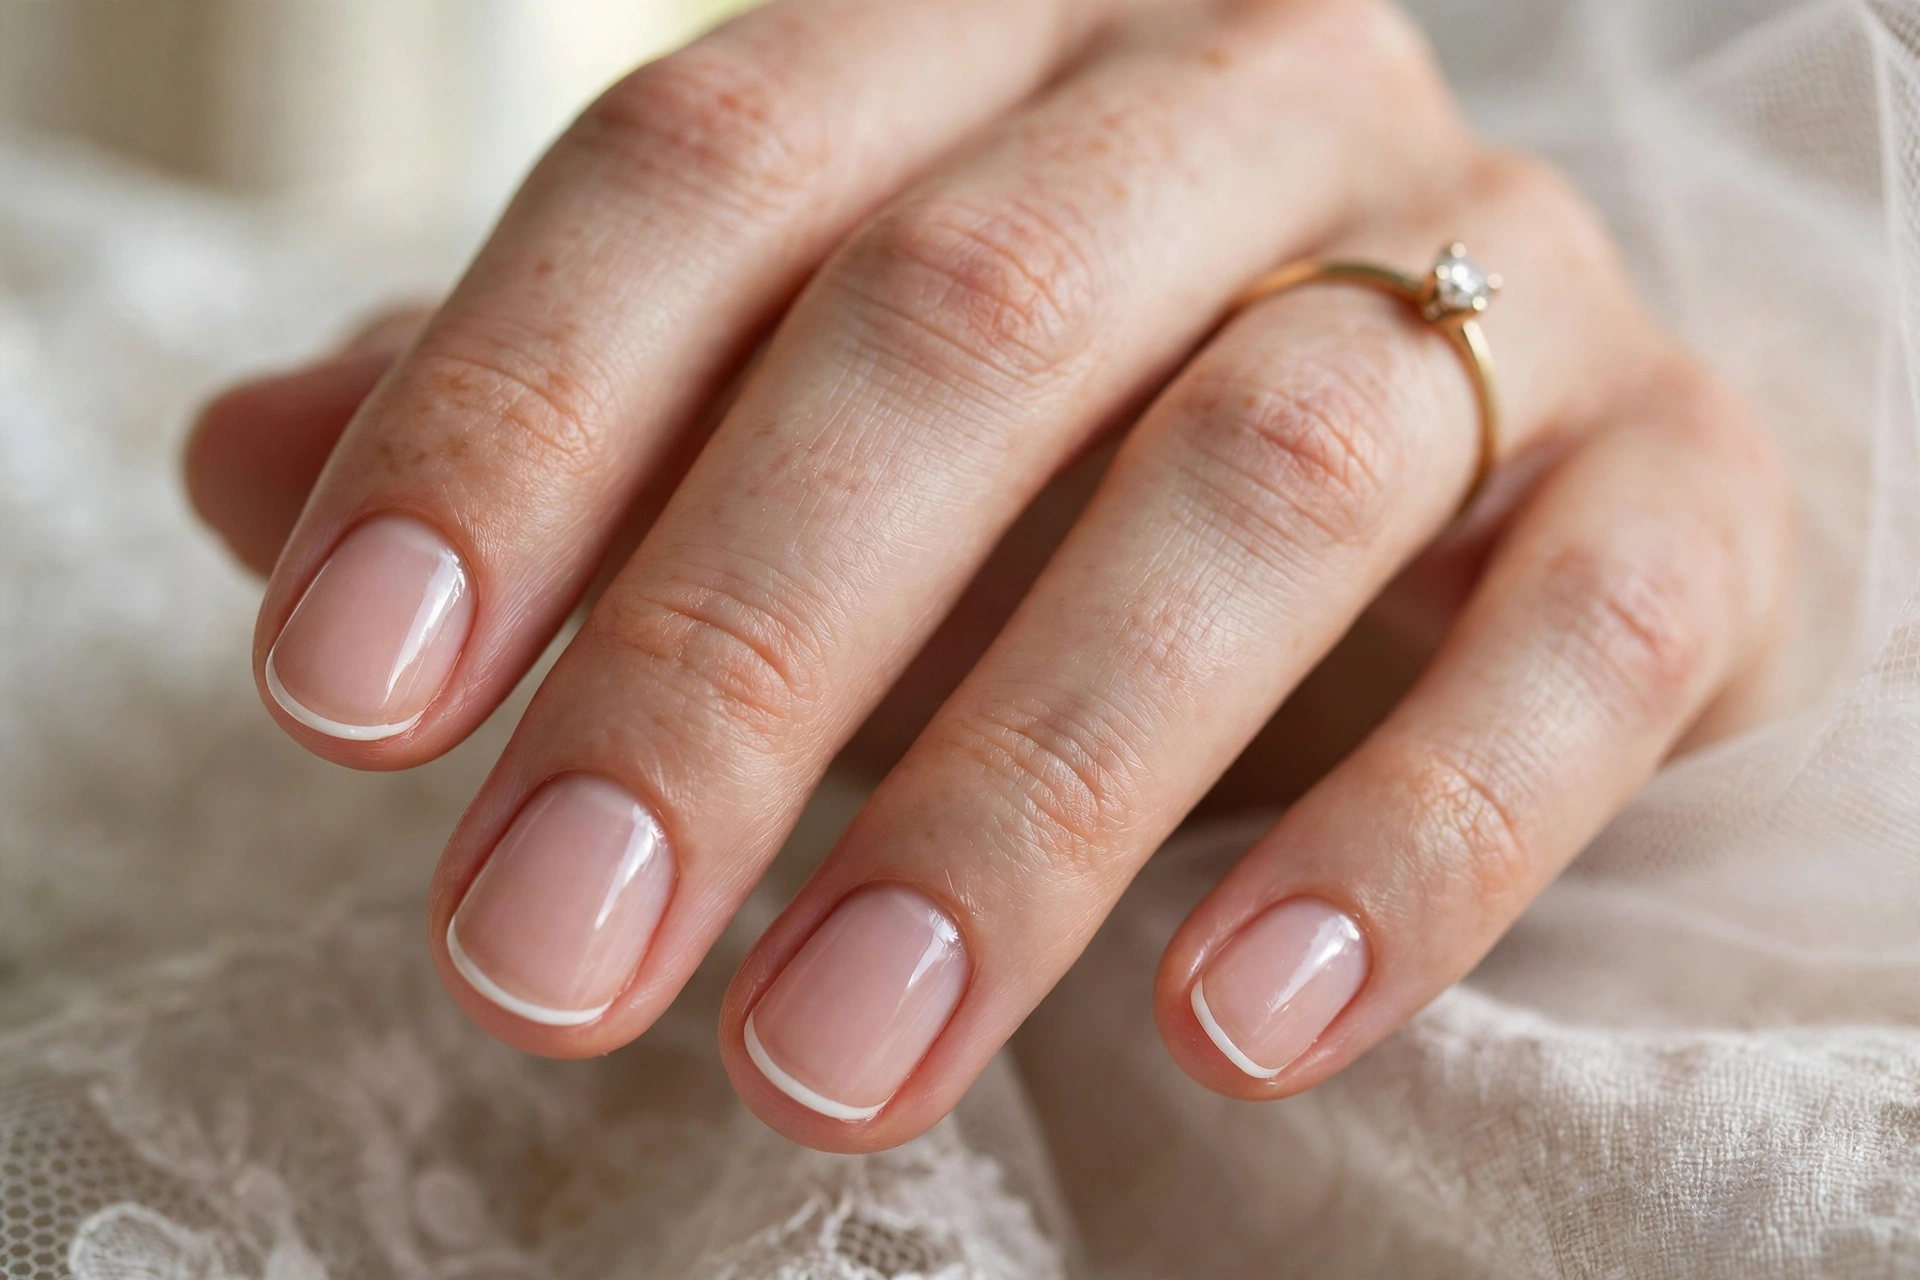
Design 1: Micro French Tip — the short-nail French that actually works. A classic French tip with a thick white band shortens a short nail — it visually “cuts” the nail in half. The micro French fixes this: a hairline of white, barely a millimeter deep, along the free edge. It makes natural nails look healthy rather than decorated. Best for: brides who never wear polish and want timeless. Salon wording: “Micro French — thin white line, sheer pink base, oval shape.” DIY: Essie Ballet Slippers as the base (~$11), a white nail art pen for the tip (~$8), Seche Vite top coat (~$12). Thin the white in two coats so it doesn’t go streaky.
Design 2: Milky White — soft, cloudy, modern. Solid white polish can read chalky and harsh on hands. Milky white is translucent — a little of the natural nail shows through, so the finish looks cloudy rather than painted. It blurs ridges and small cuticle flaws, which is exactly what you want in close-up ring shots. Best for: ivory dresses and pearl jewelry. Salon wording: “Milky white, two to three thin coats so it doesn’t pool at the sidewalls.” DIY: OPI Funny Bunny (~$12) or Essie Marshmallow (~$11); build in thin layers, seal with glossy top coat.
Design 3: Sheer Nude “Your Nails But Better” — the quiet-luxury pick. The 2026 “quiet luxury” bridal nail: sheer pink or nude that makes your nails look like the best possible version of themselves. No one will remember your nails; everyone will remember how polished you looked. Best for: minimalist gowns and city-hall weddings. Salon wording: “Sheer nude builder gel, my-nails-but-better, high gloss.” Match the shade to your skin: sheer pink for cool undertones, soft beige for warm. DIY: OPI Bubble Bath (~$12) + top coat (~$10). Two thin coats max.
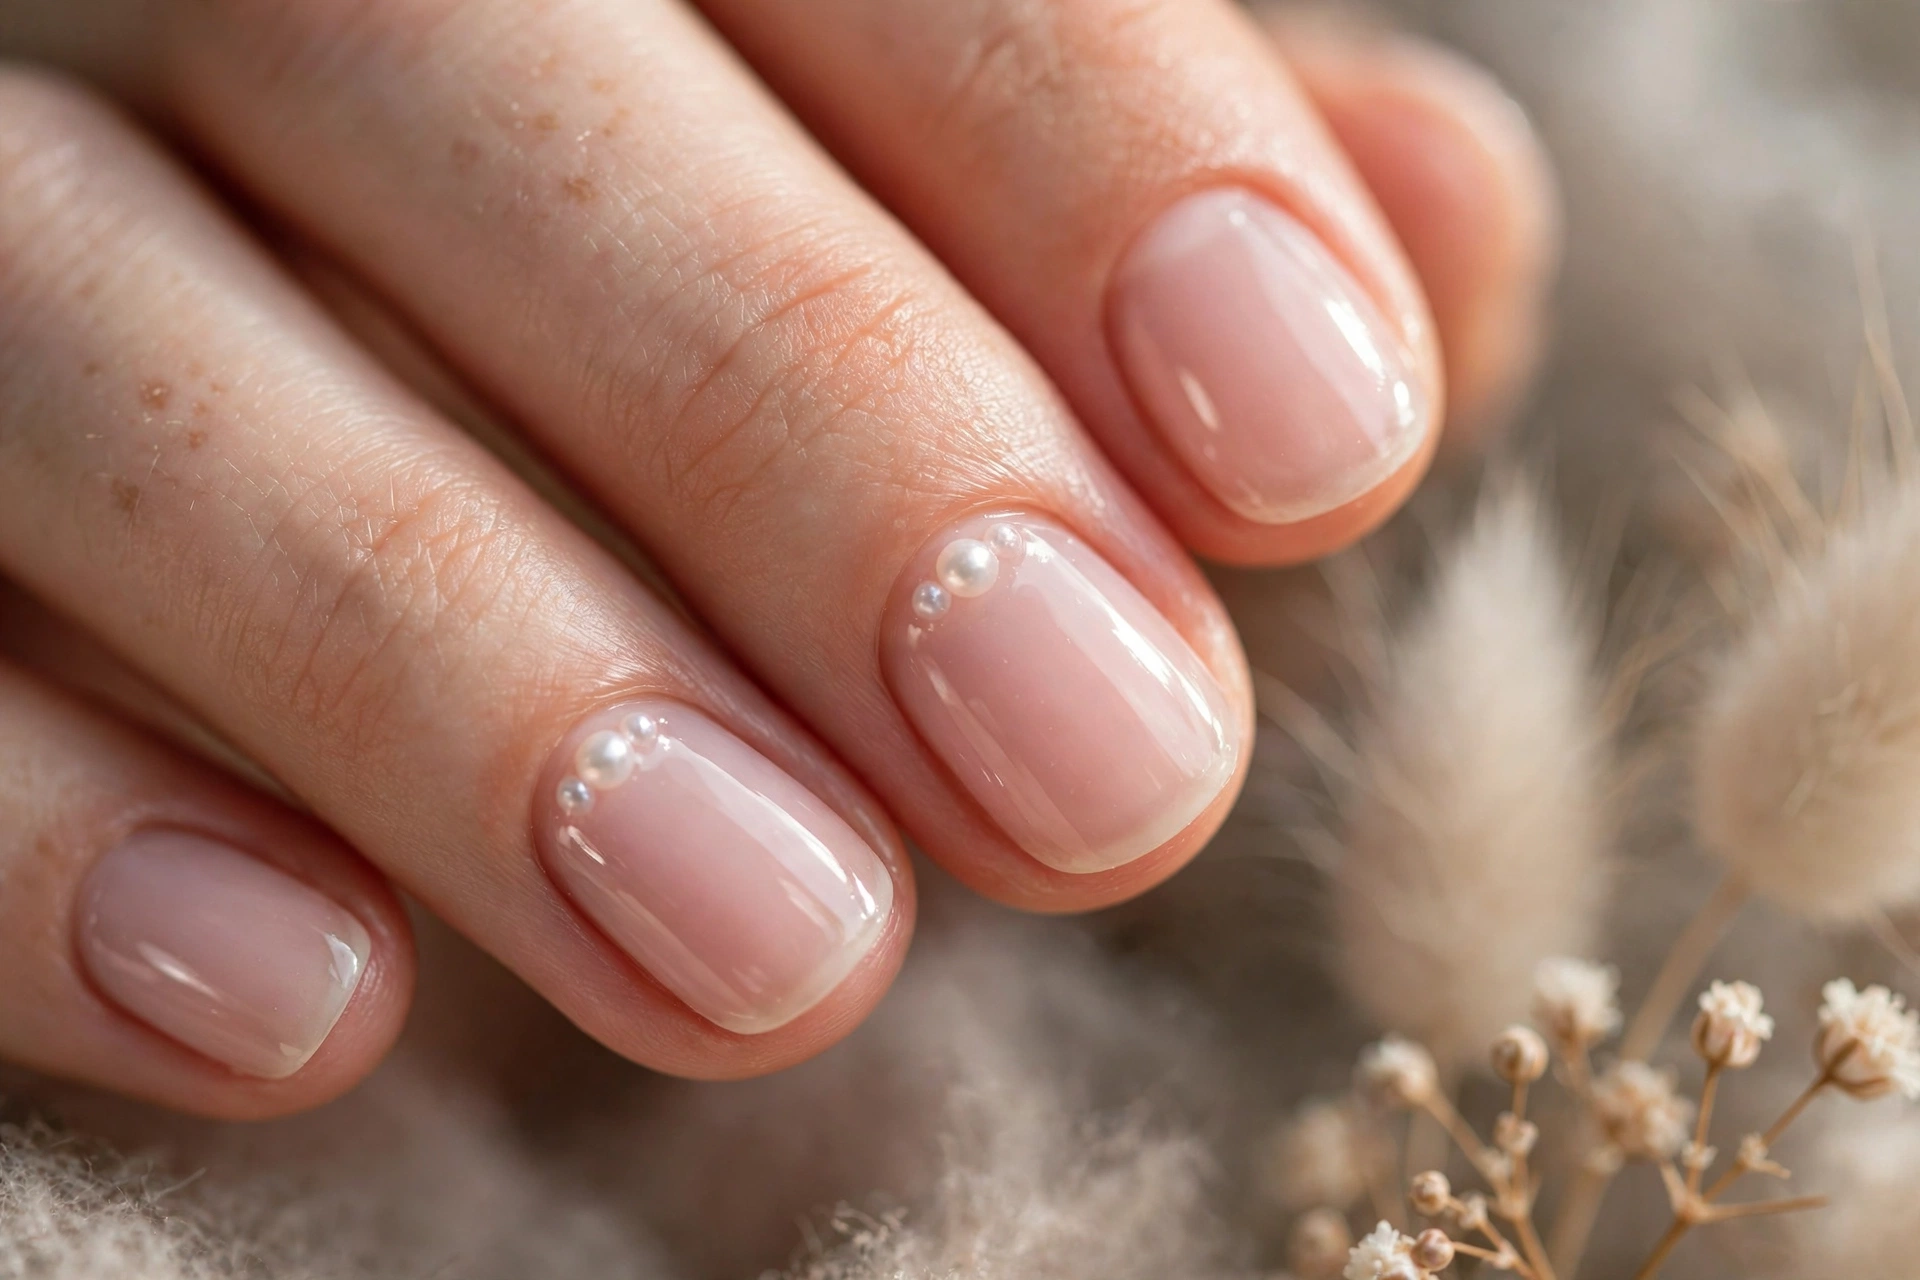
Design 4: Blush Pink with Micro Pearl — the 2026 signature. The pearl moment moved from jewelry into nails this year: a blush base with tiny pearl accents near the cuticle, or a chrome pearl powder finish that gives a luminous, almost holographic quality without glitter. Exceptionally bridal, and it photographs like jewelry. Best for: romantic garden and spring weddings. Salon wording: “Blush pink base with micro pearl accents at the cuticle — keep it minimal, two or three pearls per nail max.” DIY: Essie Fiji (~$11) + flat-back micro pearls (~$7 for a wheel) applied with nail glue, double-sealed with top coat so they survive the whole weekend.
Design 5: Glazed Chrome — the modern bride’s statement. Short nails with a chrome finish are the signature look of the 2026 modern bride. The glossy, glazed-donut shine draws the eye straight to your ring and makes the manicure look deliberate and expensive. Zero maintenance to pull off, maximum impact in photos. Best for: fashion-forward brides, evening receptions. Salon wording: “Pearl chrome powder over a sheer pink base, short oval.” DIY: a chrome powder kit (~$15) over any sheer base; the powder does the work, so the base coat barely matters. Add a tiny heart or dot detail on the ring finger if you want sweetness without fuss.
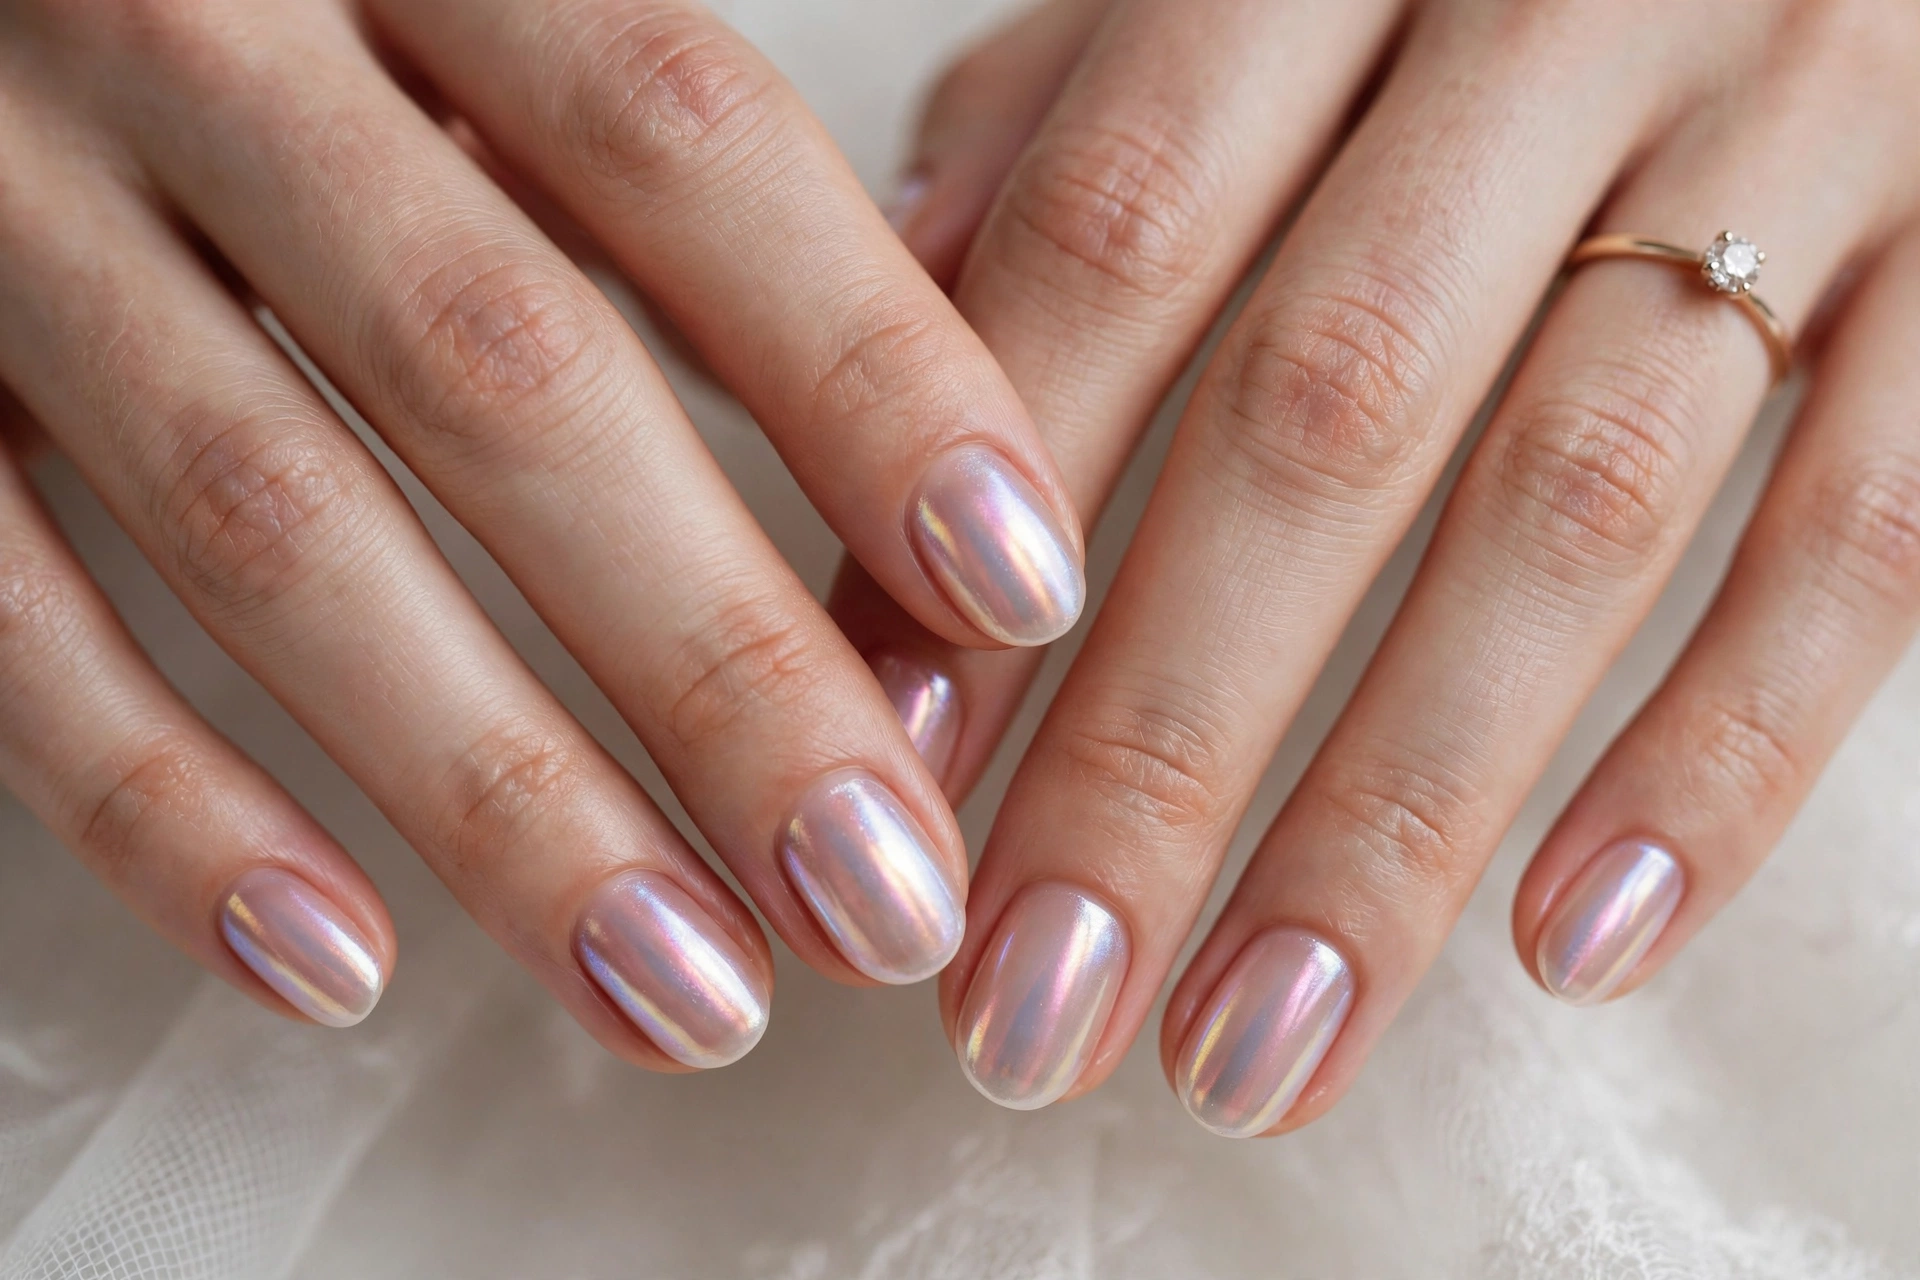
Design 6: Baby Boomer Ombré — French, but softer. The French ombré (baby boomer) fades white into pink with no hard line, so the nail looks elongated and blended — ideal under flash photography. It’s the most forgiving French for short nails because there’s no smile line to get wrong. Best for: brides who love French but fear the “dated” look. Salon wording: “Baby boomer ombré, short oval, soft fade.” DIY: a makeup sponge and two polishes (white + sheer pink, ~$22 total); sponge the fade in thin layers, clean up with an angled brush.
Design 7: Delicate White Botanical — whispered florals. Sheer milky base with fine white petal line-work, sketched loosely rather than symmetrically — imperfection makes florals look alive. Because the design doesn’t cover the whole nail bed, it works beautifully at short lengths. Best for: spring weddings and brides who want something artistic but wearable. Salon wording: “Sheer milky base, delicate white botanical line art on two accent nails.” DIY: The GelBottle Daisy White or any white gel paint (~$12) with a fine liner brush; sketch petals loosely, seal with glossy top coat. Tiny gold bead centers (~$7) elevate it further.
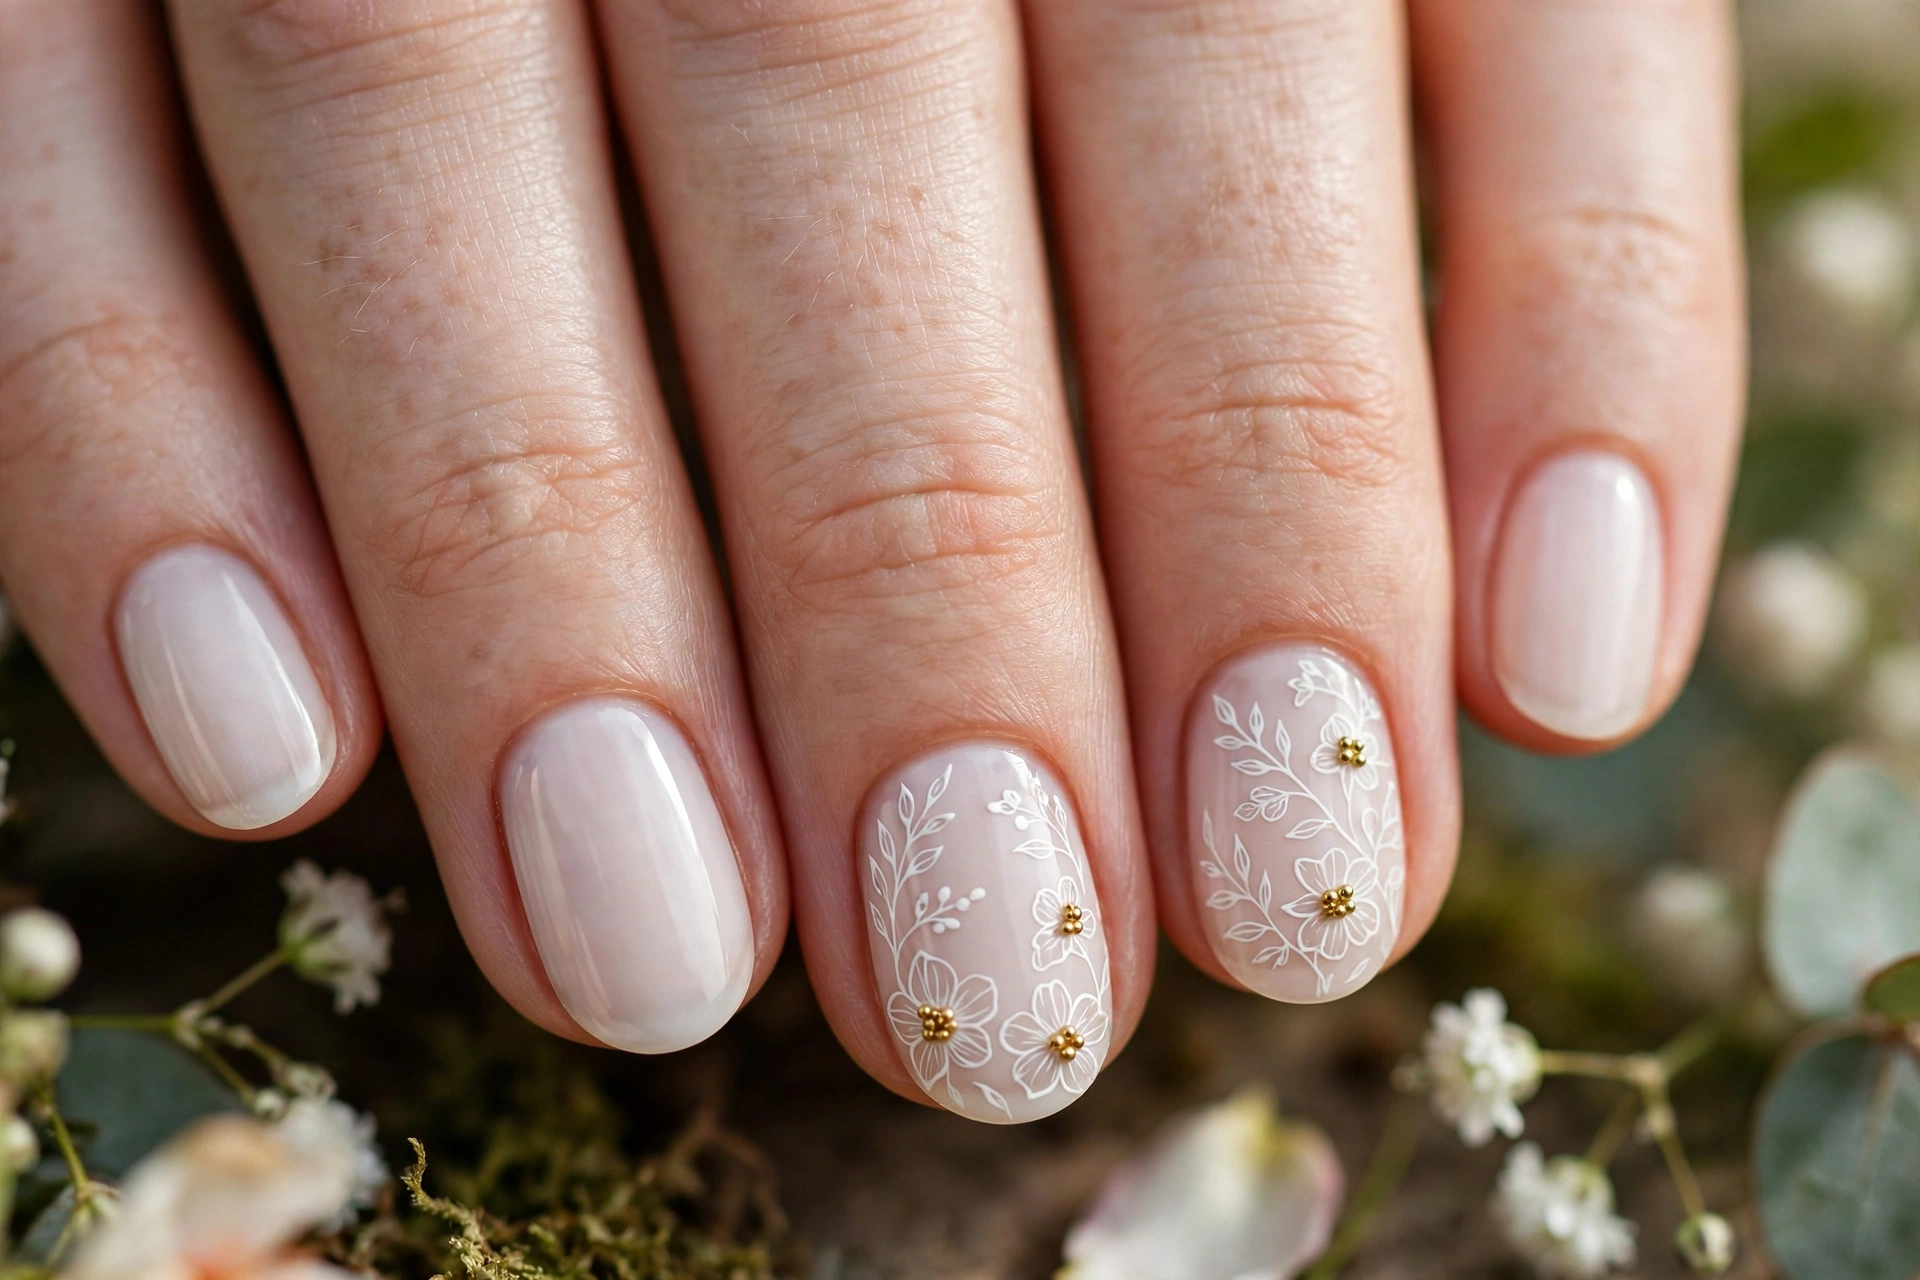
Design 8: Gold Bead Cuticle Detail — jewelry for your nails. A smooth blush or nude base with two or three tiny gold beads placed near the cuticle. It reads as delicate jewelry rather than decoration — the metallic work catches candlelight beautifully at the reception. Best for: brides wearing gold jewelry who want cohesion. DIY: any nude polish (~$11) + gold micro beads (~$7); place with a wax pencil, seal twice.
Design 9: Glitter Gradient Tips — sparkle without the disco. A nude base fading into fine glitter at the tips: all the festivity of glitter, none of the full-coverage drama. On short nails, keep the glitter fine (not chunky) and the gradient short — sparkle at the tip only. Best for: New Year’s Eve and winter weddings. Salon wording: “Nude-to-glitter gradient, fine glitter only, short oval.” DIY: Essie Topless and Barefoot (~$11) + a fine glitter polish (~$9); sponge the glitter onto the tips, two top coats to smooth the texture.
Design 10: Clean Single Color — the bold minimalist. One perfect coat of the right color, immaculately applied. Oxblood or deep berry for fall weddings, classic red for a statement, soft taupe for modern minimalism. On short nails, rich color reads chic — but the application has to be flawless, because there’s nowhere to hide. Best for: fall/winter weddings and brides with a strong personal style. Salon wording: “Single color, gel, cuticle work immaculate — the finish is the design.” DIY: Essie Bordeaux (~$11) is the classic at-home pick; cap the free edge and reapply top coat every two to three days.
Gel vs Press-Ons vs Regular Polish: The Decision Table
This is the decision most brides agonize over, so here’s the honest breakdown for short nails specifically.
| Gel polish | Press-ons | Regular polish | |
|---|---|---|---|
| Lasts | 2–3 weeks | 7–14 days (with good glue) | 5–7 days |
| Cost (USD) | $50–$120 salon | $10–$25 DIY | $15–$40 DIY |
| Honeymoon-proof? | ✅ Yes | ⚠️ Bring backup + glue | ❌ Plan a touch-up |
| Best for | Set-and-forget brides | Intricate art on a budget; short-nail brides who hate salon time | Trial runs; the week-of backup plan |
| Watch out | Needs UV lamp / salon removal | Can pop off; size the fit carefully | Chips by day 3 without top-coat maintenance |
The 2026 reality: press-ons have closed most of the quality gap. Brands like BTArtbox make short French and almond sets that look invisible up close, and they’re the better choice for intricate art that would be expensive to hand-paint. Gel still wins on longevity and simple color. Our recommendation: gel for the wedding if your budget allows; press-ons as the smart backup (and the smart primary if you’re doing detailed art).
When to Book: The Bridal Nail Timeline
3–4 weeks before: book a trial manicure. Wear it for a full week. Photograph your hand from above and from the side — that’s how the camera sees it. Check it against your dress fabric (hold your hand next to a swatch; ivory and white change how every nude reads) and your engagement ring.
2–3 days before the wedding: the real appointment. Never the morning of — you need a buffer for fixes, and freshly done nails plus wedding-morning chaos is how chips happen.
Day of: pack an emergency kit — your exact polish shade, a file, nail glue, and top coat. Assign it to your maid of honor, not your clutch.
After the honeymoon: if you chose gel, book a proper soak-off removal. Peeling gel off yourself thins the nail plate for months.
The Prep Protocol: Cuticles, Strength, Hydration
Great bridal nails are made in the two weeks before the appointment, not during it.
Two weeks out: start daily cuticle oil. Dry, ragged cuticles will undo the most expensive design — they need a couple of weeks of oil to settle. Push (never cut) cuticles gently after a shower.
One week out: add a nail strengthener under bare nails, especially if your nails peel. Keep nails at the length you want — don’t grow them “a bit longer for the wedding” if you’ve lived short all year; unfamiliar length is the enemy.
The final 48 hours: hydrate hands, but skip heavy hand cream on appointment day (oily nail plates lift polish). No picking, no biting, no using nails as tools.
Match Your Nails to Your Dress, Ring, and Bouquet
Dress color: pure white dresses pair with brighter whites and cool nudes; ivory and champagne dresses want warmer nudes, milky tones, and gold accents. Hold your hand next to your actual fabric — this single step prevents more mismatches than any rule.
Your ring: wear your engagement ring to every nail appointment so the stone and band are judged against the design. High-contrast designs (black geometric, deep oxblood) make diamonds pop; sheer nudes let colored stones lead.
Your bouquet: echo one color, not all of them. Blush bouquet? A blush nail or a single blush accent nail ties the photos together. Wildflower bouquet? The botanical design (Design 7) was made for you. Keep it to a whisper — matchy-matchy reads costume.
Jewelry metal: gold jewelry loves warm nudes and gold bead details (Design 8); silver/platinum loves cool milky whites and chrome (Design 5). Our guide to bridal jewelry for round neckline dresses covers the metal-matching rules in full.
Where to Buy: Budget vs Premium (USD)
DIY route ($15–$40 total): Essie or OPI polishes ($11–$12 each), Seche Vite top coat ($12), a nail art pen set ($8–$12), micro pearls or gold beads ($7), chrome powder kit ($15). Everything in this article’s DIY sections is available at Ulta, Sephora, Target, or Amazon US.
Salon route ($50–$120): a bridal gel manicure with simple art runs $60–$90 in most US cities; intricate hand-painted art pushes past $100. The trial manicure (3–4 weeks before) is a separate appointment — budget for both.
Press-on route ($10–$25): BTArtbox and similar soft-gel press-on sets deliver the salon look for a fraction of the price; buy two sets (one for the trial week, one for the wedding).
7 Mistakes That Ruin Short Bridal Nails
1. A thick French smile line. The classic mistake: a wide white band that eats the whole free edge and visually halves the nail. On short nails, the tip must be thin — micro French or nothing.
2. Dark opaque color with no plan. Deep shades are gorgeous on short nails but show every cuticle flaw and chip visibly. If you go dark, the cuticle work has to be immaculate and the emergency kit non-negotiable.
3. Booking the morning of the wedding. No buffer for fixes, no time for proper drying, and wedding-morning hands do a hundred unplanned tasks. Two to three days before, always.
4. Skipping the trial. The design you love on Pinterest may hate your skin tone, your dress, or your nail shape. The trial week is cheap insurance.
5. Growing your nails “a little” for the wedding. Unfamiliar length breaks, catches, and distracts you all day. Marry the hands you live with.
6. Chunky glitter on short nails. Fine glitter elongates; chunky glitter overwhelms a short nail bed and reads crafty in close-ups.
7. Forgetting the daylight check. White gel looks perfect under salon lamps and slightly blue outdoors. Photograph the finished set on your phone in daylight before you leave the salon.
5 Pro Tips from Bridal Nail Artists
1. Bring your ring and your fabric. Wear your engagement ring to the appointment and hold your hand against your dress swatch. Professionals judge the design against both — you should too.
2. Photograph like the photographer. Ask for a photo of your finished hand taken from above and from the side. That’s the ring-shot angle; if it works there, it works everywhere.
3. Thin coats, always. Whether salon or DIY, color goes on in thin layers. Thick coats pool at the sidewalls, streak, and chip faster. Two thin coats beat one thick coat every time.
4. Cap the free edge. Seal the tip of each nail with base, color, and top coat. This single habit is the difference between a manicure that lasts the wedding and one that chips by the reception.
5. Gloss is the finish. For bridal, high gloss beats matte. Gloss reflects light, blurs imperfections, and keeps short nails from reading blunt. Save matte for fashion week.
Frequently Asked Questions
What nail color is best for a bride with short nails? Sheer nudes, milky whites, and soft blush pinks are the safest and most flattering — they elongate the nail visually and keep the focus on your ring. Match the undertone to your skin (pink for cool, beige for warm) and to your dress (warm nudes for ivory, brighter whites for pure white). Rich colors like oxblood work too, but demand immaculate cuticle work.
Are French tip nails still in style for weddings? Yes — but the 2026 version is softer than the classic. Micro French tips (a hairline of white), French ombré (baby boomer), milky bases, and champagne or pale-pink tips have replaced the thick white band. Thin tips and immaculate cuticle prep are what keep it modern; a thick smile line on short nails reads dated.
Should I get press-on nails or gel for my wedding? Gel if you want set-and-forget longevity through the wedding and honeymoon (2–3 weeks). Press-ons if you want intricate art on a budget or hate salon time — quality has improved enormously, and they’re the smarter pick for detailed designs. Either way, do a trial run weeks before and bring backup glue or polish on the day.
What nail shape is best for short bridal nails? Oval first, round second, squoval third. Oval elongates the fingers and photographs best; round is the most natural on ultra-short nails; squoval is the most durable. Avoid true square (reads blunt on short nails) and skip stiletto/coffin for bridal.
When should I get my nails done before the wedding? Two to three days before — never the morning of. Book a trial manicure 3–4 weeks earlier and wear it for a week to test the design against your dress, ring, and real life.
How long will my wedding manicure last? Gel: 2–3 weeks, easily covering the wedding and honeymoon. Quality press-ons: 7–14 days with good application. Regular polish: 5–7 days — fine for the wedding itself if you reapply top coat every two to three days and keep the emergency kit handy.
Can I do my own bridal nails at home? Absolutely — start with simpler designs: solid colors, sheer nudes, or a classic French. Every design in this guide includes a DIY route with real products. Practice the exact design twice before the wedding week, photograph it in daylight, and keep your salon appointment as a backup plan if the DIY doesn’t satisfy you.
How do I stop my wedding nail polish from chipping? Start with clean, dry nails; use a base coat; apply thin coats and cap the free edge with every layer; finish with a robust top coat and reapply it every two to three days. Avoid harsh tasks with your hands in the final 48 hours, and keep your shade in the emergency kit for instant fixes.
Short nails aren’t a compromise — in 2026, they’re the connoisseur’s choice. Pick the design that feels like you, book the trial, prep the cuticles, and walk down the aisle with hands you’re proud to photograph. For the rest of your bridal beauty plan, explore our simple wedding dresses for short brides and curly wedding hairstyles with veil guides.