16 Wedding Hairstyles for Thin Hair with Extensions (2026)
Thin hair is not a wedding-day problem. It is a planning problem — and extensions solve it beautifully, as long as you pick the right type, place it in the right spot, and build the style around it instead of on top of it. The difference between extensions that look like your own hair and extensions everyone notices is almost never the extensions themselves. It is placement, weight, color match, and blending.
This guide gives you all four. Every one of the 16 styles below names its extension type, how much hair to use, exactly where it sits, and how to build the style step by step — so you (or your stylist) can walk in with a real plan instead of a Pinterest screenshot and a hope.
Quick note on terms: “fine” hair means each strand is thin. “Thin” hair means you have fewer strands (low density). “Thinning” hair means density has decreased over time. Most brides reading this have fine + low-density hair, and everything here is written for that combination.
Quick Tutorial
Watch the 30-second version: clip in, blend, pin, spray. The full step-by-step for every style is below.
Which Extensions Should a Thin-Haired Bride Choose?
Start here, not at the style list. The wrong type — too heavy, too bulky, wrong attachment — will show, slip, or hurt by the reception. The right type disappears.
| Extension type | Best for thin hair? | Wedding-day wear | Cost (US) | DIY or stylist? | Watch out for |
|---|---|---|---|---|---|
| Seamless clip-ins (silicone wefts) | Yes — top pick | Day only, remove at night | $80–$250 | DIY-friendly | Standard wefts can ridge; choose seamless/flat |
| Halo (wire) | Yes — gentlest | Day only | $100–$300 | Easiest DIY | Can slide on silky hair; needs a top layer to cover the wire |
| Tape-ins | Yes, with a pro | 4–8 weeks | $200–$600+ | Stylist only | Tabs can peek on very fine hair if placed too high |
| Nano / micro rings | Only if hair is strong enough | 2–3 months | $300–$800+ | Stylist only | Weight on fragile strands; skip if hair breaks easily |
| Clip-in ponytail | Yes — best instant updo | Day only | $40–$120 | DIY-friendly | Must match your ponytail base exactly |
| Bun filler / donut | Yes — zero damage | Day only | $5–$15 | DIY-friendly | Must be fully covered; match your hair color |
The verdict for most thin-haired brides: seamless clip-ins for the wedding day. They are light, removable, re-stylable, and you can rehearse with the exact set you will wear. Add a halo if your crown area is sparse (no clips near the scalp), and a bun filler whenever a bun needs to look twice its real size. Tape-ins make sense if you want the volume for the honeymoon too — but get them fitted at least 2 weeks before the wedding so you can trial the real thing.
How many grams? For thin hair, less is more. A full-head set of 100–140 grams is usually plenty; 150–180 grams is the ceiling for most fine-haired brides. More weight pulls, shows, and slips. If a set feels heavy in the box, it will feel heavier by hour six.
Color match: match the extensions to your mid-lengths and ends, not your roots. Roots are almost always darker, and matching to them makes the ends look two-toned. In daylight, hold a weft next to the ends of your hair — if you cannot see where one ends and the other begins, it is right. Many brands offer a free color-match service from a photo; use it, and order 2–3 weeks early so exchanges are possible.
The 5 Rules to Make Extensions Invisible
These five rules are the whole secret. Every style below follows them.
- Place low, not high. Clips go at or below ear level — about an inch below your parting, never at it. The higher the weft, the thinner your coverage over it.
- Keep a deep top layer. Leave enough of your own hair loose over every weft to act as a veil. If you can see scalp through your top layer when your hair falls loose, a wire or weft will show through too — use fewer, smaller pieces, or switch to a topper (see the honest box below).
- Fewer, lighter wefts beat a full set. Start with 2–3 wefts (or one halo), check in the mirror, then add only if you need more. Bulk is what reads as “extensions.”
- Tease the grip. Lightly backcomb the roots where each clip will sit, and tease a little of the hair that will fall over the clip too. Teasing gives clips something to hold and hides the clip itself. Move clip positions slightly between wears so the same strands are not always carrying the weight.
- Check in daylight. Bathroom light lies. Check the back, sides, and crown in natural light — and have someone else check the back — before you call it done.
The 16 Styles
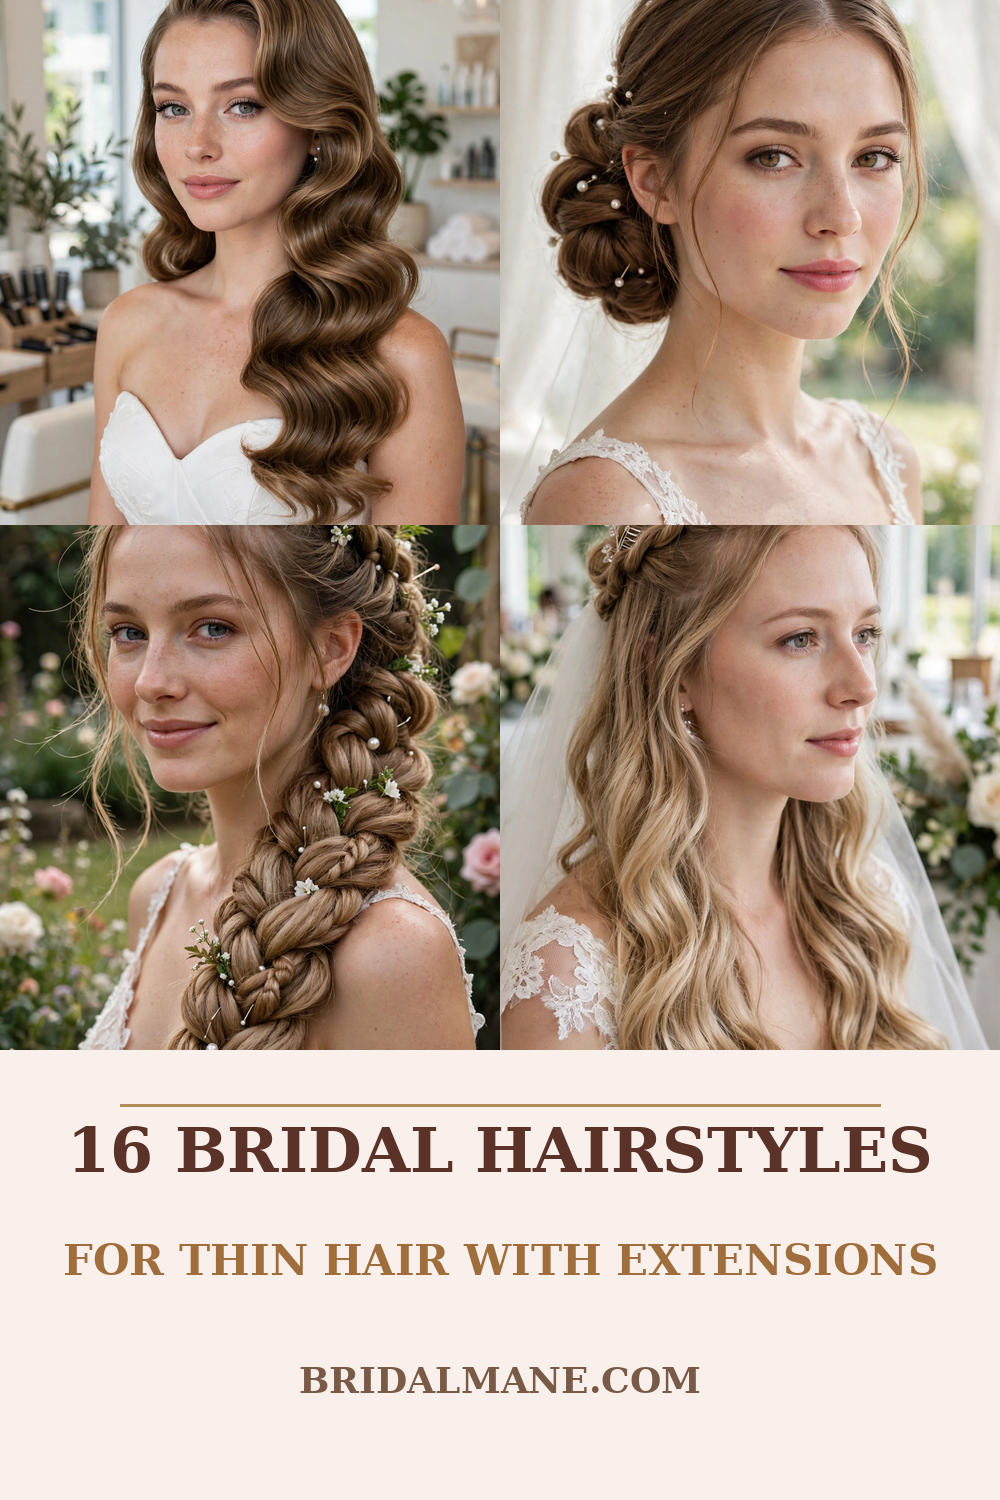
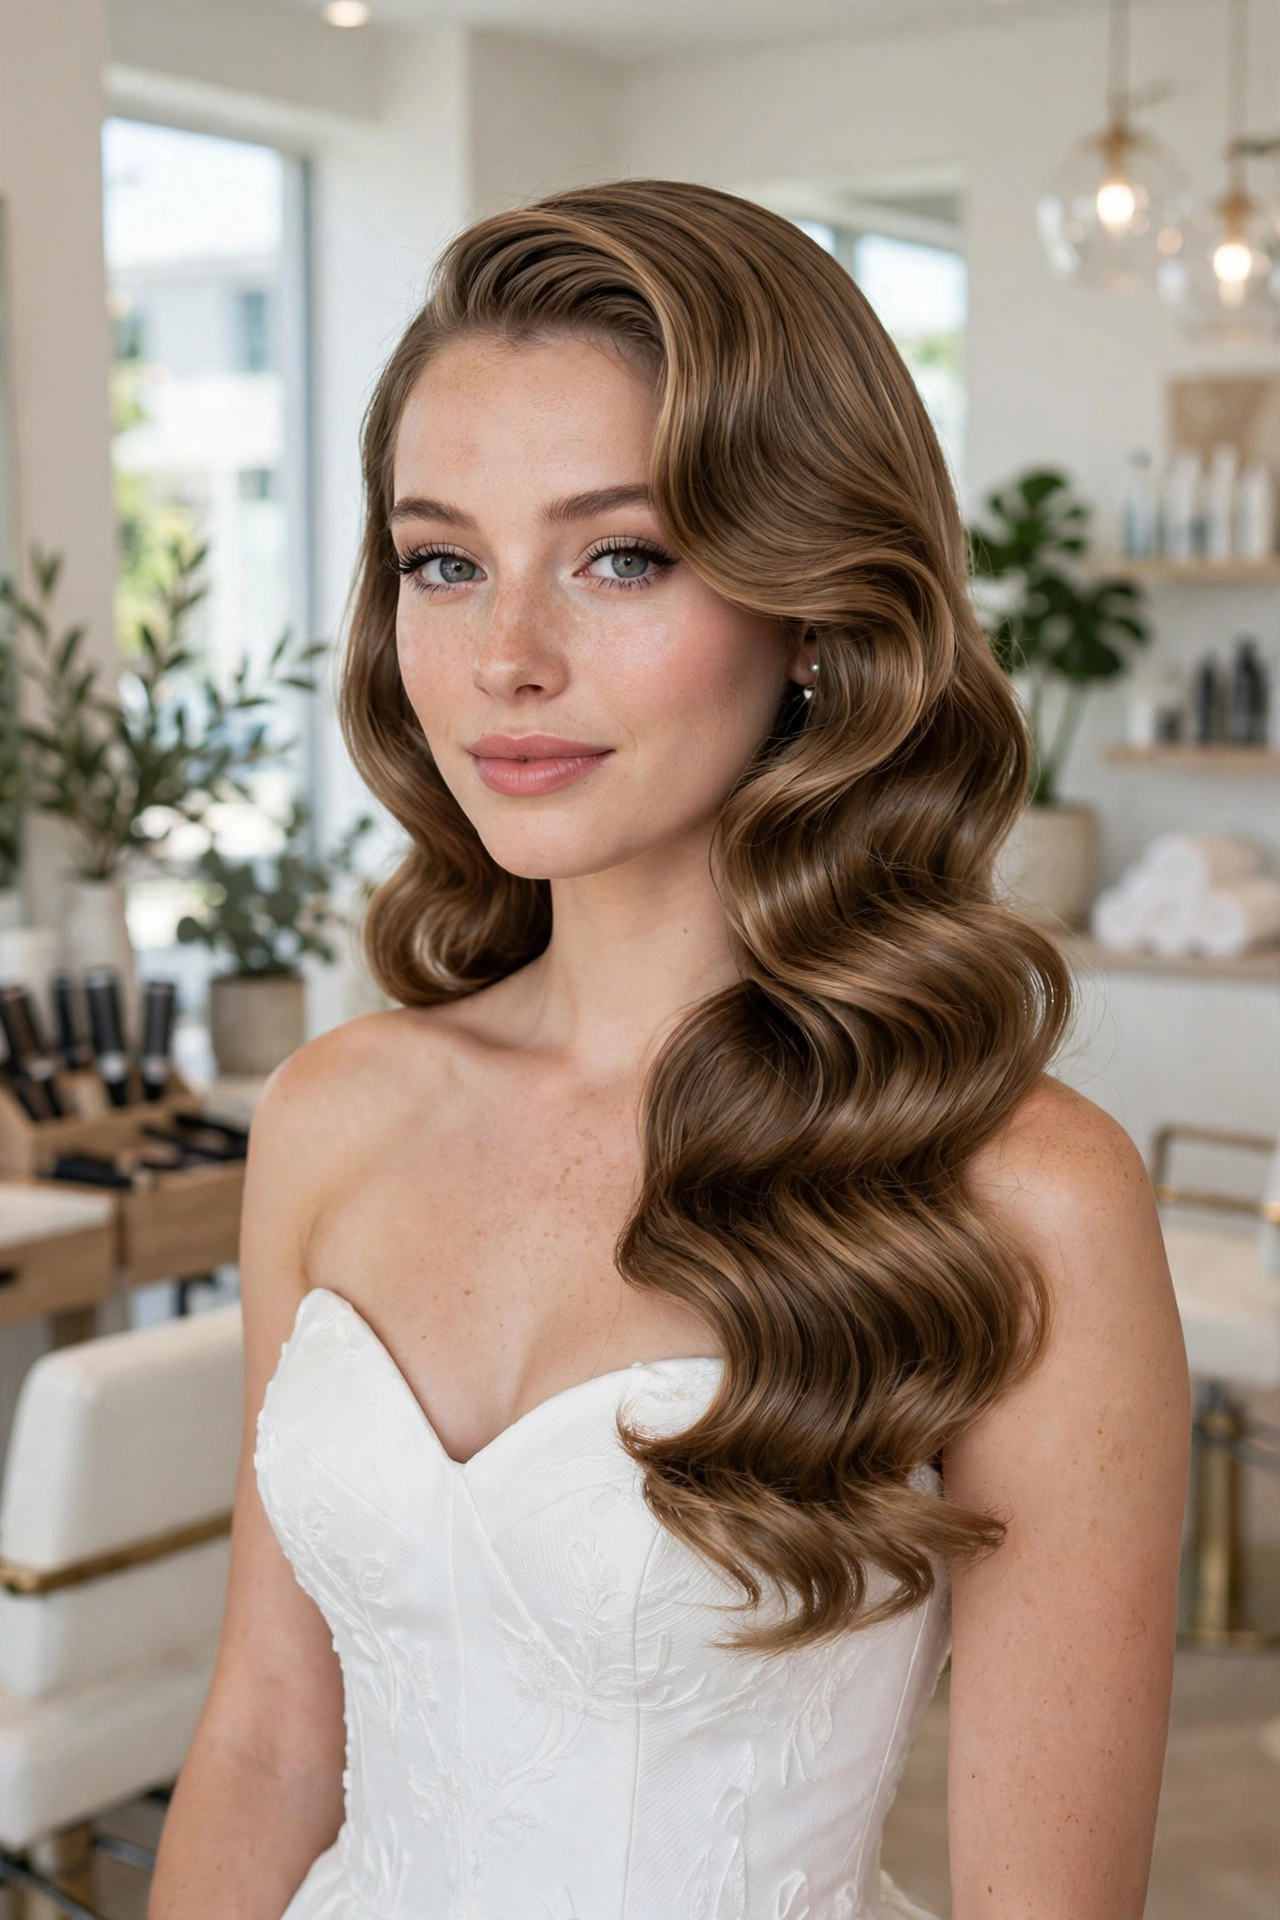
1. Hollywood Waves with Seamless Clip-Ins
Time: 25 min | Difficulty: Medium | Extensions: 2–3 seamless clip-in wefts (100–120g), mid-head and nape | Best for: Long thin hair, classic ballroom weddings, round or oval faces
The S-shaped wave is thin hair’s best friend: every curve adds the illusion of density, and the extensions hold a curl longer than fine hair alone.
How to:
- Clip in the wefts starting at the nape, working up to ear level. Tease each section lightly first.
- Curl your hair and the extensions together in 1-inch sections, all curling the same direction, with a 1.25-inch iron.
- Let every curl cool completely before touching it — this is what makes the waves last.
- Brush through gently with a wide-tooth comb to merge the S-shapes, then pin the front section to one side for the classic sweep.
- Mist with flexible-hold spray, not maximum hold (stiff spray makes fine hair look thinner).
You’ll need: seamless clip-ins, 1.25-inch curling iron, wide-tooth comb, flexible-hold spray. Extension note: curl the wefts before or with your hair — curling them separately first gives a lusher finish. Veil note: a fingertip veil comb sits above the top weft, never on it.
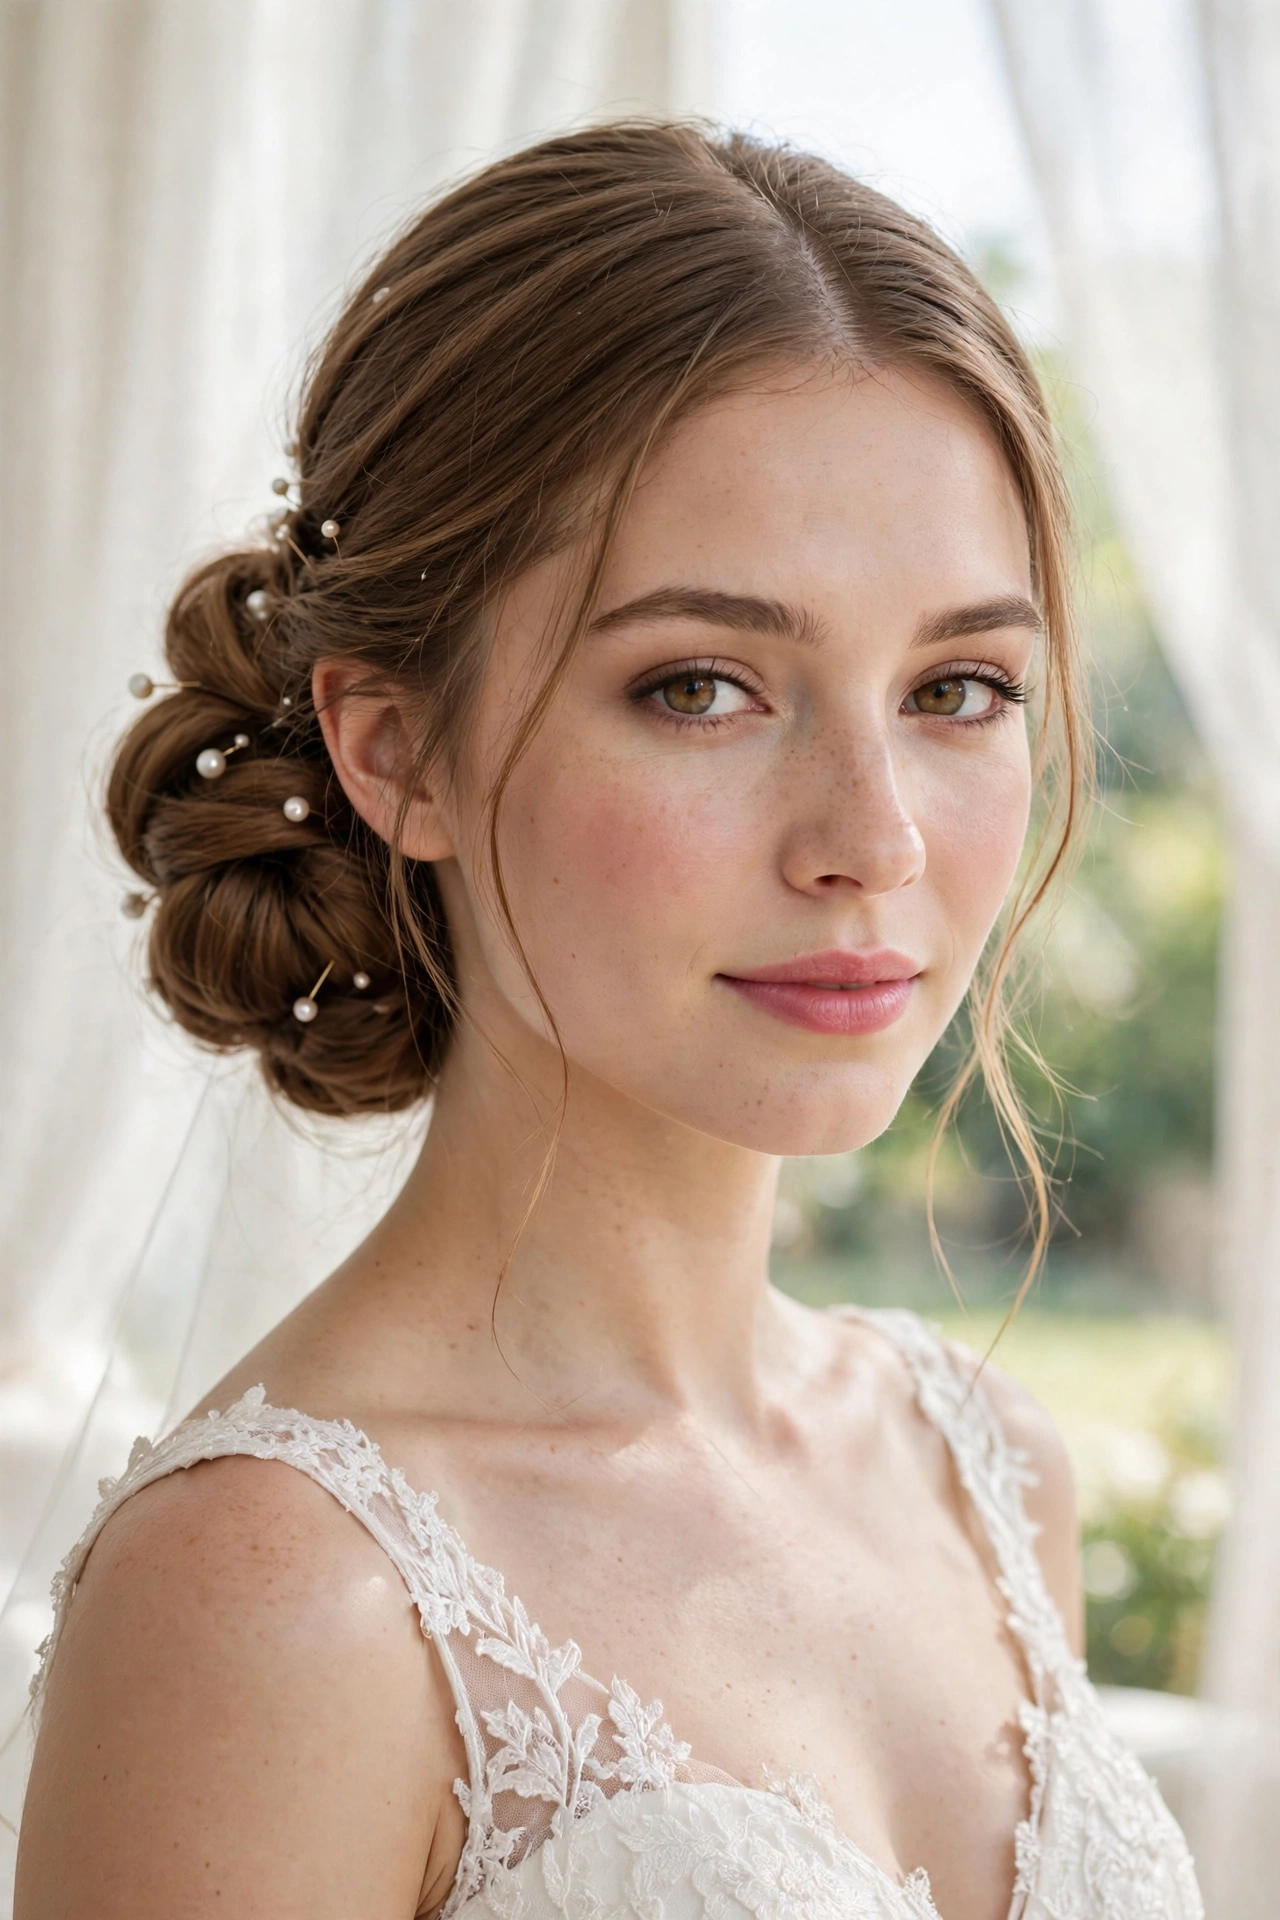
2. Low Chignon with Pearl Pins
Time: 20 min | Difficulty: Medium | Extensions: 1–2 clip-in wefts at the nape + optional bun filler | Best for: Medium thin hair, elegant or church weddings, showing off a backless dress
A low chignon concentrates everything you have into one polished shape — and a filler underneath makes it look twice its real size.
How to:
- Clip one weft across the nape, low and wide. Add a second only if the ponytail still feels wispy.
- Gather into a low ponytail at the nape. Wrap a small bun filler (matched to your color) at the base.
- Divide the ponytail in two, twist each section loosely, and wrap in opposite directions around the filler, pinning as you go.
- Pull out 2–3 face-framing strands and soften them with the iron.
- Scatter 5–7 pearl pins across the bun — pins also camouflage any filler edge.
You’ll need: clip-in weft(s), bun filler, U-pins, pearl pins, light spray. Extension note: the filler does the heavy lifting here; the weft just covers it. Best for: brides who want an updo that photographs like a much thicker head of hair.
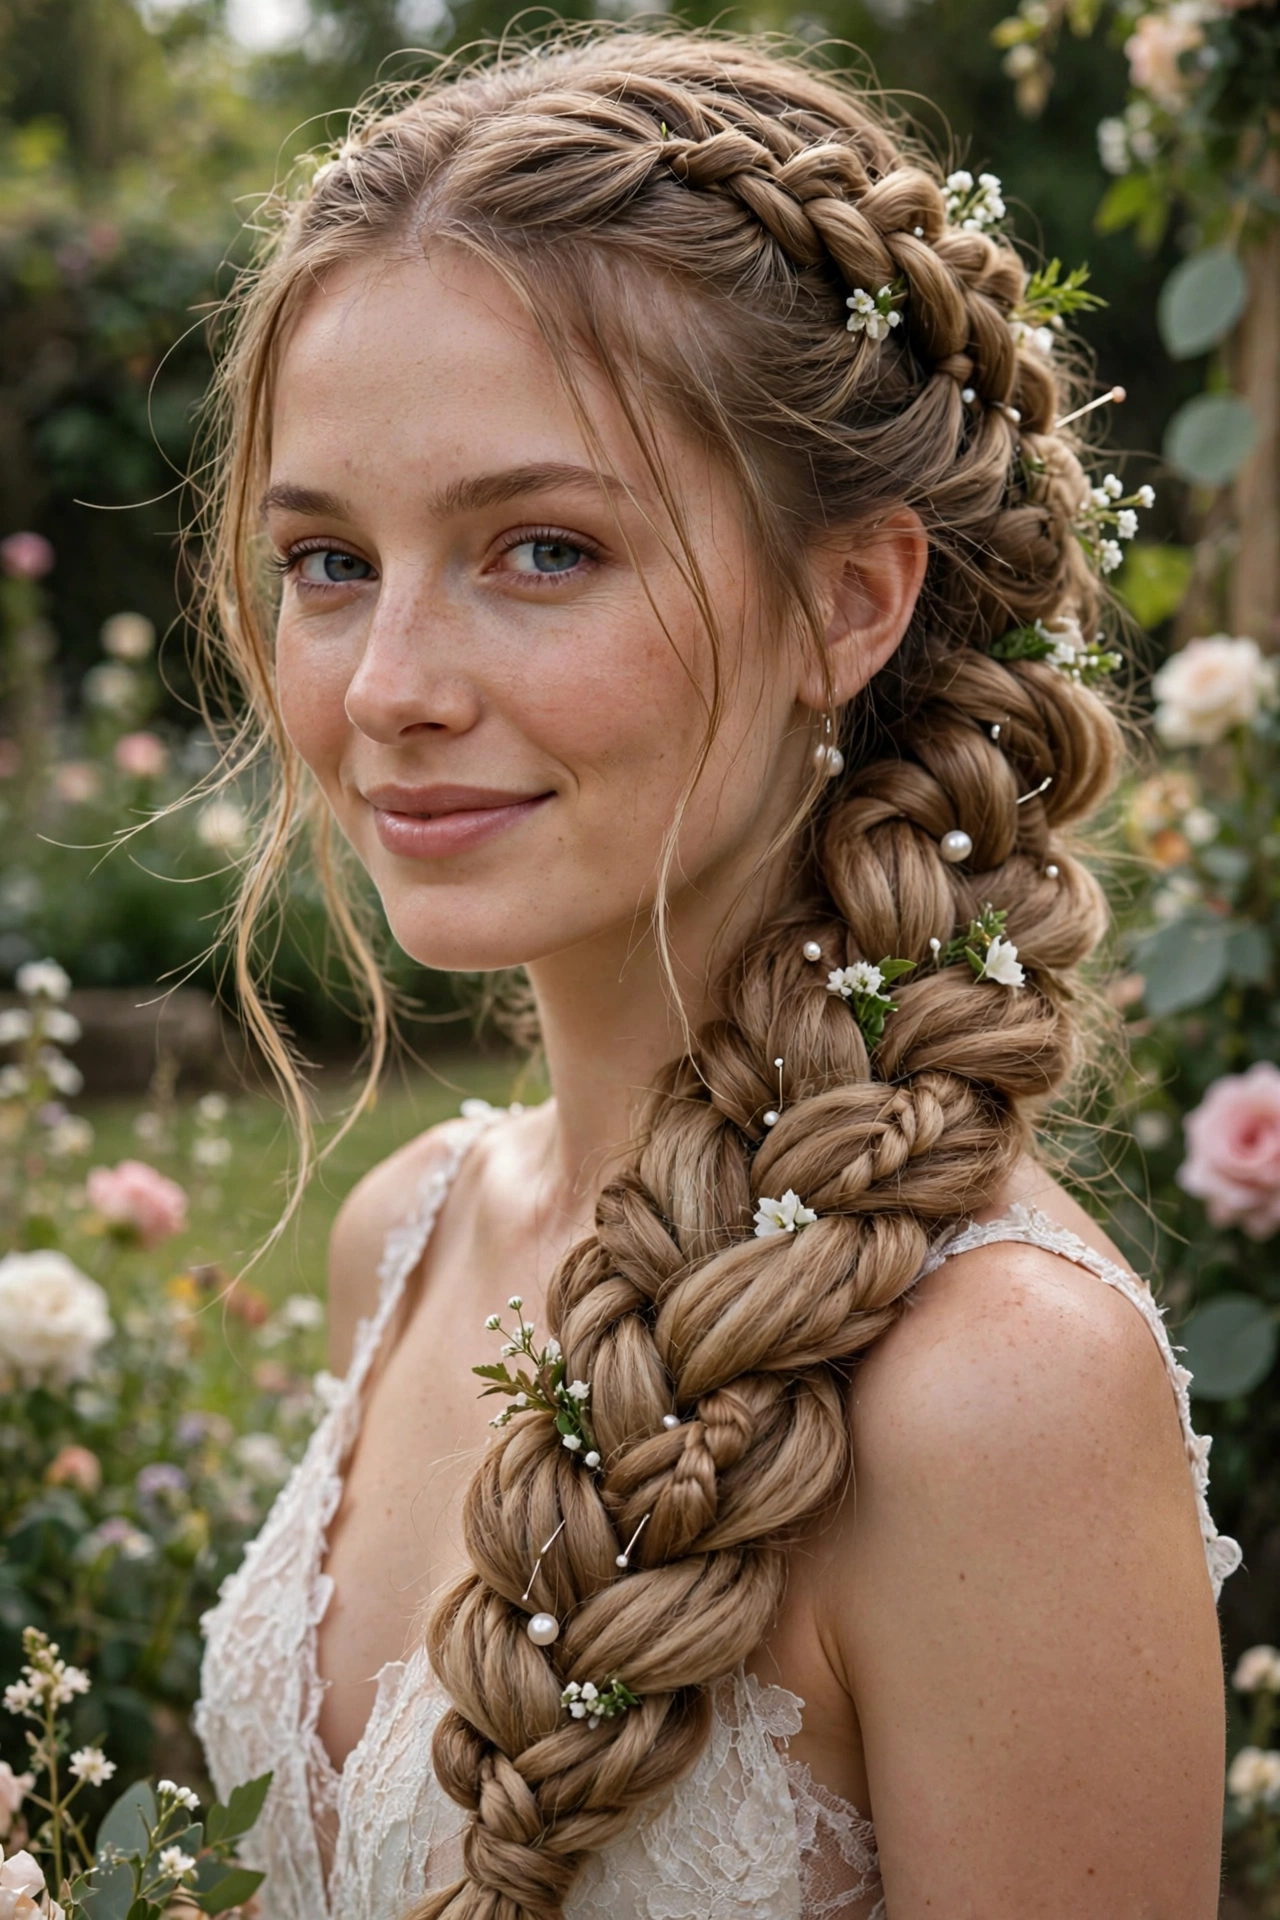
3. Boho Fishtail Braid with Woven-In Extensions
Time: 30 min | Difficulty: Medium | Extensions: 2 clip-in wefts woven into the braid | Best for: Long thin hair, garden / boho / outdoor weddings
Thin braids go stringy. Braids with extensions woven in go chunky — and the pancaking trick (gently tugging each loop wider) doubles the effect.
How to:
- Clip one weft at each side, just behind the temples, low enough that your top hair covers the clips.
- Sweep all hair to one side and divide into two sections.
- Fishtail-braid, weaving the extension hair evenly into both sections as you go.
- Tie off, then pancake: tug each outer loop gently outward, starting at the bottom and working up.
- Tuck in small flowers or pearl pins where the loops open up.
You’ll need: 2 clip-in wefts, small clear elastic, flowers or pearl pins, texture spray. Extension note: because the braid itself hides the wefts, this is one of the most forgiving styles for first-time extension wearers. Outdoor note: braids survive wind and humidity better than any worn-down style.
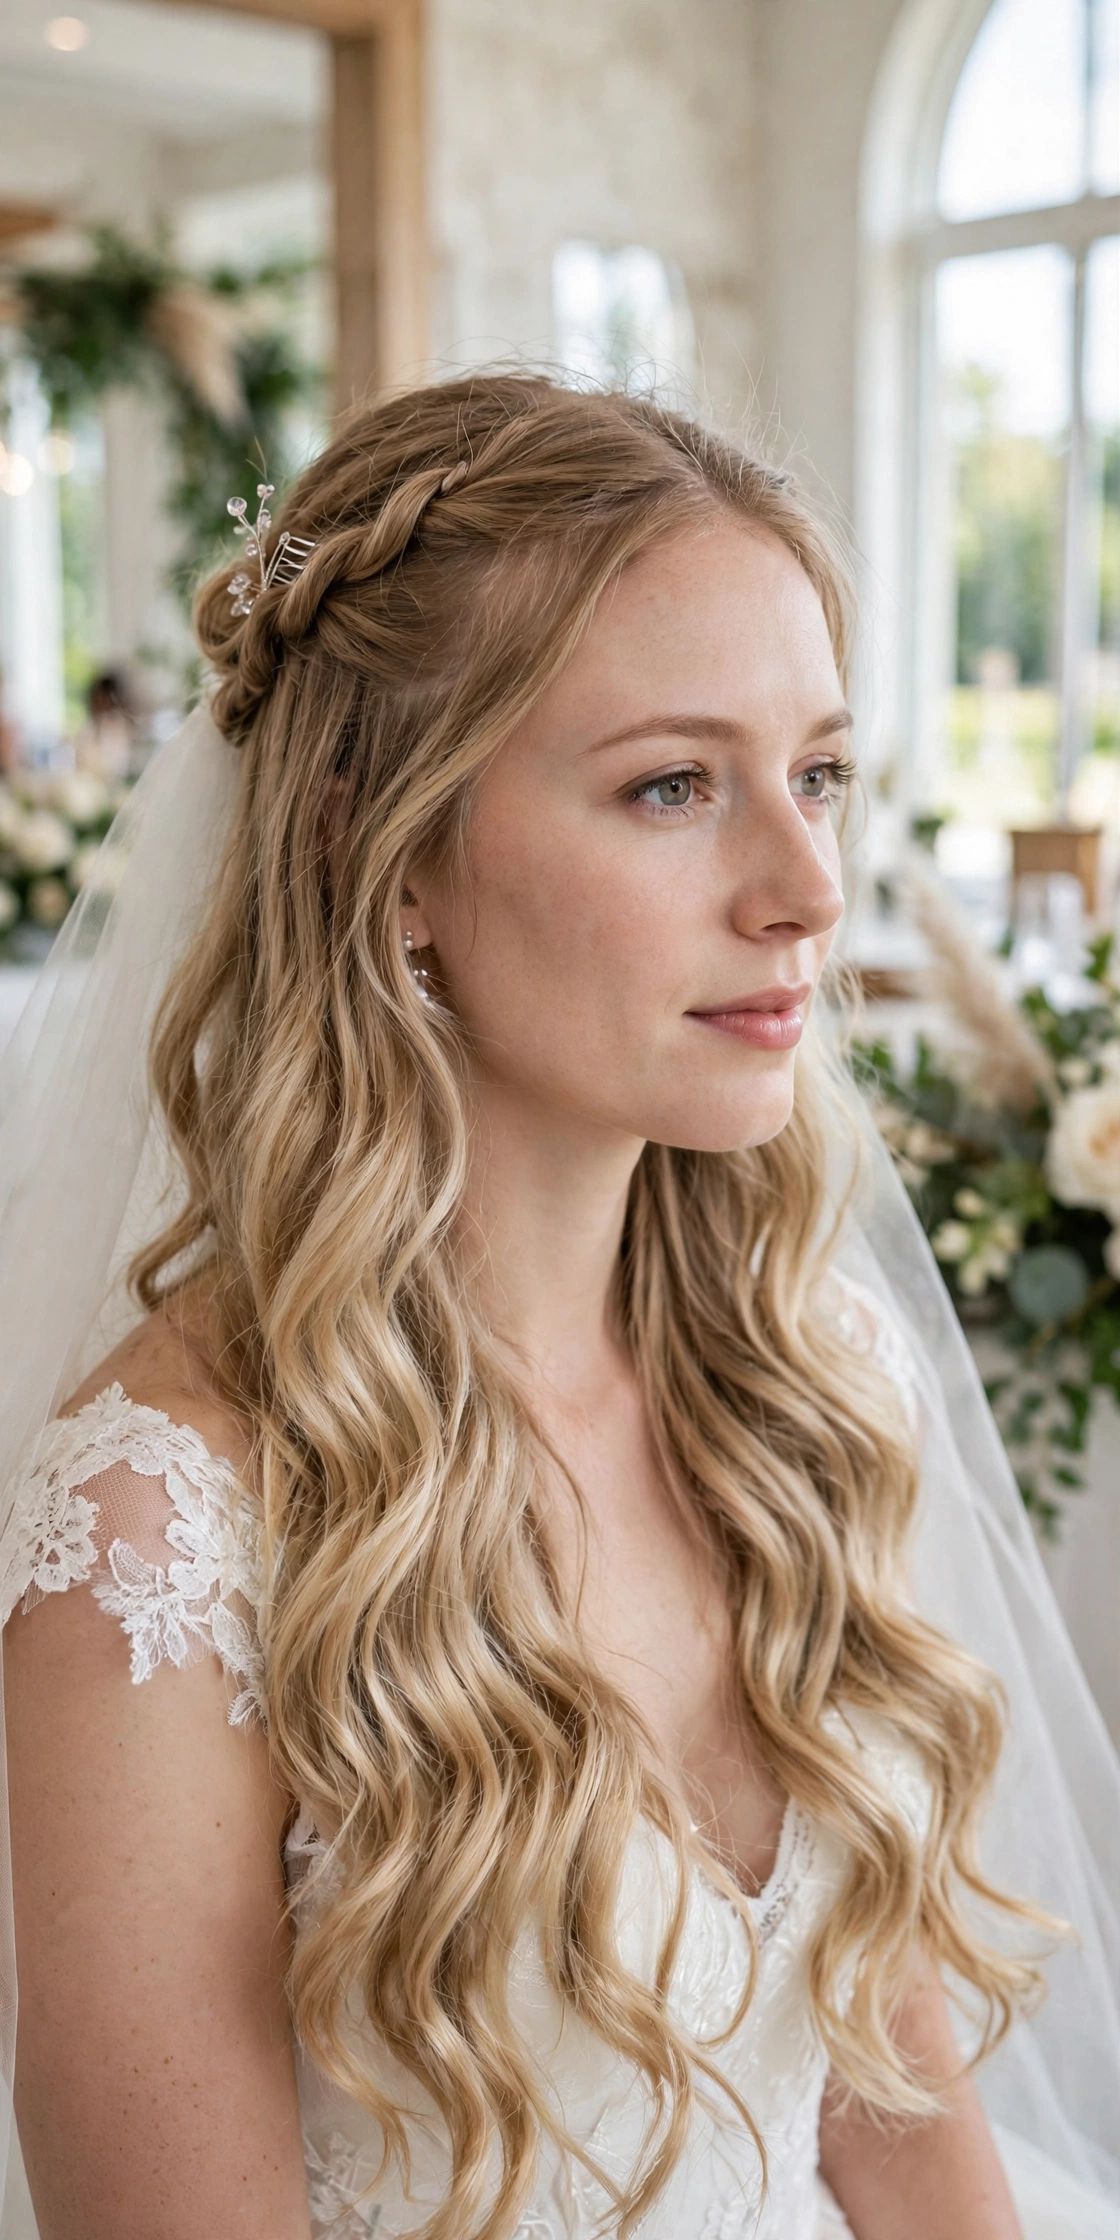
4. Half-Up Twist with Crystal Comb
Time: 15 min | Difficulty: Easy | Extensions: 1–2 clip-in wefts in the lengths (not the pinned section) | Best for: Medium or long thin hair, brides who want hair down but off the face
The half-up is the hiding champion: the pinned top section covers the wefts, and the lengths get all the volume.
How to:
- Clip wefts into the lower half only — nothing in the section you will pin up.
- Curl the lengths in loose waves.
- Take a 2-inch section from each temple, twist each toward the back, and cross them at the crown.
- Pin the crossed twists with 2–3 bobby pins in an X, then slide a crystal comb over the join.
- Loosen the crown slightly with your fingers for height.
You’ll need: 1–2 clip-in wefts, bobby pins, crystal comb, curling iron. Extension note: skip wefts in the “up” area entirely — they add nothing there and only risk showing. Veil note: a veil comb slides right under the crossed twists.
5. Sleek Low Bun with a Hidden Weft
Time: 15 min | Difficulty: Easy | Extensions: 1 wide seamless weft across the back | Best for: Medium thin hair, minimalist or modern weddings, statement earrings
Sleek styles are the hardest to hide extensions in — so this one uses a single flat weft and a middle or side part that keeps the hairline clean.
How to:
- Apply smoothing serum to damp hair, blow-dry straight with a paddle brush.
- Clip one wide seamless weft low across the back, below ear level.
- Brush everything into a low ponytail at the nape, keeping the top smooth.
- Twist the ponytail and coil it flat against the head, pinning every inch.
- Tame flyaways with a toothbrush misted with spray — never a full blast.
You’ll need: 1 seamless weft, paddle brush, smoothing serum, U-pins, strong-hold spray. Extension note: flat wefts only here; a standard ridged weft will bump through sleek hair. Straight-hair warning: straight styles show every join — keep the weft short (at or above your own length) and point-cut its ends.
6. Textured High Ponytail with a Ponytail Extension
Time: 15 min | Difficulty: Easy | Extensions: 1 clip-in ponytail piece (80–120g) | Best for: Long thin hair, modern or city weddings, dancing all night
The fastest full-hair illusion in this guide: your own hair makes the base, the ponytail piece makes the volume.
How to:
- Tease the crown, then gather your hair into a high ponytail and secure tightly.
- Clip or wrap the ponytail extension around your ponytail base, covering the join.
- Wrap a 1-inch strand of your own hair around the base to hide the attachment, pinning underneath.
- Curl the ponytail in 3–4 sections and backcomb the underside lightly for body.
- Spray the base, not the lengths — sprayed lengths go stiff and separate.
You’ll need: clip-in ponytail, elastic, teasing comb, curling iron. Extension note: match the ponytail piece to your hair’s ends, and test the weight at the trial — a heavy piece will drag the ponytail down by hour three.
7. Tousled Updo with Face-Framing Tendrils
Time: 25 min | Difficulty: Medium | Extensions: 1 one-piece clip-in at the back + 2 small side wefts | Best for: Medium thin hair, boho / beach / garden weddings, brides who hate “done” hair
Tousled texture is camouflage: loose pieces break up every line, including any weft edge.
How to:
- Clip the one-piece weft across the back at ear level, plus a small weft behind each ear.
- Curl everything loosely and let it cool.
- Gather the hair up loosely, pinning sections at random heights — no symmetry, no tight pulls.
- Pull out soft tendrils around the face and at the nape; curl them once more.
- Pin a few fresh blooms or a small comb into the loosest section.
You’ll need: one-piece clip-in + 2 small wefts, curling iron, bobby pins, texture spray. Extension note: the messy finish hides wefts better than any sleek style — ideal if you are nervous about extensions showing. Beach note: this is the most humidity-forgiving updo here; wind only improves it.
8. Braided Crown with a Halo Extension
Time: 20 min | Difficulty: Easy | Extensions: 1 halo (wire) extension | Best for: Medium thin hair, romantic or vintage weddings, sensitive scalps
No clips at all: the halo sits on a clear wire, your own hair falls over it, and the braids lock everything in place.
How to:
- Place the halo about 1 inch back from the hairline, and pull your top layer over the wire.
- Take a section from above each ear and braid each toward the back.
- Cross the braids at the back of the crown and pin with X-pins.
- Loosen the braids slightly (pancake) so they look full.
- Check the wire line in daylight — if it shows, pull a little more top hair forward.
You’ll need: halo extension, bobby pins, light spray. Extension note: halos are the gentlest option for fragile or thinning hair — nothing grips, pulls, or tapes onto your strands. Sensitive-scalp tip: if clips ever hurt, switch to a halo for the whole day.
9. Soft Side-Swept Curls with Tape-Ins
Time: 30 min | Difficulty: Medium (stylist) | Extensions: 4–6 tape-in pieces, fitted by a stylist 2+ weeks ahead | Best for: Long thin hair, glamorous weddings, brides who want volume for the honeymoon too
Tape-ins stay in for weeks, so the wedding-day style starts from hair that is already fuller — and the side sweep keeps the tapes covered on the swept side.
How to:
- Have tape-ins fitted low and wide (never near the part or hairline) at least 2 weeks before the wedding.
- On the day, set a deep side part on the side with fewer tapes.
- Curl in large sections away from the face; let cool.
- Sweep all hair to one shoulder, pinning the smaller side flat behind the ear with hidden pins.
- Finish with shine spray on the lengths only.
You’ll need: stylist-fitted tape-ins, large-barrel iron, hidden pins, shine spray. Extension note: tape-ins must be fitted by a pro — DIY tape-ins on fine hair are the fastest route to visible tabs and breakage. Trial rule: trial the exact style on the taped hair, not on your natural hair.
10. Voluminous Top Knot with a Bun Filler + Weft
Time: 15 min | Difficulty: Easy | Extensions: 1 clip-in weft + small bun filler | Best for: Medium thin hair, modern or minimalist weddings, hot-weather days
Height is the trick: a top knot pulls the eye up, and the filler supplies the volume your hair cannot.
How to:
- Clip one weft across the back at ear level.
- Gather into a high ponytail at the crown. Slide a small filler over the base.
- Wrap the ponytail around the filler, pinning every inch, tucking ends underneath.
- Pull 2–3 tiny pieces loose at the hairline for softness.
- Spray the knot only; leave the hairline soft.
You’ll need: 1 clip-in weft, small bun filler, elastic, U-pins. Extension note: keep the filler small — an oversized donut on a fine-haired head looks like a helmet in photos.
11. Romantic Low Ponytail with Wrapped Base
Time: 15 min | Difficulty: Easy | Extensions: 1–2 clip-in wefts in the lengths | Best for: Medium thin hair, outdoor or rustic weddings, bridesmaids too
Soft, simple, and honest: a low ponytail with a wrapped base hides the elastic and shows off waves.
How to:
- Clip wefts into the lower half; curl the lengths loosely.
- Gather into a low ponytail at the nape, leaving face-framing pieces out.
- Wrap a 1-inch strand around the elastic and pin underneath.
- Loosen the crown gently for a soft silhouette.
- Add a small bow, ribbon, or pearl comb above the base if you like.
You’ll need: 1–2 clip-in wefts, elastic, curling iron, bobby pin. Extension note: the wrapped base is also where a clip-in ponytail piece can join invisibly if you want more length.
12. Waterfall Braid with Clip-In Volume
Time: 25 min | Difficulty: Medium | Extensions: 2 clip-in wefts in the lengths | Best for: Long thin hair, romantic or fairy-tale weddings, photo-heavy days
The waterfall braid drops strands as it goes, so the lengths do all the showing — give them the volume.
How to:
- Clip wefts into the lengths; curl everything in loose waves.
- Start a French-style braid at one temple, dropping the bottom strand each stitch and picking up a new one.
- Carry the braid across the back to the other temple and pin.
- Let the dropped strands fall through the braid — these are the “waterfall.”
- Pancake the braid loops gently for fullness.
You’ll need: 2 clip-in wefts, curling iron, bobby pins, light spray. Extension note: the braid’s own bulk covers the wefts; the dropped strands must be curled or they look stringy against the braid.
13. Vintage Finger Waves with a Halo
Time: 30 min | Difficulty: Medium | Extensions: 1 halo extension | Best for: Short or medium thin hair, vintage / Great Gatsby weddings, birdcage veils
Finger waves lie flat against the head — exactly where a halo wants to be hidden.
How to:
- Place the halo, pull your top layer over the wire.
- Set sculpted waves with gel and finger-shaping on the top and sides; clip to set.
- Dry on low heat or let set, then remove clips.
- Pin the lengths into a low roll at the nape if hair is long enough; otherwise tuck behind the ears.
- Add a birdcage veil or crystal headpiece at the crown.
You’ll need: halo extension, strong-hold gel, wave clips, birdcage veil (optional). Extension note: the halo adds the length behind the waves without any clips near the sculpted front. Short-hair note: halos work on chin-length hair if the top layer covers the wire — test at the trial.
14. Curly Updo with Clip-In Curls (Thin Curly Hair)
Time: 25 min | Difficulty: Medium | Extensions: 2 curly-textured clip-in wefts, matched to your curl pattern | Best for: Thin curly hair, any venue, brides who want to keep their natural texture
The rule for curly thin hair: match the curl pattern, not just the color. Straight wefts in curly hair will always separate and show.
How to:
- Define your own curls first (curl cream, diffuse, cool completely).
- Clip curly wefts into the back and sides, low, under your own top curls.
- Gather loosely into a high or low updo, pinning curl clumps — never raking through.
- Leave a few curls out around the face and nape.
- Refresh with a light curl mist, not spray — spray flattens curls.
You’ll need: curly clip-in wefts, curl cream, diffuser, bobby pins. Extension note: buy wefts in your curl pattern (2B/3A etc.) and have a stylist trim them to blend — untrimmed wefts end in a blunt line that curls cannot hide.
15. Straight Sleek Chignon with Seamless Wefts (Thin Straight Hair)
Time: 20 min | Difficulty: Medium | Extensions: 2 seamless wefts, trimmed to end at or above your own length | Best for: Thin straight hair, formal or city weddings, high-neck dresses
Straight hair is the hardest case: no texture to break up the join. The fix is trimming the wefts shorter than your hair and point-cutting their ends.
How to:
- Clip seamless wefts low across the back. Have them point-cut (not blunt-cut) so the ends taper.
- Blow-dry straight with a paddle brush; flat-iron only the top layer.
- Gather into a low chignon at the nape; wrap and pin tightly.
- Run a flat iron once over the chignon’s surface for a glassy finish.
- Check the back in daylight — straight hair shows a weft edge from behind if one is peeking.
You’ll need: 2 seamless wefts (point-cut), paddle brush, flat iron, U-pins, serum. Extension note: if your hair is pin-straight and very fine, skip lengths entirely and use the wefts only inside the chignon — the bun is the volume.
16. Short-Hair Bob with a Halo + Faux Fullness
Time: 15 min | Difficulty: Easy | Extensions: 1 short halo, at or above your own length | Best for: Thin short hair (bob / lob), brides who refuse to grow it out for the wedding
Short hair + extensions fails when the piece is longer than your hair. Keep the halo at or above your own length and let it add density, not length.
How to:
- Place the halo; pull your top layer over the wire. Trim the halo to end just above your own ends.
- Blow-dry with a round brush, turning ends under for a bob shape.
- Add a deep side part and tuck one side behind the ear.
- Add a headband, comb, or veil at the crown — accessories anchor short styles and cover the wire line.
- Texturize the ends with a tiny amount of pomade for a thicker edge.
You’ll need: short halo, round brush, pomade, headband or comb. Extension note: short hair shows clips easily, which is why this style uses a halo — no clips, no tabs, nothing to peek through. Short-hair rule: density, not length. Always.
Veil + Extensions: How to Wear Both
- Comb placement: the veil comb goes into your own hair above the top weft, or into the pinned section of a half-up — never through a weft or onto a halo wire. If the comb must sit where a weft is, move the weft down half an inch.
- Best styles for veils: low chignon (Style 2), half-up twist (Style 4), sleek bun (Style 5), braided crown (Style 8). The pinned structure holds the comb.
- Trickiest: worn-down waves (Style 1) — the comb has little to grip. Anchor it with 2 crossed bobby pins through the comb into teased hair, not just the comb alone.
- Removal: take the veil out first, then the extensions, then brush. Pulling a veil comb through a weft is how clips get ripped out and hair gets broken. Ask your maid of honor to do the veil removal — it is a two-hand job.
All-Day Hold System (So Nothing Slips by the First Dance)
- Tease every grip point. Backcomb roots under every clip, pin, and comb. Teasing is the grip; spray alone is not.
- X-pin everything. Two bobby pins crossed over each other hold 3x better than one, and they disappear under hair.
- Layer product in order: heat protectant → style → texture spray at roots → flexible spray to finish. Spraying before styling makes hair slippery; spraying only at the end makes it stiff.
- Carry a touch-up kit: 6 bobby pins, 2 mini claw clips, blotting papers, one mini spray, and a small comb. Assign it to one bridesmaid.
- Weight check: if your head feels heavy at the trial, it will hurt by dinner. Remove one weft and re-check — you will look better with slightly less hair that stays put.
Damage safety — read this before you buy. Clip-ins are safe for thin hair when they are light, well-placed, and removed nightly. Tape-ins and rings can stress fragile strands if they are too heavy or left too long — get them from a stylist who works with fine hair, and tell them if your hair breaks easily. Never sleep in clip-ins. And the honest rule: if your scalp shows through when your hair falls loose, extensions alone may not cover it — a topper or a wig gives fuller, more secure coverage for significant thinning, and a stylist can blend one invisibly. There is no shame in the option that actually looks best.
No-Extension Fallback (If You Skip Extensions)
Extensions are not mandatory. Teasing + a bun filler + root powder on the part line can fake surprising fullness for updos, and a half-up with a crystal comb needs almost no volume to look finished. If budget or hair health rules extensions out, Style 2 (chignon + filler), Style 4 (half-up twist), and Style 10 (top knot + filler) all work with zero wefts — just add extra teasing and a filler.
7 Mistakes That Give Extensions Away
- Placing wefts too high, at the part line, or near the hairline.
- Using a full heavy set when 2–3 wefts would do.
- Matching color to your roots instead of your mid-lengths and ends.
- Leaving wefts longer than your own hair with a blunt cut.
- Styling bone-straight over a weft with no texture to break the line.
- Skipping the daylight check — especially the back view.
- Sleeping in clip-ins, or leaving tape-ins in past their service window.
Budget vs Premium Kit
| Budget (~$120–$200) | Premium (~$350–$600) | |
|---|---|---|
| Extensions | Seamless clip-in set, synthetic-heat-friendly or entry Remy | Remy human-hair seamless set, color-matched + trimmed by a stylist |
| Filler | Foam donut ($5–$10) | Human-hair bun piece, color-matched |
| Tools | Iron you own + drugstore pins/spray | Stylist trial + day-of styling |
| Veil help | Maid of honor removes it | Stylist stays for veil removal + touch-ups |
Either kit works — the premium difference is the color match, the trim, and the stylist’s hands, not the concept.
Trial Timeline
- 6–8 weeks out: decide clip-in/halo vs tape-in. Order clip-ins/halos now (exchanges take time). Book the stylist trial.
- 3–4 weeks out: tape-ins fitted if using them. First full trial with the exact extensions, veil, and accessories. Photograph the back in daylight.
- 1 week out: final check — extensions washed (if needed), clips tight, color still matching, touch-up kit packed.
- Day of: clip in on clean, dry, product-light hair. Style, check in daylight, then veil.
Choosing Guide: Match the Style to You
- By length: short (bob/lob) → Style 16, Style 13, Style 8. Medium (shoulder/collarbone) → Styles 2, 4, 5, 7, 10, 11. Long → Styles 1, 3, 6, 9, 12.
- By texture: straight → Styles 5, 15 (and keep wefts short). Wavy → Styles 1, 4, 11. Curly → Style 14.
- By face shape: round faces → height at the crown (Styles 7, 10) and face-framing tendrils; avoid flat, center-parted sleek styles. Oval faces → almost everything; the side sweep (Style 9) is especially flattering.
- By venue: outdoor/garden/beach → braids and updos (Styles 3, 7, 8) — wind is their friend. Ballroom/formal → waves, chignon, sleek bun (Styles 1, 2, 5).
- By dress: strapless or sweetheart → worn-down waves or half-up (Styles 1, 4). High neck / long sleeves → updos (Styles 2, 5, 7) so the dress shows. Backless → low chignon or low ponytail (Styles 2, 11).
Bridesmaids & Guests
Everything here scales down: bridesmaids with thin hair can wear the same styles with one weft instead of three, and the half-up twist (Style 4) is the easiest group style — same structure on everyone, different accessories. Wedding guests: the low ponytail (Style 11) and the half-up twist (Style 4) with a single clip-in weft are the fastest guest looks, and both survive a full reception.
Pro Tips
- Rehearse with the exact set you will wear — not a borrowed set, not “similar” wefts.
- Wash clip-ins the night before (every 15–20 wears), never the morning of — freshly washed extensions are slippery.
- Curl wefts and natural hair together in the same sections for one blended texture.
- Photograph the back of every trial in daylight and zoom in on the weft lines.
- If a clip hurts, it is misplaced — move it, do not endure it.
- Keep extensions 1–2 inches shorter than your own hair unless length is the whole point.
Frequently Asked Questions
Can you wear hair extensions if your hair is very thin? Usually yes — the test is what your own top layer covers, not how thin your hair feels. If your top layer hides a weft in daylight, clip-ins or a halo will work. If your scalp shows through when your hair falls loose, a topper or wig gives better, more secure coverage than extensions alone. A stylist can assess this in five minutes at a consultation.
How do you hide clip-in extensions in thin hair? Place wefts low (at or below ear level, an inch below the parting), leave a deep layer of your own hair over each weft, use fewer and lighter wefts than you think you need, tease the roots under every clip, match the color to your mid-lengths and ends, and check the back in natural light. Texture — waves, curls, tousled finishes — hides every remaining line.
What type of extensions are best for thin, fine hair? Seamless (flat-silicone-weft) clip-ins are the safest all-rounder: light, removable, DIY-friendly. Halos are gentlest (no clips at all) and best for sensitive scalps. Tape-ins work if fitted by a stylist experienced with fine hair. Avoid heavy standard-weft clip-ins and heavy ring systems on fragile hair.
Will hair extensions damage my thin hair? Lightweight clip-ins and halos, worn for the day and removed at night, rarely damage healthy thin hair. Damage comes from weight (too many grams), tension (clips always in the same spot), and time (sleeping in clip-ins, tape-ins left past their window). Move clip positions slightly between wears, never sleep in clip-ins, and get tape-ins/rings fitted and removed by a pro.
How many grams of extensions do I need for thin hair? 100–140 grams is plenty for most thin-haired brides; 150–180 grams is the ceiling. More weight pulls, shows, and slips. If fullness is the goal (not length), you may need even less — 2–3 wefts, not a full set.
Can I wear a veil with hair extensions? Yes. Put the veil comb into your own hair above the top weft or into the pinned section of a half-up — never through a weft or onto a halo wire. Remove the veil first at the end of the night, then the extensions. Updos and half-ups hold veils most securely; worn-down waves need crossed bobby pins through the comb for grip.
How long do clip-in extensions last? Can I sleep in them? Quality Remy human-hair clip-ins last 6–12 months with care (occasional wear), 3–6 months with daily wear. Wash every 15–20 wears, store in a case, and avoid excessive heat. Never sleep in clip-ins — they tangle, pull, and damage both your hair and the extensions. Remove them before bed, every night.
Related reading: Bridal Updos for Thin Hair · Half Up Half Down Wedding Hair · Wedding Hairstyles for Long Hair