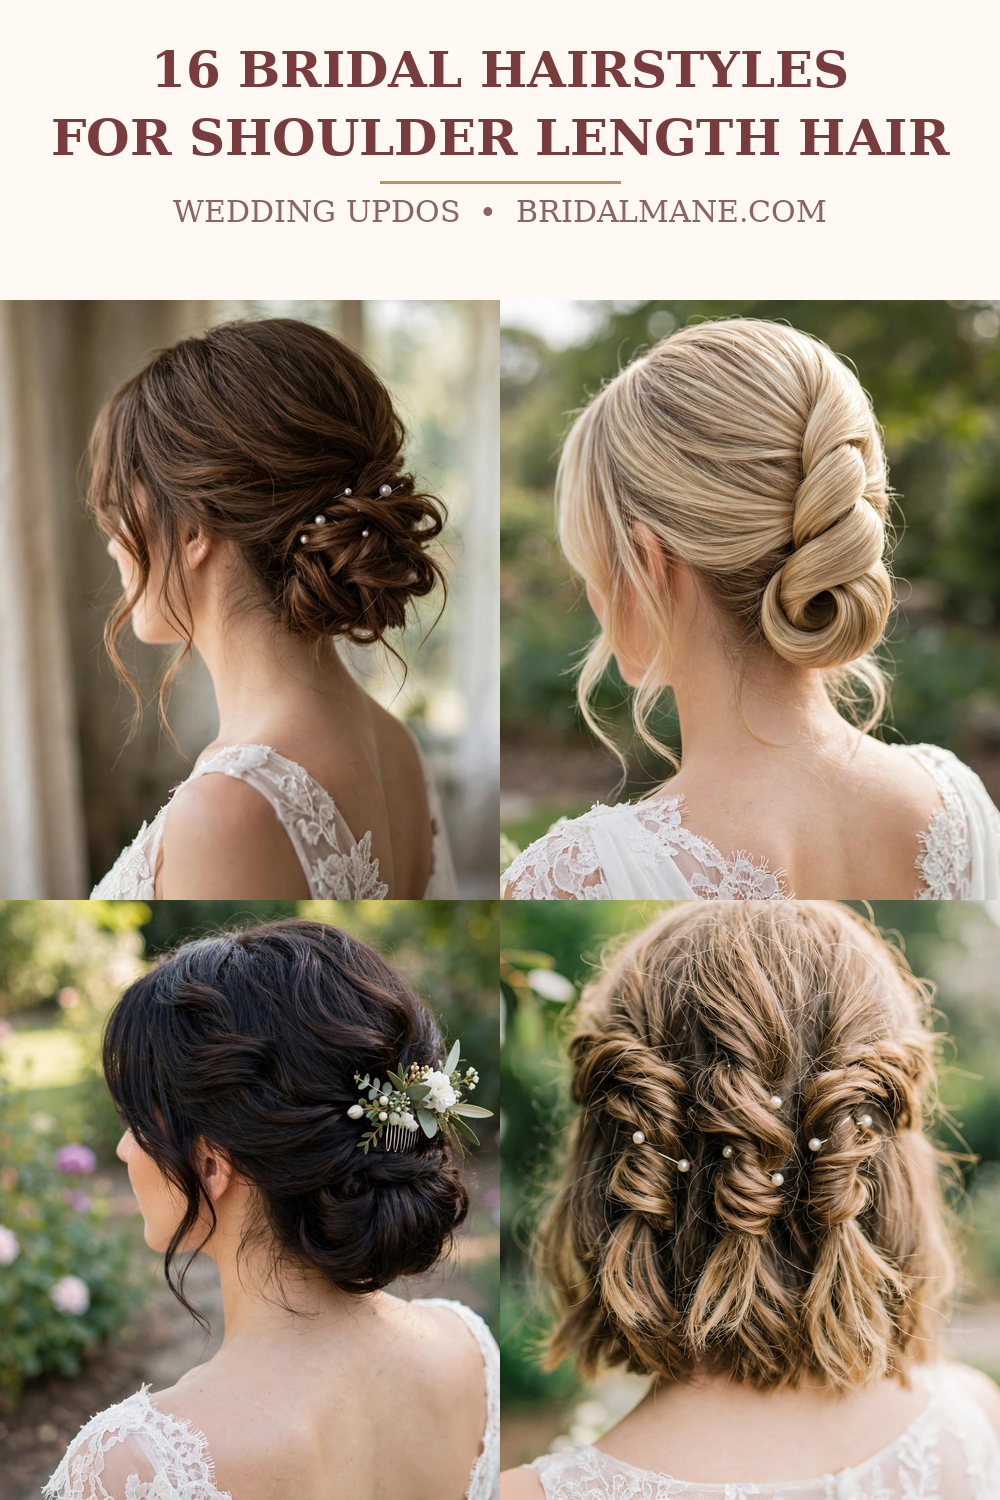
16 Wedding Updos for Shoulder Length Hair (2026)
16 Wedding Updos for Shoulder Length Hair (2026)
Shoulder-length hair is the most underestimated bridal length there is. Too short for a dramatic waterfall braid, too long to leave plain — or so the internet keeps telling you. The truth is the opposite: shoulder length is the sweet spot for updos. Your bun is never so heavy it drags downward. Your twist never turns into a bulky log on the back of your head. Your pins actually hold, because there is less weight pulling against them.
The problem is not your length. The problem is that almost every updo guide is written for long hair, and the shoulder-length advice that does exist is either three vague sentences ("pull back, twist, pin") or a 70-photo gallery with no instructions at all. This guide fixes that. Every one of the 16 updos below is built specifically for hair that grazes the shoulders, with a time, a difficulty, a numbered how-to, the exact products and tools, who it suits best, and — most important — the anchor that keeps it up until the last dance.
The ponytail test: if you can pull your hair into a low ponytail — even a short, stubby one — you can do every updo in this guide. If a few nape hairs escape, that is normal for this length, and the anchor system below handles it.
The 5-Rule Anchor System (read this first)
Every style below runs on the same five rules. Learn them once, and any updo gets easier:
- Grip before shape. Clean, freshly conditioned hair spits pins out. Wash the night before, not the morning of. Work volumizing mousse into damp roots, and mist dry shampoo or texture spray at the roots before you pin anything. You want the hair to feel slightly "dirty" — that grit is what holds pins.
- Build a hidden anchor. The single best trick for shoulder-length hair: braid the bottom layer at the nape into one small flat braid and pin it against your scalp. Every other pin in the style hooks into that braid instead of sliding down smooth hair. This one move ends the "my updo fell out by noon" problem.
- Pin with the wavy side down. The wavy side of a bobby pin is the grip side. Slide pins in flat against the scalp, wavy side down, and cross two pins in an X over every join. Never pry a pin open with your teeth — it ruins the tension and the pin slides right out.
- Work in sections, never one mass. One ponytail-based bun is the fastest way to fail at this length. Divide the back into 2–3 sections and secure each one separately. If one loosens, the style survives — and smaller sections mean shorter "reach," so layered ends actually stay tucked.
- Pancake and shake-test. After pinning a twist or braid, gently pull its edges outward with your fingertips ("pancaking"). A twist pulled 30% wider reads as twice as thick. When you finish, shake your head firmly: nothing should shift. If it does, add one X-pin at the moving join — do not add more spray.
Quick Tutorial
Watch the 30-second tutorial for the three moves every style below uses: anchor the nape, twist and pin, pancake and spray. The full step-by-steps for all 16 styles follow below.
The 16 Styles
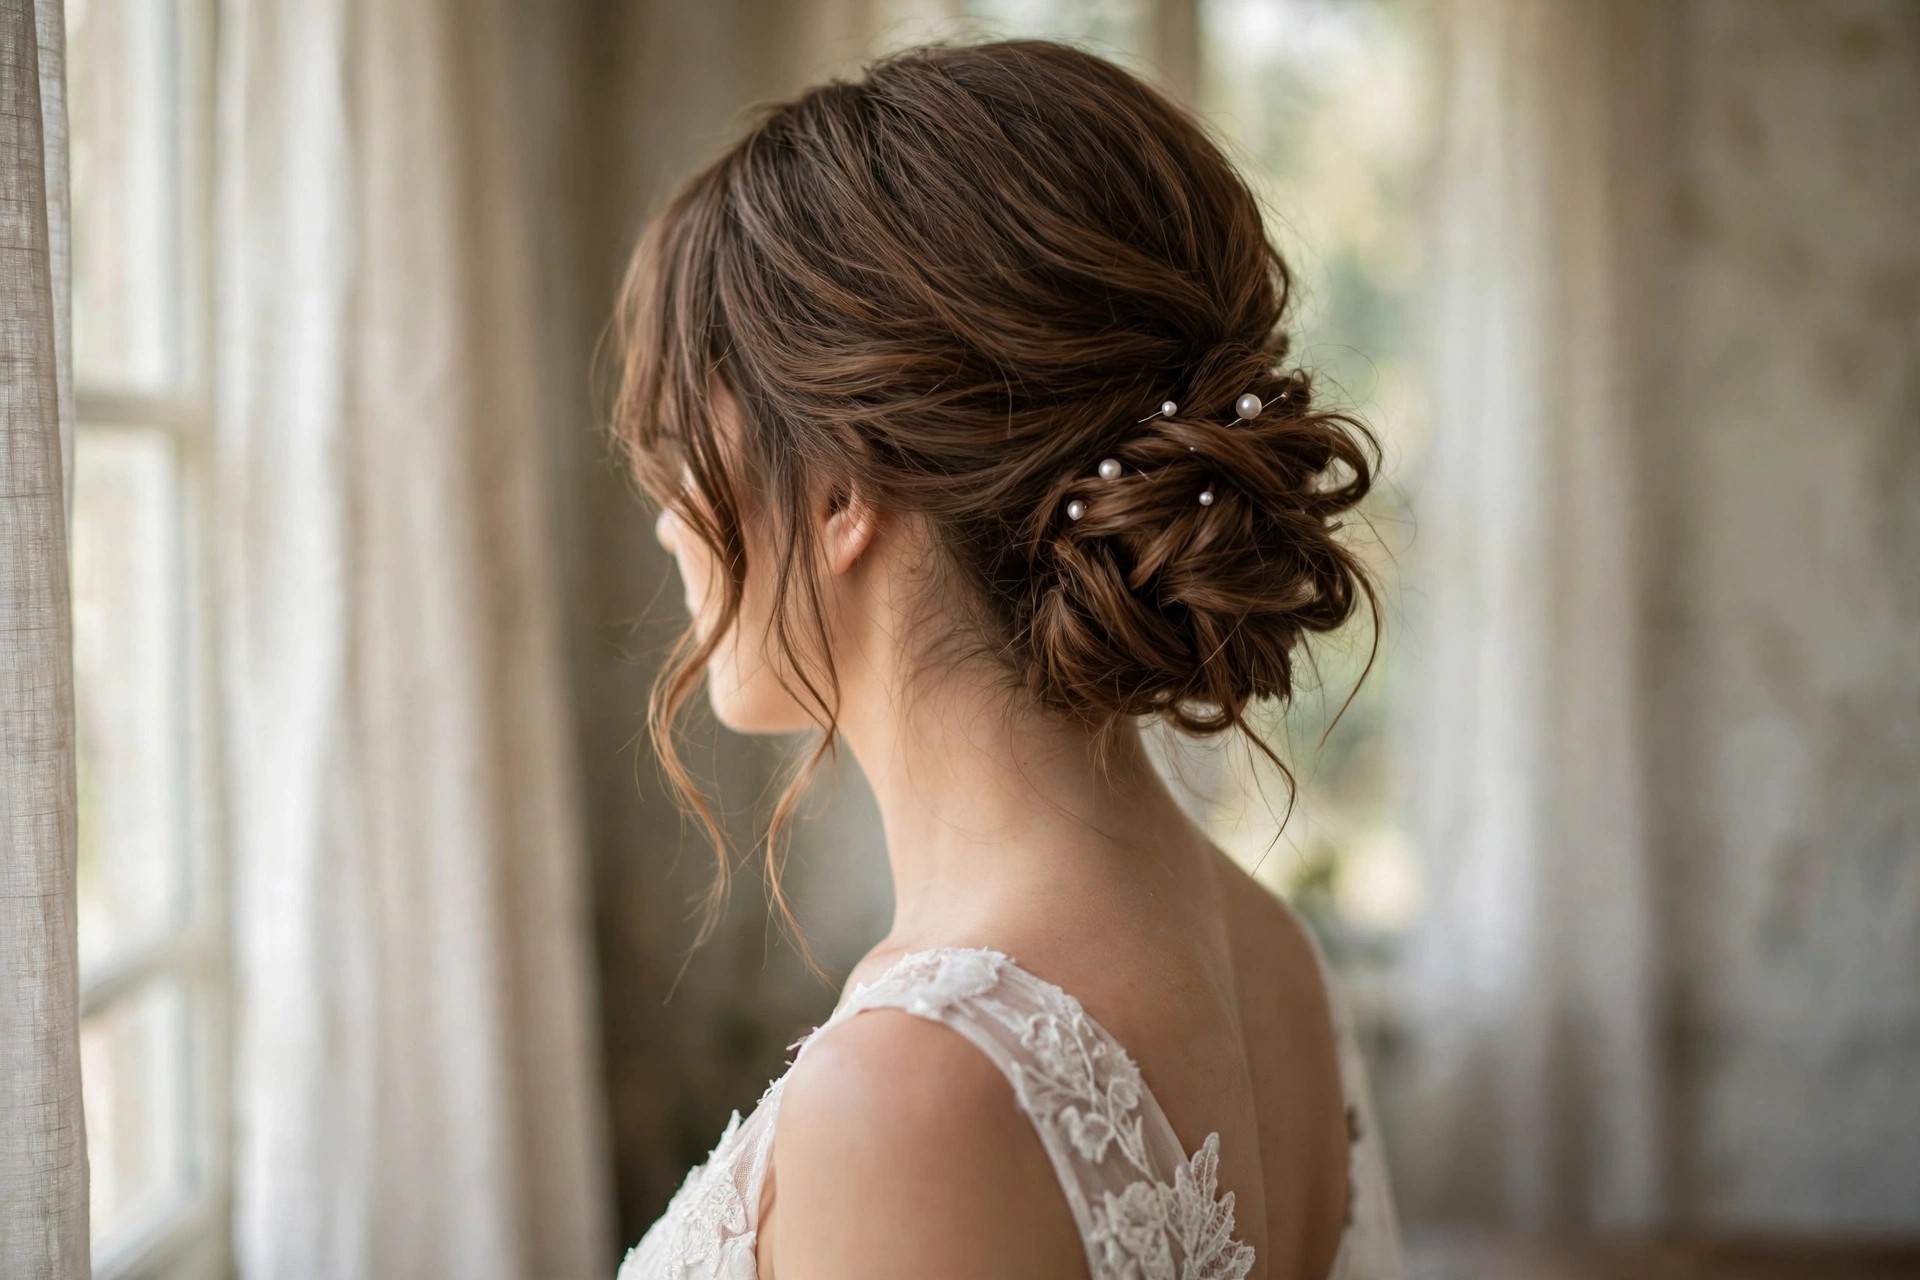
1. Low Deconstructed Chignon (lob / bob)
The holy grail for shoulder-length hair. Because your hair is not super long, the "tail" of the chignon is easy to loop and hide — no long ends to wrestle. Leave a few face-framing pieces out and it never looks severe.
- Time: 20 minutes | Difficulty: Easy–Medium | Anchor: hidden nape braid + X-pins
- You'll need: 8–10 bobby pins, 2 U-pins, small elastic, texture spray, flexible-hold hairspray.
How to:
- Texture-spray the roots. Build the hidden nape braid: take the bottom inch of hair at the nape, braid it flat, and pin it against your scalp.
- Gather the rest into a low ponytail at the nape and secure with a small elastic.
- Divide the ponytail into 3 sections. Twist each loosely, loop it around the elastic, and pin the end under the loop with an X-pin.
- Pancake each loop gently to widen it. Pull out two slim face-framing pieces.
- Mist with flexible-hold spray. Shake-test.
Best for: oval and round faces, low-back and strapless gowns, brides who want a classic, veil-friendly base. Anchor note: hook every loop pin into the nape braid — that is what stops the chignon from sliding down by the reception.
2. Modern French Twist (straight / wavy)
The French twist used to be called "grandma hair." It is having a massive moment in 2026 — and shoulder length is the perfect amount of hair for it. Long hair makes the twist a bulky log; shoulder length gives a slim, chic silhouette that sits flush against the head.
- Time: 15 minutes | Difficulty: Medium | Anchor: X-pins along the twist seam
- You'll need: 6–8 bobby pins, 2 U-pins, smoothing cream, texture spray, medium-hold hairspray.
How to:
- Lightly curl the hair first with a 3/4-inch iron (smaller barrel = tighter curls you brush out into grip-building waves). Mist texture spray.
- Gather hair into a low ponytail in one hand — do not tie it. Place your thumb pointing down against the base of the ponytail (the "thumb method").
- Wrap the hair up and over your thumb, tucking the ends into the pocket you just created. Slide a large U-pin into the seam.
- Smooth the outer surface with smoothing cream on your palms. Pin along the seam with X-pinned bobby pins.
- Fan the top ends into a soft mini-bun, pin, and mist with medium-hold spray. Leave two wispy face-framing pieces for a modern finish.
Best for: formal and black-tie weddings, straight or wavy hair, high-neckline and boat-neck gowns. Anchor note: if the bottom bits keep falling out, build the hidden nape braid first — it gives the bottom of the twist something to grip.
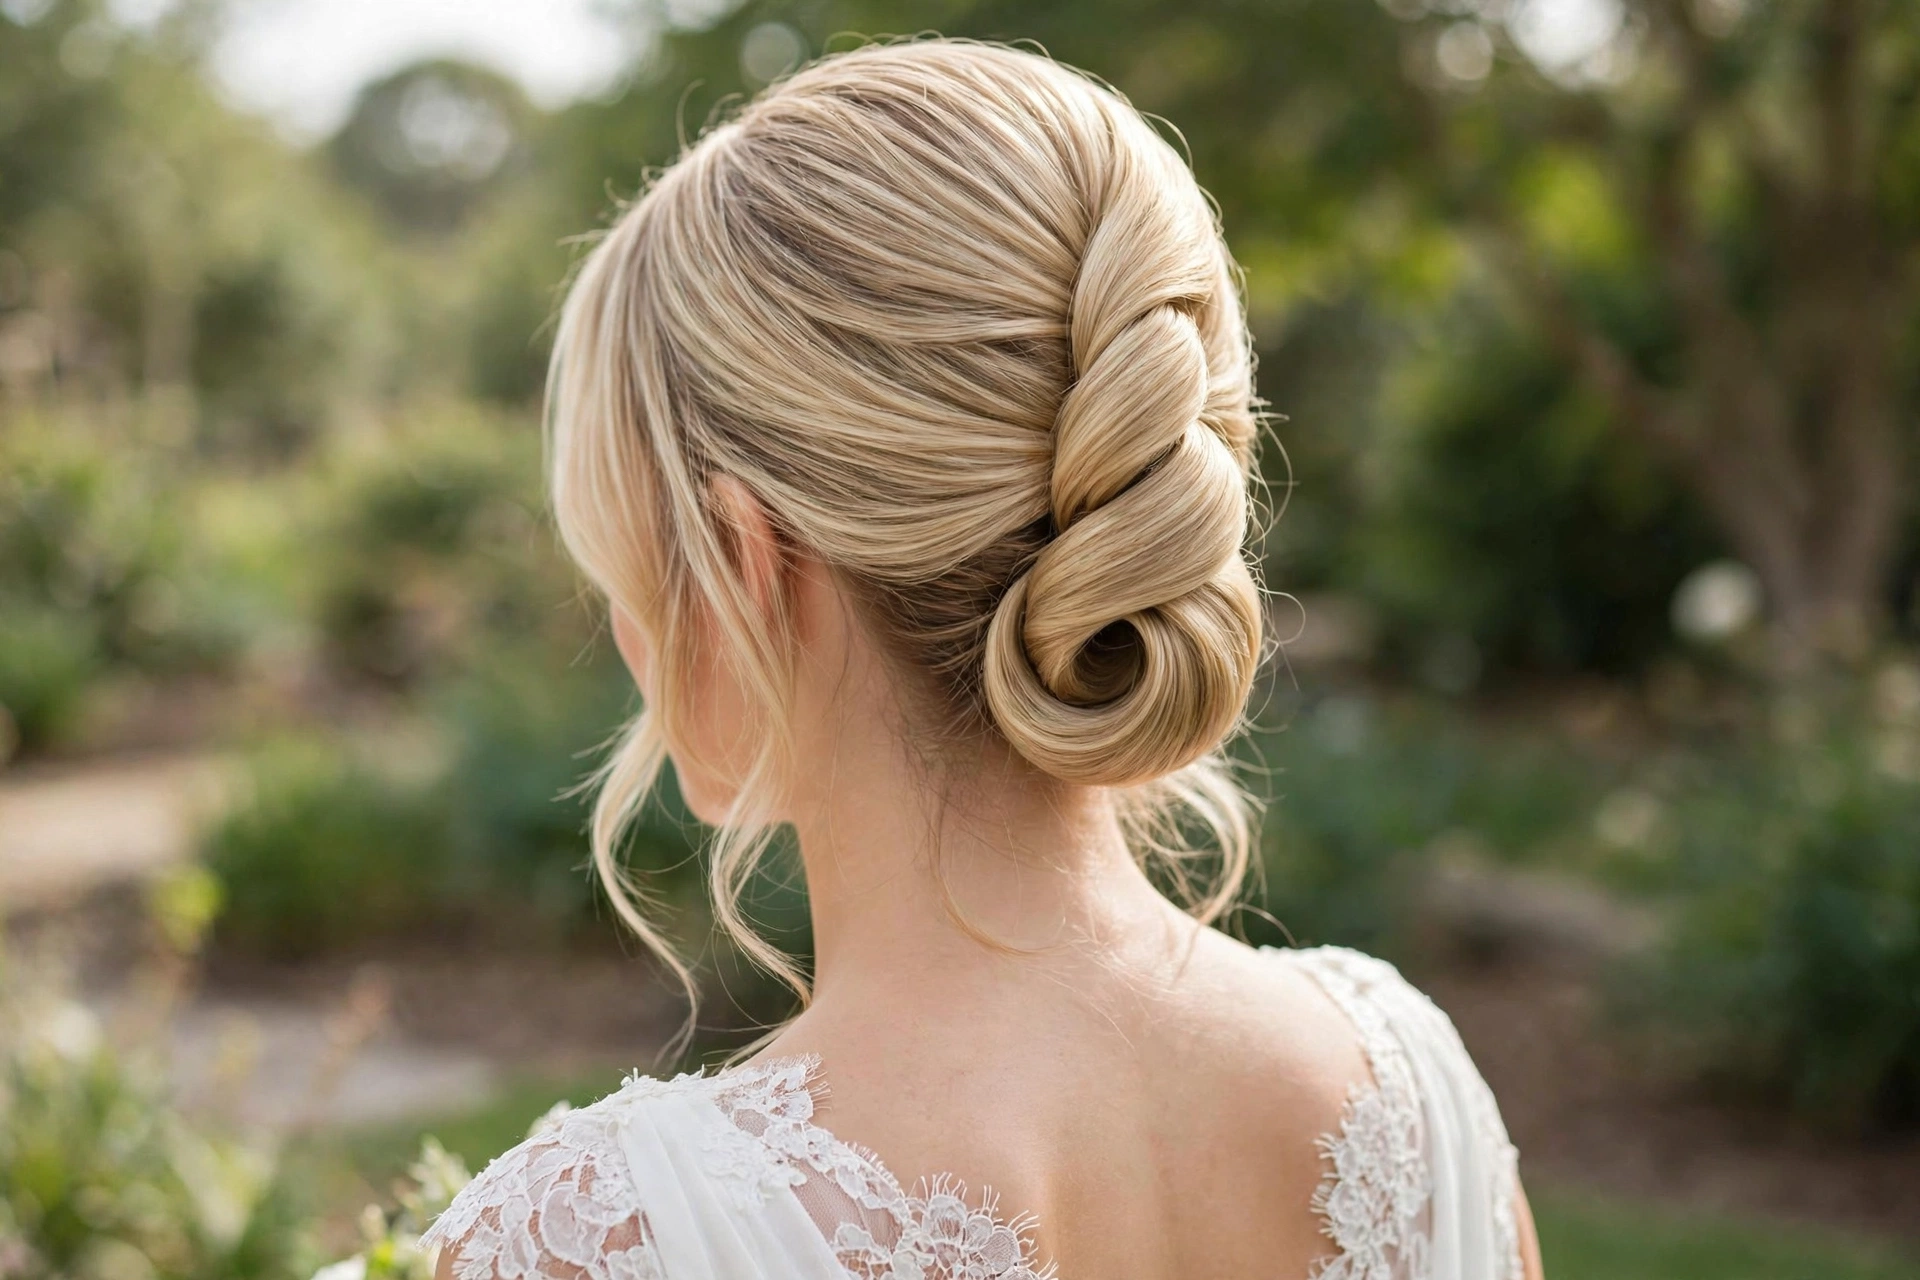
3. Gibson Tuck (all textures)
The vintage roll that looks like it took an hour and takes ten minutes. Shoulder-length hair tucks cleanly because there is no long tail to fold three times.
- Time: 10 minutes | Difficulty: Easy | Anchor: elastic + tuck pocket
- You'll need: 1 small elastic, 6–8 bobby pins, texture spray, light-hold spray.
How to:
- Texture-spray the roots. Gather hair into a low ponytail at the nape and tie with a small elastic.
- With your fingers, make a hole in the center of the hair just above the elastic.
- Flip the ponytail up and through the hole, pulling it all the way through so the sides twist.
- Roll the remaining tail upward into itself, tucking it into the pocket above the elastic.
- Pin the roll in place with X-pins, tuck any escaping ends, and mist lightly. Add a comb or floral pin at the roll for a bridal finish.
Best for: vintage and garden weddings, brides who want an updo they can genuinely DIY, veil wearers (the roll is a perfect veil-comb ledge — see the veil section). Anchor note: the tuck pocket does the holding — if the roll feels loose, tighten by pulling the two sides of the ponytail base apart before pinning.
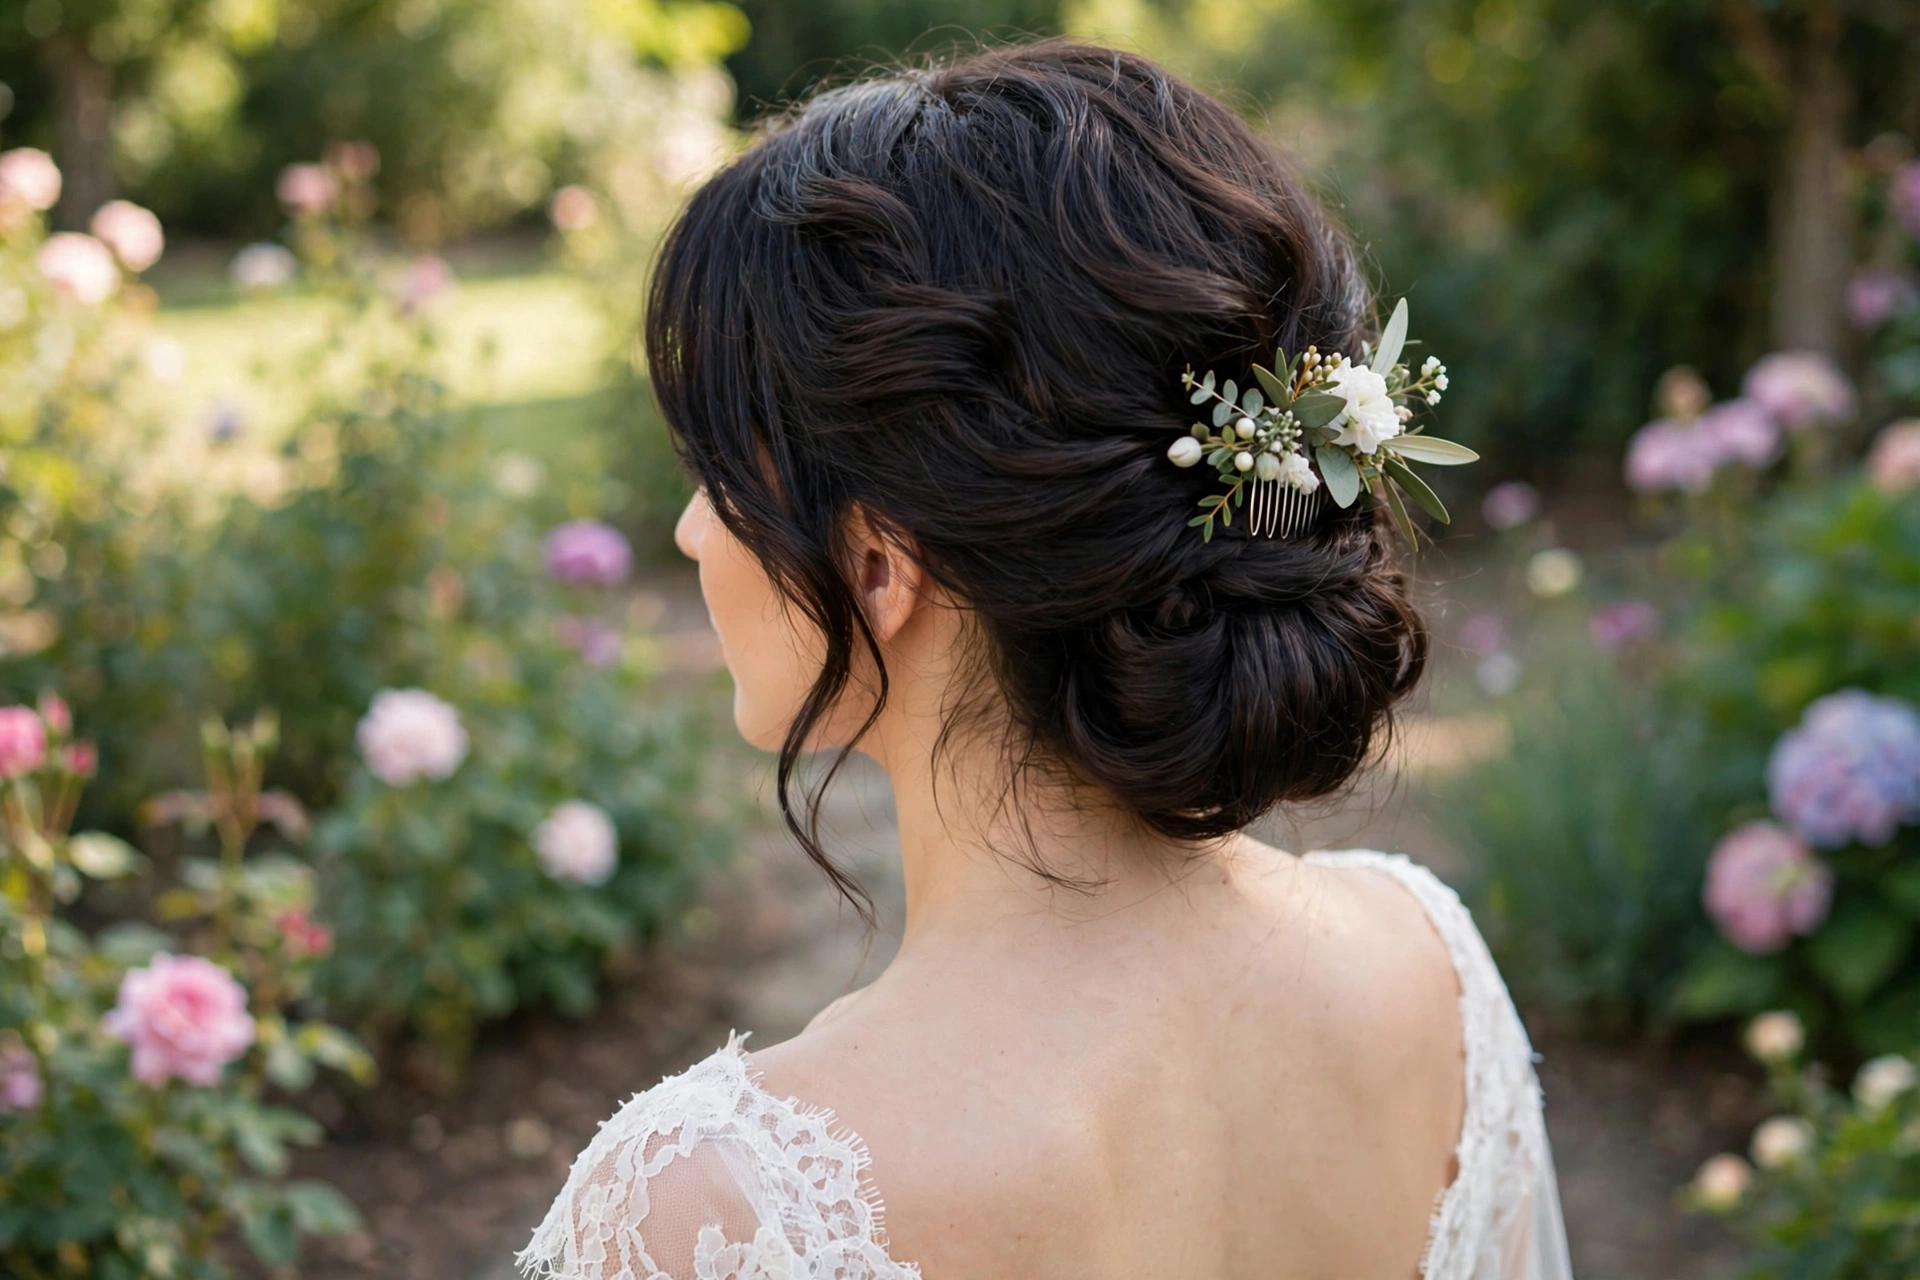
4. Side-Swept Low Updo (round face)
The most flattering updo for round faces at this length: everything sweeps to one side, which creates a diagonal line that visually lengthens the face, and the asymmetry photographs beautifully from the front.
- Time: 20 minutes | Difficulty: Easy–Medium | Anchor: side X-pin grid
- You'll need: 8–10 bobby pins, 2 U-pins, texture spray, flexible-hold spray.
How to:
- Part hair deeply on one side (above the arch of the eyebrow). Texture-spray the roots on the fuller side.
- Sweep all the hair to the opposite side of the part and gather it into a low side ponytail just behind the ear. Tie with a small elastic.
- Twist the ponytail, coil it into a low bun, and pin with X-pins hooked into the side hair above.
- Pancake the bun gently. Pull out one soft tendril on the fuller side of the face.
- Mist with flexible-hold spray. Check the front view in the mirror — the sweep should read clearly in photos.
Best for: round faces, one-shoulder and off-the-shoulder gowns, brides who want to show off earrings. Anchor note: pin the bun to the hair above it, not just to itself — the side grid is what stops a side bun from migrating toward the middle.
5. Triple Twist for Layers (layered hair / lob)
If you have face-framing layers or a shag cut, a single bun is impossible — everything spills out the sides. The triple twist fixes it by dividing the hair into three vertical sections so no strand has far to travel.
- Time: 20 minutes | Difficulty: Easy–Medium | Anchor: three separate X-pin joins
- You'll need: 10–12 bobby pins, texture spray, flexible-hold spray.
How to:
- Texture-spray the roots. Divide the back into three vertical sections: left, center, right. Clip two aside.
- Roll the center section inward toward the middle and pin it at the nape with X-pins.
- Roll the left section inward toward the center and pin it over the center roll's edge. Repeat on the right.
- Pancake each twist by pulling its edges outward — this is what turns three skinny rolls into one full-looking updo.
- Tuck the shorter layer ends under the neighboring twist. Add pearl pins along the joins and mist.
Best for: layered lobs, shag cuts, bridesmaids with grown-out layers, anyone whose hair "won't stay in a bun." Anchor note: each twist is independently secured, so one escaping layer cannot unravel the style — this is the most reliable updo in the guide for stubborn layers.
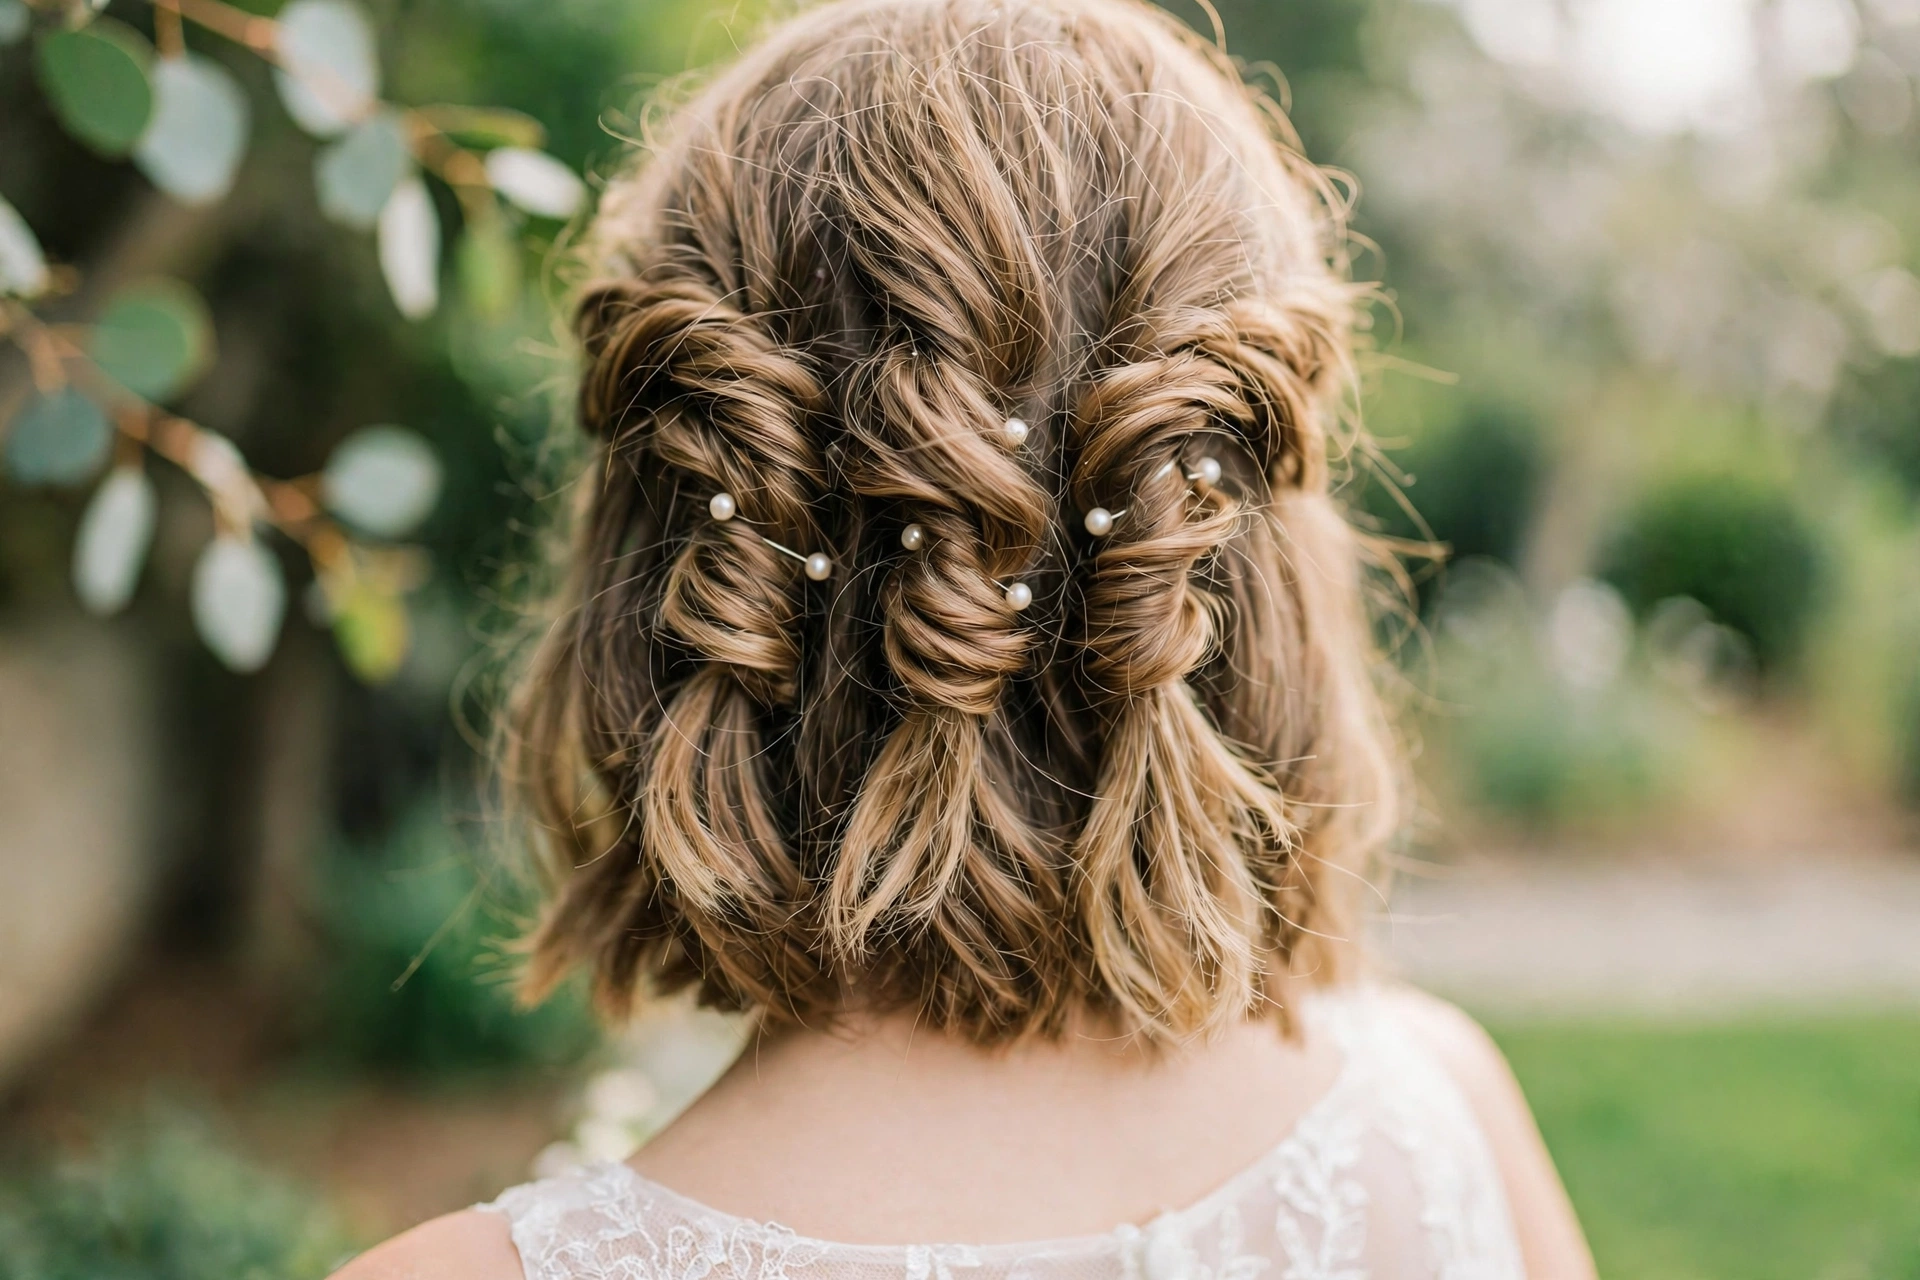
6. Messy Textured Bun (boho / garden)
The undone bun that looks effortless because the texture does the work. Shoulder-length hair is ideal here: the bun stays small and soft instead of turning into a heavy knot.
- Time: 15 minutes | Difficulty: Easy | Anchor: textured base + X-pins
- You'll need: 8 bobby pins, sea salt spray or dry texturizer, flexible-hold spray.
How to:
- Mist sea salt spray through the lengths. Scrunch and let air-dry, or diffuse on low — you want visible texture, not smoothness.
- Gather hair loosely into a low ponytail. Do not smooth the top — bumps and waves are the point.
- Twist the ponytail loosely, wrap it around the base, and pin with X-pins, leaving the ends to poke out slightly.
- Pull a few strands loose around the face and at the nape. Pancake the bun edges.
- Mist lightly. The finish should look touchable, never shellacked.
Best for: boho, garden, and outdoor weddings, wavy and curly textures, flowy chiffon gowns. Anchor note: texture is the anchor here — smooth hair will not hold a messy bun, so do not skip the salt spray.
7. Braided Crown Updo (braided)
Two side braids meet at the back into a low knot — the crown braid gives you the romance of a braid with the security of an updo, and the braid itself acts as a built-in headband that keeps front layers out of your face.
- Time: 25 minutes | Difficulty: Medium | Anchor: braids as structure
- You'll need: 2 small clear elastics, 8–10 bobby pins, texture spray, flexible-hold spray.
How to:
- Part hair down the middle. Texture-spray the roots.
- Braid a 3-strand braid along each side from the temple back toward the nape. Secure each with a clear elastic.
- Cross the two braids at the nape and pin them flat with X-pins — this crossed pair is your anchor bar.
- Gather the remaining back hair into a low mini-bun tucked under the crossed braids. Pin into the braid bar.
- Pancake both braids gently to widen them. Mist and shake-test.
Best for: romantic and rustic weddings, brides who want braids without a full braided head, flower-crown wearers (the braids frame the crown). Anchor note: the crossed braids are structural — pin the bun into them, not into loose hair, and the whole style locks together.
8. Pinned Curly Updo (curly hair)
Do not fight your curls — pin them. Shoulder-length curls build a full updo with almost no backcombing, because each curl is its own little volume unit.
- Time: 20 minutes | Difficulty: Easy–Medium | Anchor: curl-by-curl pinning
- You'll need: 10–14 bobby pins (curly hair eats pins), curl-defining cream, light-hold spray.
How to:
- Apply curl-defining cream to damp curls and let them set in their natural pattern — do not brush out.
- Working curl by curl, lift each curl cluster up and toward the back of the head and pin it with a bobby pin hidden inside the curl.
- Build from the nape upward, letting curls overlap like shingles. Leave the curls around the face free.
- Tuck any curl that hangs below the nape upward and pin. Do not smooth anything — the texture is the style.
- Mist lightly with light-hold spray (heavy spray makes curls crunchy).
Best for: naturally curly and coily hair, garden and beach weddings, brides who want to look like themselves, only dressed up. Anchor note: pin inside the curl, not through it — a pin across a curl crushes it; a pin hidden inside it holds it.
9. Curtain-Fringe Updo (bangs / fringe)
Bangs do not disqualify you from an updo — they frame it. The trick is keeping the fringe out of the updo itself and styling it last, after everything else is pinned.
- Time: 20 minutes | Difficulty: Easy–Medium | Anchor: low chignon base + fringe styled last
- You'll need: 8 bobby pins, round brush or flat iron, texture spray, flexible-hold spray.
How to:
- Clip the fringe section out of the way. Build a low chignon (style #1) with the rest of the hair.
- Release the fringe. Blow-dry it with a round brush, sweeping each side away from the center part.
- If the fringe is long enough to tuck, pin its ends into the sides of the chignon. If it is short, leave it free and smooth with a fingertip of cream.
- Check the front view: the fringe should frame the face symmetrically, not cover the eyebrows.
- Mist the updo only — never spray the fringe directly, or it goes stiff.
Best for: curtain bangs, side-swept fringe, blunt fringe (with the ends pinned back), brides who wear bangs daily and want to look like themselves. Anchor note: styling the fringe last is the whole trick — pin it after the updo is done and it stays where you put it.
10. Padded Low Bun (fine / thin hair)
Fine hair makes a small bun. A mesh donut fixes that invisibly: pins have something to grab, and the bun looks substantial without needing more hair.
- Time: 20 minutes | Difficulty: Easy–Medium | Anchor: donut padding + X-pins
- You'll need: small mesh donut in your hair color, 8–10 bobby pins, 2 U-pins, volumizing mousse, texture spray.
How to:
- Apply mousse to damp roots, blow-dry upside down for lift, then mist texture spray.
- Backcomb the crown lightly (3–4 strokes), smooth the top layer over it, and gather hair into a low ponytail at the nape.
- Slide the donut over the ponytail to the base. Spread your hair evenly over the donut and pin the ends under it.
- Pancake the bun edges gently. Pull out two soft tendrils.
- Mist with flexible-hold spray. Shake-test.
Best for: fine or thin shoulder-length hair, classic and formal weddings, brides who want a bun that photographs full. Anchor note: if ends poke through the donut, wrap a second thin layer of hair over the spot and pin underneath — never add more spray, which makes fine hair clump.
11. Fishtail-to-Bun (braided)
A fishtail braid interlocks in two directions, so it resists slipping better than a three-strand plait — and on shoulder-length hair, a short fishtail coiled into a bun looks intricate while taking minutes.
- Time: 25 minutes | Difficulty: Medium | Anchor: fishtail structure + X-pins
- You'll need: 1 small clear elastic, 8 bobby pins, texture spray, flexible-hold spray.
How to:
- Texture-spray the lengths. Gather hair into a low side ponytail and tie with a clear elastic.
- Fishtail-braid the ponytail: split it in two, take a thin strand from the outside of one side, cross it to the inside of the other, and repeat. Keep strands thin — thin strands make the fishtail pattern show.
- Tie the end with a clear elastic. Pancake the braid by pulling its edges outward.
- Coil the braid into a low bun and pin with X-pins. Tuck the tail under.
- Mist and shake-test.
Best for: boho and rustic weddings, brides who want visible braid detail, outdoor venues (the fishtail holds in wind better than loose twists). Anchor note: pancake after braiding, then pin again — pancaking loosens pins, so always re-pin after widening.
12. Double Twisted Buns (thick hair / high bun)
Thick shoulder-length hair in one bun gets heavy and sags. Two buns split the weight — and placed high on the crown, they give the height a high bun promises without the collapse.
- Time: 25 minutes | Difficulty: Medium | Anchor: two independent bun bases
- You'll need: 2 small elastics, 10–12 bobby pins, texture spray, strong-hold spray.
How to:
- Part hair down the middle. Texture-spray the roots.
- Tie two low pigtails at the crown (higher than a nape ponytail, lower than top-of-head). Twist each pigtail until it coils around itself.
- Pin each coil into a bun with X-pins. Keep both buns the same size — check from behind.
- Pancake both buns. Pull out two face-framing pieces.
- Mist with strong-hold spray — thick hair needs it.
Best for: thick hair, brides who want height, modern and city weddings, anyone whose single bun always sags by the reception. Anchor note: because the weight is split, neither bun pulls against the other — this is the most sag-proof high placement for thick shoulder-length hair.
13. Sleek Low Knot (elegant / formal)
The minimalist updo: one smooth knot, no flyaways, maximum jewelry visibility. It is the easiest updo to photograph and the hardest to fake — smoothness is everything.
- Time: 15 minutes | Difficulty: Medium | Anchor: smoothing + X-pins
- You'll need: smoothing cream or gel, fine-tooth comb, 6–8 bobby pins, strong-hold spray, shine serum.
How to:
- Apply smoothing cream to damp hair. Blow-dry smooth with a paddle brush, or flat-iron the lengths.
- Part hair precisely down the middle (or deep side — pick one and commit). Comb the sides smooth back to the nape.
- Gather into a low ponytail. Twist it once, wrap it into a tight knot, and pin with X-pins.
- Comb any flyaways flat and pin. Mist with strong-hold spray. Finish with one drop of shine serum smoothed over the top — ends only, never roots.
- Check the front view: the part line should be ruler-straight.
Best for: minimalist and modern weddings, statement earrings, high-neckline gowns, black-tie receptions. Anchor note: sleek styles show every escaping hair — build the hidden nape braid first so the smooth surface has grip underneath.
14. 5-Minute Tuck-and-Pin (easy DIY / guests)
The fastest real updo in this guide. If you are a guest or bridesmaid getting ready in a hotel room with no stylist, this is your style.
- Time: 5 minutes | Difficulty: Easy | Anchor: headband or elastic base
- You'll need: 1 stretchy headband (or 1 elastic + pins), 6 bobby pins, texture spray.
How to:
- Put a stretchy headband over the top of your hair like a crown (or tie a low ponytail with an elastic).
- Starting from the front, take small sections and tuck them over and under the headband, working toward the back.
- Keep going until all the hair is looped around the band at the back. Pin any loose sections with bobby pins.
- Leave a few pieces loose around the face — "messy" is a style choice, not a mistake.
- Mist lightly. Done.
Best for: wedding guests, bridesmaids doing their own hair, second-day hair, anyone running late. Anchor note: the headband does the holding — if a section slips, re-tuck it under the band rather than adding pins.
15. Wind-Proof Pinned Updo (outdoor / beach / garden)
Outdoor weddings punish loose styles. This one pins every section flat in overlapping rows, so wind has nothing to grab — and the pins are placed with the wind direction in mind.
- Time: 25 minutes | Difficulty: Medium | Anchor: overlapping pinned rows + wind-direction pinning
- You'll need: 12–14 bobby pins, 2 U-pins, strong-hold spray, texture spray.
How to:
- Texture-spray the roots. Divide the hair into horizontal rows from nape to crown.
- Starting at the nape, twist each row and pin it flat against the head, overlapping the next row over it like shingles.
- Pin with the wind in mind: if the venue wind comes from the left, pin each section's join on the left side so gusts press the hair into the pins, not away from them.
- Finish with a low coiled bun at the nape tucked under the last row. Pin the bun into the rows above it.
- Mist with strong-hold spray. Do a wind test: shake your head and blow a hair dryer on low across the style — nothing should lift.
Best for: beach, garden, rooftop, and outdoor weddings, windy venues, brides who refuse to fuss with their hair all day. Anchor note: overlapping rows are the whole trick — a gust cannot lift a section that is pinned under the section above it.
16. Accessorized Updo (flowers / pearls / comb)
The updo where the accessory is the point. Build any low bun from this guide, then place the accessory last — its position changes the whole look.
- Time: 20 minutes + accessory | Difficulty: Easy–Medium | Anchor: base bun + accessory pins
- You'll need: base-bun supplies (style #1 or #10) + your accessory: pearl pins, floral comb, crystal vine, or fresh flowers.
How to:
- Build a low chignon or padded bun (styles #1 or #10). Finish and shake-test it before adding anything.
- Place the accessory: a floral comb slides into the top of the bun; pearl pins scatter in a diagonal row across the bun; a crystal vine weaves along the twist seam; fresh flowers tuck behind one ear.
- Pin every accessory with its own bobby pin — never rely on the comb's teeth alone. Fresh flowers need a pin through the stem.
- Step back and check the front view: the accessory should be visible from the front, not just from behind. Move it up half an inch if it disappears behind your head in photos.
- Mist lightly around — not over — fresh flowers (spray wilts petals).
Best for: brides who want one statement detail, boho flower crowns (scaled down), pearl-and-crystal themes, garden weddings. Anchor note: accessories add weight — a heavy comb needs two pins in an X, and the bun underneath must be shake-tested before the accessory goes on.
Choosing Guide: Which Updo for You?
By face shape
| Face shape | Best updos | Avoid |
|---|---|---|
| Round | Side-swept (#4), French twist (#2), triple twist (#5) — height + diagonal lines | Flat, center-parted, slicked styles that widen the face |
| Oval | Almost all — chignon (#1), Gibson tuck (#3), sleek knot (#13) | Nothing specific; match the neckline instead |
| Square | Messy bun (#6), curly pinned (#8), curtain fringe (#9) — softness around the jaw | Severe slicked-back styles |
| Heart | Low chignon (#1), padded bun (#10), accessorized (#16) — fullness at the jaw | Excessive crown height that broadens the forehead |
By hair texture
- Straight: curl first with a 3/4-inch iron for grip (styles #2, #13). Straight hair holds pins worst when silky-smooth.
- Wavy: your texture is free grip — styles #1, #6, #7 need the least prep.
- Curly: pin the curls (style #8); do not blow them straight first unless you want the sleek look, and then use smoothing cream.
- Fine/thin: pad the bun (style #10), use mousse + texture spray, and keep buns low — height without padding collapses.
- Thick: split the weight (style #12), use strong-hold spray, and section generously.
By neckline and venue
- Strapless / off-the-shoulder: low updos (#1, #10) show the shoulders; side-swept (#4) shows the earrings.
- High neckline / boat neck: French twist (#2) or sleek knot (#13) keeps the neckline clean.
- Low-back dress: low chignon (#1) or Gibson tuck (#3) — nothing covering the back detail.
- Outdoor / beach / garden: wind-proof pinned (#15), messy bun (#6), fishtail bun (#11).
- Formal / black-tie: French twist (#2), sleek knot (#13), padded bun (#10).
By role
- Bride: any style — but trial it first (see the timeline below). Veil-friendly picks: #1, #3, #10.
- Bridesmaids: triple twist (#5), messy bun (#6), braided crown (#7) — pretty, fast, and they do not upstage the bride. Coordinate on one shared element (same accessory, same bun height) rather than identical styles.
- Guests: 5-minute tuck (#14), Gibson tuck (#3), messy bun (#6) — polished in minutes, no stylist needed.
By length: is your hair "shoulder length" enough?
Shoulder length means the ends graze the shoulders when dry. If yours just reaches the shoulders, styles #3, #5, #14, and #15 work best (short-reach styles). If yours falls 2–3 inches past the shoulders, every style in this guide works, and you can add a little extra pancaking for fullness. Shoulder length sits at the short end of "medium hair," so every medium-hair updo technique scales down to you — the reverse is not true, which is why long-hair guides fail at this length.
Veil + Updo: How to Anchor a Veil on Shoulder-Length Hair
Yes, you can wear a veil with a shoulder-length updo — but the veil needs its own anchor, planned at the trial, not improvised on the wedding morning.
- Method 1 — comb above the bun (most secure): place the veil comb at the crown, just above the bun, and pin through the comb into the bun base with two U-pins. Best for fingertip and waltz veils. The bun's bulk holds the comb.
- Method 2 — comb under the bun (most invisible): slide the veil comb under the bun at the nape and pin into the hidden nape braid. Best for cathedral veils — the weight hangs from the anchor braid, not from smooth hair. Check the back view: the veil should fall cleanly without pulling the bun down.
- Method 3 — birdcage or blusher (lightest): pin a birdcage veil to one side with two crossed pins into the side hair, or attach a blusher to a headband base. Birdcage veils need almost no support and suit pixie-to-shoulder lengths beautifully.
- Removal plan: decide at the trial whether the veil comes off after the ceremony. If it does, have your stylist or maid of honor practice removing it without disturbing the updo — a comb pulled straight out takes pins with it; a comb wiggled gently side-to-side slides free.
The All-Day Hold System + Morning-Of Timeline
Hold system: second-day hair + mousse at roots + texture spray + hidden nape braid + X-pins + pancaking + flexible/strong spray + shake test. If your style survives the shake test at home, it survives the wedding — the shake test is the trial's whole point.
Morning-of timeline (bride):
- Night before: wash hair (not the morning of), air-dry or blow-dry smooth, sleep on a silk pillowcase.
- Morning: mousse on damp roots if re-wetting, texture spray, build the updo before makeup (hairspray and makeup do not mix — spray drifts onto foundation).
- After the updo: makeup, then veil, then jewelry, then dress. Veil goes on last before photos.
- Touch-up kit (maid of honor carries): 6 bobby pins, travel hairspray, 2 U-pins, a small silk scrunchie for the end of the night, blotting papers (for the face, not the hair).
7 Mistakes That Ruin Shoulder-Length Updos
- Washing the morning of. Freshly washed, conditioned hair is too slippery to pin. Wash the night before.
- One ponytail, one bun. A single base cannot hold this length. Section the hair; secure each section separately.
- Opening bobby pins with your teeth. It ruins the tension. Slide pins in flat, wavy side down, crossed in an X.
- Skipping the trial. You need to see how your hair holds for six hours, whether the style clashes with the neckline, and whether the veil pulls. A trial is not optional.
- Copying long-hair inspiration. Delete any reference photo where the model's hair reaches her waist. Search specifically for "shoulder-length bridal hair" or "lob wedding styles."
- Spraying the fringe. Hairspray on bangs goes stiff and shiny. Spray the updo, not the fringe.
- No exit strategy. If you want hair down for the reception, practice the transition — you do not want to spend 45 minutes in a bathroom pulling out 60 pins.
Budget vs Premium Kit
| Budget (under $30 total) | Premium ($60–$120 total) | |
|---|---|---|
| Grip | Drugstore dry shampoo + texture spray | Oribe Dry Texturizing Spray + Kristin Ess texture spray |
| Hold | Drugstore flexible-hold hairspray | Kenra Volume Spray 25 (pro favorite) |
| Pins | Standard bobby pins + U-pins | Diane or MetaGrip pins (they genuinely stay put) |
| Padding | Mesh donut (any color close to yours) | Human-hair filler in your exact shade |
| Finish | Drugstore shine serum | Kérastase Glaze Drops |
Both kits work. The premium pins and the donut/filler are the two upgrades worth paying for — they are the difference between "held" and "held all day."
Do You Need Extensions?
No — not for any style in this guide. Shoulder-length hair is enough for every updo here, and extensions add weight that fights the anchors. Two exceptions: (1) if you want a dramatically large bun for photos, one small clip-in filler or a mesh donut gives the same fullness with less weight; (2) if your hair is both short and very fine, 2–3 clip-in wefts at the crown add fullness — but pin them in before building the updo, and tell your stylist, because clip-ins change how the anchors sit. If extensions are not "you," skip them entirely. Your length is a style choice, not a compromise.
5 Pro Tips
- The dusting trim: get a tiny trim two weeks before the wedding — clean ends, but do not lose even a centimeter of precious length.
- Babylights for dimension: if your hair is all one color, subtle micro-highlights around the face add depth to twists and braids in photos — solid dark hair can read as one flat block.
- Wear the trial to your dress fitting. Does the hair catch on sequins or straps? Does it cover a back detail you paid for? You will only notice with the dress on.
- Buy your own pins. Most stylists use standard pins. If your hair is thick or your style is complex, bring high-quality pins — they actually stay where you put them.
- Photograph the back. Your guests and photographer see the back of your updo more than the front. Check the back view at the trial, not just the mirror.
FAQ
1. Can shoulder-length hair be put into an updo? Yes — absolutely. If you can pull your hair into a low ponytail, you can do every updo in this guide. Shoulder length is enough for chignons, French twists, Gibson tucks, braided crowns, and more. The secret is grip (second-day hair + texture spray) and anchors (hidden nape braid + X-pins), not length.
2. Can I wear a veil with a shoulder-length updo? Yes. Anchor the veil comb above the bun (most secure), under the bun into the hidden nape braid (most invisible, best for heavy cathedral veils), or pin a birdcage to one side (lightest). Plan the placement and the removal at your hair trial — do not improvise it on the wedding morning.
3. Should I use hair extensions for my updo? Not necessary. Every style here works without extensions. A mesh donut or one small clip-in filler is a lighter way to add fullness if you want a bigger bun. Skip extensions unless you specifically want extra volume — they add weight that fights your anchors.
4. How do I keep a shoulder-length updo from falling out? Run the 5-rule anchor system: second-day hair, texture spray, hidden nape braid, pins inserted flat with the wavy side down and crossed in an X, and a shake test before you leave. The most common failure is a single ponytail base — section the hair and secure each section separately.
5. What updo works for shoulder-length hair with layers? The triple twist (style #5). Dividing the back into three vertical sections means no strand has far to travel, so layers stay tucked. The Gibson tuck (style #3) and the wind-proof pinned updo (style #15) are the next-best picks for layered hair.
6. How long does a shoulder-length updo take — can I DIY it? Most styles take 15–25 minutes with a stylist, 20–30 minutes DIY the first time. The 5-minute tuck (style #14) is genuinely five minutes, and the Gibson tuck (style #3) is ten. Practice once at home before the wedding — every style gets twice as fast on the second try.
7. What is the best updo for a round face with shoulder-length hair? The side-swept low updo (style #4): the deep side part and diagonal sweep visually lengthen the face. The French twist (style #2) and triple twist (style #5) also flatter round faces because they add height. Avoid flat, center-parted, slicked styles that widen the face — and keep two soft tendrils loose to frame it.